

Introduction
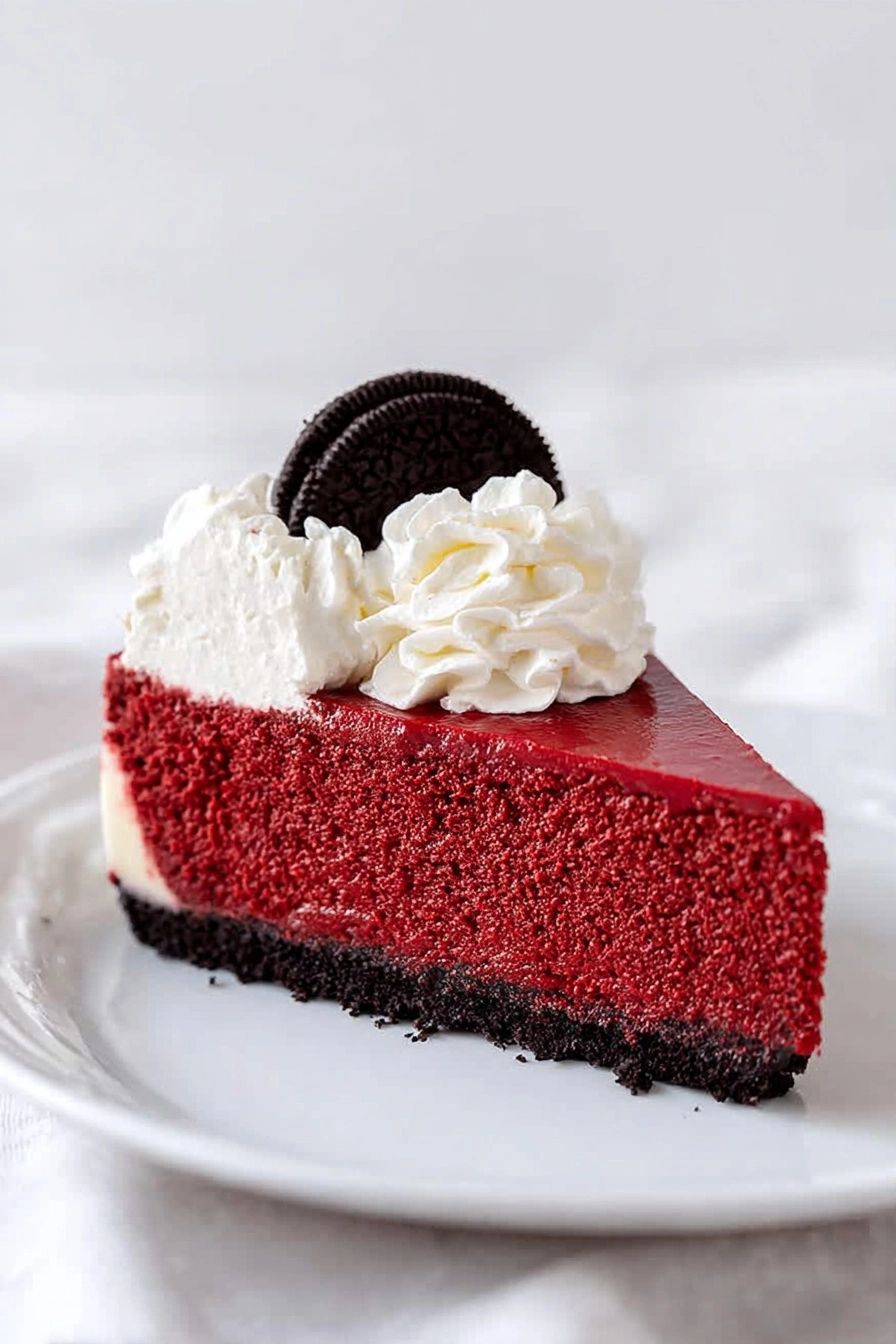
Have you ever wondered why Red Velvet Cheesecake tastes richer and more luxurious than a classic cheesecake, even though the ingredients look almost the same? The secret is in the balance of cocoa, acidity, and creaminess that gives this dessert its iconic flavor and texture. Red Velvet Cheesecake isn’t just beautiful to look at, it delivers a smooth, tangy, chocolate-kissed bite that feels indulgent without being overwhelming. Many people believe cheesecakes are difficult or risky to bake at home, but this recipe proves otherwise. With clear steps and simple techniques, you can make a bakery-style Red Velvet Cheesecake right in your own kitchen. It’s perfect for celebrations, holidays, and especially Valentine’s Day desserts when you want something impressive yet reliable.

Ingredients List
Crust
25 Oreo cookies, crushed
4 tablespoons butter, melted
You can substitute the Oreo cookies with chocolate graham crackers or chocolate digestive biscuits if needed.
Cheesecake Filling
24 ounces cream cheese, room temperature
1 1/4 cups granulated sugar
3 tablespoons unsweetened cocoa powder
4 large eggs
1 teaspoon vanilla extract
1 cup full-fat sour cream
1/2 cup buttermilk
1 teaspoon vinegar
1 tablespoon red gel food coloring
The cocoa powder adds depth without overpowering the cheesecake, while the buttermilk and vinegar provide the classic red velvet tang.
Cream Cheese Whipped Cream
4 ounces cream cheese, room temperature
1 cup heavy whipping cream
1/2 cup powdered sugar
1 teaspoon vanilla extract
Timing
Preparation time is about 30 minutes, baking time ranges from 1 hour 30 minutes to 1 hour 40 minutes, and chilling time is 8 to 12 hours. The total time is approximately 10 to 12 hours. This slow method reduces cracking and improves texture compared to faster cheesecake recipes.
Step-by-Step Instructions
Step 1: Prepare the Crust
Preheat the oven to 350°F (175°C). Lightly grease the sides of a 9.5-inch springform pan and line them with parchment paper. Add the Oreo cookies with their filling to a food processor and pulse until fine crumbs form. Add the melted butter and pulse until the crumbs are evenly coated. Press the mixture firmly into the bottom of the pan and place it in the fridge or freezer while preparing the cheesecake batter.
Step 2: Beat the Cream Cheese
Add the cream cheese to a large bowl and beat on medium speed until completely smooth. This step is essential to avoid lumps and achieve a creamy texture.
Step 3: Add Sugar and Cocoa
Add the granulated sugar and cocoa powder to the cream cheese and continue beating until fully incorporated. Scrape down the sides of the bowl to ensure everything mixes evenly.
Step 4: Add Eggs and Flavor
Add the vanilla extract, then add the eggs one at a time, mixing just until incorporated. Avoid overmixing, as too much air can cause cracks during baking.
Step 5: Finish the Batter
Once the eggs are incorporated, add the sour cream, buttermilk, vinegar, and red food coloring. Beat just until combined. If the color is uneven, gently fold with a spatula instead of mixing further.
Step 6: Bake the Cheesecake
Wrap the outside of the springform pan with two layers of heavy-duty foil or place it in a slightly larger pan to protect it from moisture. Pour the batter over the crust and bake for 1 hour 30 minutes to 1 hour 40 minutes. The edges should be set while the center jiggles slightly like gelatin when shaken.
Step 7: Cool Slowly
Turn off the oven and leave the cheesecake inside with the door slightly open until it cools to room temperature. Then refrigerate overnight to fully set.
Step 8: Make the Whipped Cream
Beat the cream cheese until smooth, add the heavy whipping cream and beat until soft peaks form, then add powdered sugar and vanilla extract and beat until stiff peaks form. Pipe the whipped cream on top of the cheesecake before serving.
Nutritional Information
Calories: 737 kcal
Carbohydrates: 58 g
Protein: 10 g
Fat: 53 g
Saturated Fat: 29 g
Cholesterol: 211 mg
Sodium: 499 mg
Potassium: 291 mg
Fiber: 1 g
Sugar: 47 g
Vitamin A: 1815 IU
Vitamin C: 1 mg
Calcium: 153 mg
Iron: 3 mg
Nutrition values are estimates and may vary. Consult a registered dietitian for specific dietary advice.
Healthier Alternatives
To lighten this Red Velvet Cheesecake, you can use reduced-fat cream cheese, substitute sour cream with Greek yogurt, or reduce the crust thickness. These swaps maintain flavor while lowering calories.
Serving Suggestions
Serve this cheesecake with fresh strawberries, raspberries, or a drizzle of chocolate sauce. It’s perfect for Valentine recipes desserts, family gatherings, or special occasions. For clean slices, wipe your knife with warm water between cuts.
Common Mistakes to Avoid
Avoid overmixing the batter, skipping room-temperature ingredients, baking at high heat, or rushing the cooling process. Each of these can affect texture and appearance.
Storing Tips
Store Red Velvet Cheesecake covered in the refrigerator for up to 5 days. You can also freeze individual slices for up to 2 months. Thaw overnight in the fridge before serving.
Conclusion
This Red Velvet Cheesecake delivers rich flavor, creamy texture, and a stunning presentation that feels bakery-quality but is easy to make at home. Try this recipe, leave a comment with your results, and subscribe to GoTasty for more delicious dessert ideas.
FAQs
Can I make Red Velvet Cheesecake ahead of time?
Yes, this cheesecake is best made a day in advance to allow it to fully set.
Why is vinegar used in red velvet cheesecake?
Vinegar enhances flavor and balances sweetness without making the cheesecake taste sour.
Can I freeze Red Velvet Cheesecake?
Yes, wrap it tightly and freeze for up to two months.
Do I need a water bath?
A water bath or moisture protection is highly recommended for even baking and crack prevention.
