

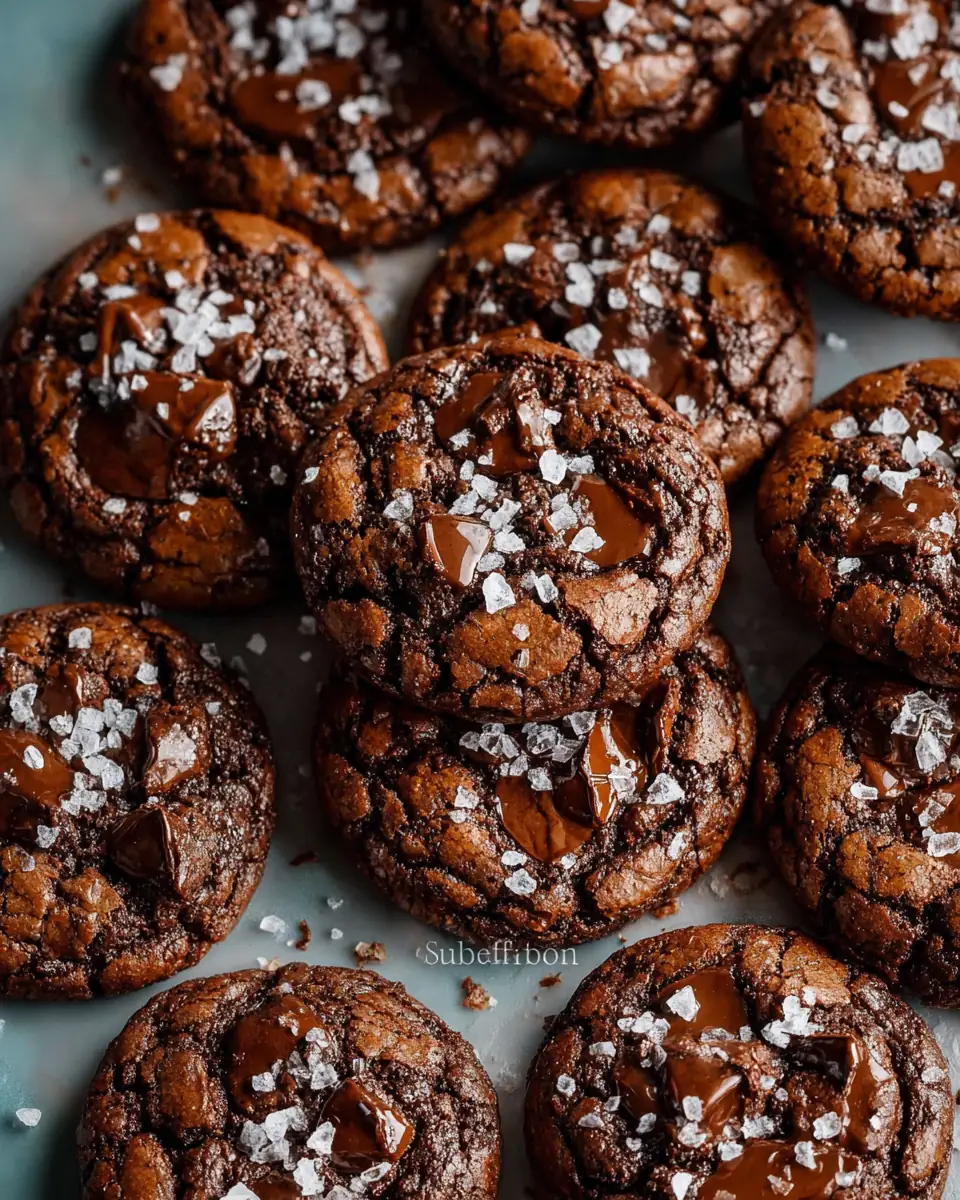
If you’ve ever found yourself torn between the rich, fudgy allure of a brownie and the crispy, chewy charm of a cookie, you’re in for a treat. Our Salted Brownie Cookies offer the best of both worlds, delivering a decadent chocolate experience with a hint of savory sea salt to tantalize your taste buds. These cookies are not only delicious but also easy to make, making them an ideal dessert for any occasion.
In this comprehensive guide, we will explore every detail related to creating the perfect batch of Salted Brownie Cookies, from ingredient choices and baking techniques to storage tips and serving suggestions. Let’s dive into this delightful baking adventure.
Ingredients You’ll Need
A great recipe starts with quality ingredients. Here’s what you’ll need to create these mouthwatering cookies:
- 1 cup All-Purpose Flour: Provides structure to the cookies.
- 1 tsp Baking Powder: Helps the cookies rise and achieve the desired texture.
- 1/8 tsp Salt: Enhances flavor.
- 2 Large Eggs, room temperature: Contributes to the cookies’ richness and structure.
- 1 Large Egg Yolk, room temperature: Adds extra richness and moisture.
- 1 cup Granulated Sugar: Sweetens the cookies.
- 1 tbsp Vegetable Oil: Adds moisture and helps achieve the desired texture.
- 1 tsp Vanilla Extract: Adds depth of flavor.
- 6 tbsp Unsalted Butter: Provides richness and flavor.
- 1 cup Semi-Sweet Chocolate Chips, plus some for topping: The star of the show, providing the cookies’ chocolatey flavor.
- 1/4 cup Unsweetened Cocoa Powder: Intensifies the chocolate flavor.
- 1 tsp Espresso Powder (optional, but enhances the chocolate flavor): Intensifies the chocolate flavor.
- Sea Salt Flakes for topping (optional garnish): Adds a savory touch that complements the sweetness.
Choosing the Right Ingredients
When it comes to baking, the quality of your ingredients can significantly impact the final product. For this recipe, consider using high-quality chocolate and cocoa powder to ensure a rich, deep chocolate flavor. Opt for fresh, organic eggs and pure vanilla extract to enhance the overall taste. Chocolate, being the star ingredient, deserves special attention. Look for chocolate chips with a cocoa content of at least 60% to achieve a balanced bitterness and sweetness. Additionally, using European-style butter can add an extra layer of richness due to its higher fat content compared to regular butter.
Baking Instructions
Let’s walk through the steps to create these irresistible cookies:
Step 1: Prep Your Baking Space
Adjust your oven rack to the second level mark, just above the center. Preheat your oven to 350ºF (175ºC). Line two baking sheets with parchment paper or silicone baking mats and set them aside. Preparing your baking space ensures you have everything ready for a smooth baking process. This step might seem trivial, but it can significantly streamline your workflow, making the baking process both efficient and enjoyable.
Step 2: Dry Ingredients
In a medium-sized bowl, whisk together the all-purpose flour, baking powder, and salt. This dry mixture will provide structure to your cookies. Set it aside for now. Whisking aerates the flour, ensuring an even distribution of the leavening agent and salt, which is crucial for even baking. A well-aerated flour mixture is key to achieving a light and airy cookie texture.
Step 3: Wet Ingredients
Using a hand mixer or a stand mixer fitted with the paddle attachment, beat the eggs, egg yolk, granulated sugar, vegetable oil, and vanilla extract together on medium-high speed. The goal is to achieve a frothy, fully combined mixture, which will take about 2-3 minutes. This step incorporates air into the batter, contributing to the cookies’ light texture. The addition of an extra egg yolk is a classic technique to enhance the richness and chewiness of cookies, offering moisture and depth.
Step 4: Melt the Chocolate
In a small saucepan, melt the semi-sweet chocolate chips and unsalted butter over medium heat. Stir frequently to ensure a smooth, lump-free mixture. Once melted, remove from heat and whisk in the unsweetened cocoa powder and optional espresso powder. This chocolate mixture adds the rich, deep flavor characteristic of brownies. Melting the chocolate separately allows for a smoother integration with the wet ingredients, promoting a uniform texture in the final batter.
Step 5: Combine Everything
Carefully pour the melted chocolate mixture into the bowl of wet ingredients. Mix until just combined, ensuring not to over-mix. Next, add in the whisked dry ingredients, mixing on low speed until the batter is smooth and uniform. The batter will be slightly thin yet scoopable. Avoid over-mixing, as this can lead to tough cookies. The key here is to incorporate all ingredients just until the flour streaks disappear, maintaining a tender crumb.
Step 6: Scoop and Bake
Using a 1 1/2 tablespoon-sized cookie scoop or two spoons, scoop the batter onto your prepared baking sheets. Leave about 1 1/2 inches between each cookie to allow for spreading. Sprinkle a pinch of sea salt flakes over the top of each cookie to enhance the chocolate flavor with a savory touch. Baking at a consistent temperature ensures even cooking, and the sea salt flakes create a delightful contrast to the sweetness, elevating the overall flavor profile.
Bake the cookies for 8-10 minutes or until the tops have a shiny, crackly appearance. This indicates that your cookies are baked to perfection. Keep a close eye on them, as they can go from perfectly baked to overdone quickly. A crackly top is a hallmark of brownie-inspired treats, signifying the perfect blend of textures.
Step 7: Finishing Touches
Once out of the oven, press a few additional chocolate chips into each cookie if desired. If you prefer perfectly round cookies, use a round cookie cutter to shape them while they’re still warm and pliable. For detailed tips, check out our ‘how do you make perfectly round cookies?’ section. Adding chocolate chips while the cookies are warm allows them to melt slightly, adhering to the cookie’s surface. This step not only enhances the visual appeal but also provides an extra burst of chocolate flavor with each bite.
Step 8: Cool and Enjoy
Allow the cookies to cool on the baking sheets for about 5 minutes before transferring them to a cooling rack. They’re incredibly delicious when enjoyed warm, with the chocolate still gooey. The cooling rack prevents the bottoms from becoming soggy, ensuring a nice texture. Enjoying these cookies warm amplifies the sensory experience, as the gooey chocolate and crisp edges create a delightful contrast.
Storage Tips
These Salted Brownie Cookies are best consumed fresh but can be stored in a sealed food container at room temperature for up to 2 days. This ensures they maintain their delightful texture and flavor. For longer storage, consider freezing the cookies. Once cooled completely, place them in a single layer on a baking sheet and freeze until solid. Transfer them to a resealable freezer bag or airtight container. They can be frozen for up to three months. When you’re ready to enjoy them, thaw at room temperature or warm them in the oven for a few minutes. Freezing ensures you always have a sweet treat on hand, perfect for unexpected guests or a quick indulgence.
Serving Suggestions

Salted Brownie Cookies are versatile and can be served in various ways:
- As a Standalone Treat: Enjoy them with a glass of cold milk or a hot cup of coffee. The classic pairing of milk and cookies is a nostalgic treat that enhances the chocolate flavor.
- Ice Cream Sandwiches: Pair them with your favorite ice cream flavor for a delicious dessert. Consider flavors like vanilla bean, salted caramel, or mint chocolate chip to complement the rich chocolate taste of the cookies.
- Crumbled Over Desserts: Use them as a topping for brownies or ice cream sundaes for added texture and flavor. The contrast of textures between the soft brownie or ice cream and the crispy cookie crumbles creates a delightful dessert experience.
- Gift Baskets: Wrap them up for a thoughtful homemade gift for friends and family. Personalize your gift basket with a selection of teas or coffees that pair well with the cookies, making for a complete indulgent experience.
Troubleshooting Tips
While this recipe is straightforward, here are some tips if you encounter any issues:
- Cookies Spread Too Much: Ensure your butter is not too warm, and chill the dough if necessary before baking. Chilling the dough can help control spreading by solidifying the fats, resulting in a thicker cookie.
- Cookies Too Dry: Double-check your measurements, particularly the flour, which should be measured by spooning it into the cup and leveling it off. Accurate measurements are crucial in baking, where precision is key to achieving the desired texture.
- Flat Cookies: Ensure your baking powder is fresh, as expired baking powder can lead to flat cookies. Baking powder is a leavening agent, and its effectiveness can diminish over time, affecting the rise and texture of baked goods.
Conclusion
Salted Brownie Cookies beautifully marry the rich intensity of brownies with the satisfying crunch of cookies. They’re perfect for serving at gatherings, gifting to friends, or simply indulging in a moment of chocolatey bliss. Try this recipe today and enjoy the harmonious blend of sweet and salty in every bite.
Whether you’re an experienced baker or a novice in the kitchen, this recipe is designed to deliver delicious results. By following these steps and tips, you’ll create cookies that are sure to impress anyone who tries them. Enjoy the process and the delightful rewards that come with baking these Salted Brownie Cookies! They are more than just a treat; they are an experience, inviting you to savor each bite and share the joy of baking with loved ones.


Salted Brownie Cookies

These salted brownie cookies combine the rich, fudgy texture of brownies with a delightful cookie form, perfect for any chocolate lover.
- Baking Sheets
- Parchment Paper
- Mixer
Dry Ingredients
- 125 g All-Purpose Flour
- 1 tsp Baking Powder
- 0.125 tsp Salt
Wet Ingredients
- 2 large Eggs (room temperature)
- 1 large Egg Yolk (room temperature)
- 200 g Granulated Sugar
- 15 ml Vegetable Oil
- 5 ml Vanilla Extract
Chocolate Mixture
- 85 g Unsalted Butter
- 175 g Semi-Sweet Chocolate Chips (plus some for topping cookies)
- 30 g Unsweetened Cocoa Powder
- 1 tsp Espresso Powder (optional)
- Sea Salt Flakes (for topping cookies (optional garnish))
- Adjust the oven rack to the 2nd level mark and preheat your oven to 350ºF. Line two baking sheets with parchment paper or silicone mats. Set to the side.
- In a medium bowl, whisk together the all-purpose flour, baking powder, and salt. Set to the side.
- Using a hand mixer or stand mixer fitted with the paddle attachment, beat the eggs, egg yolk, granulated sugar, vegetable oil, and vanilla extract together on medium-high speed until fully combined and frothy.
- Meanwhile, in a small saucepan, heat the semi-sweet chocolate chips and unsalted butter together over medium heat until fully melted and smooth. Remove from heat and immediately whisk or stir in the unsweetened cocoa powder and espresso powder.
- Carefully pour the melted chocolate mixture into the wet ingredients and mix until the chocolate is just combined. Add in the whisked dry ingredients and mix on low speed until just combined.
- Using a 1 1/2 tablespoon-size cookie scoop or 2 spoons, scoop the cookie dough out and place onto the baking sheets, leaving about 1 1/2 inches of space between them. Sprinkle some sea salt flakes over the top of each cookie.
- Bake for 8-10 minutes at 350ºF or until the tops of the cookies have a shiny, crackly top to them. Remove from the oven and top with a few additional chocolate chips if desired. Let the cookies cool on the baking sheets for about 5 minutes before transferring them to a cooling rack to cool almost completely.
Cookies are best kept in a sealed food container at room temperature for up to 2 days. For perfectly round cookies, use a round cookie cutter immediately after baking while they’re still soft.
