

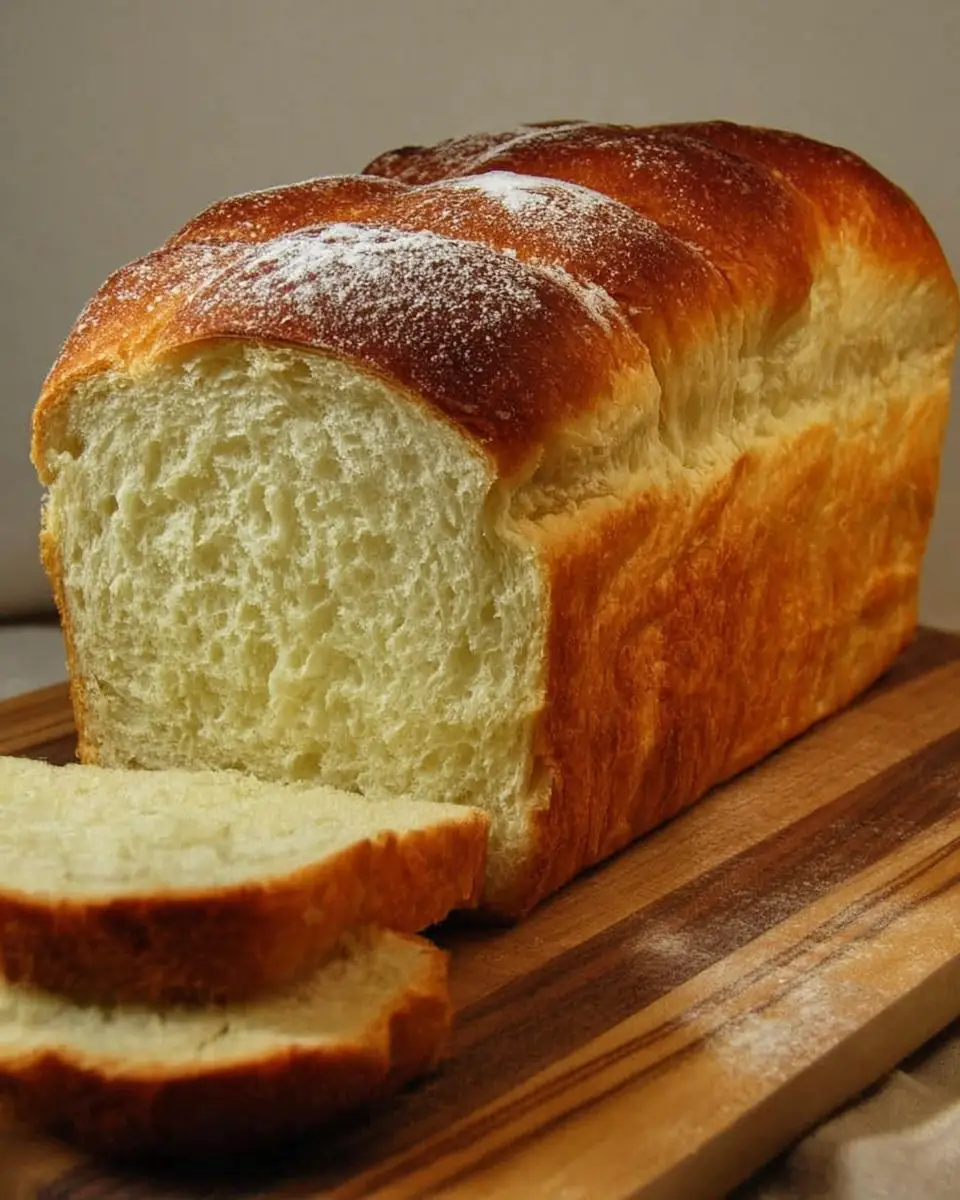
Homemade Sandwich Bread: A Step-by-Step Guide to Perfect Loaves
There’s nothing quite like the aroma of freshly baked bread wafting through your home. Homemade sandwich bread is not only a rewarding baking project but also a delicious staple that elevates any meal. Whether you’re looking to craft the perfect slice for a turkey club or a simple piece of toast, this recipe will guide you through the process of making your own flavorful and fluffy bread at home.
Why Make Homemade Bread?
Making bread at home allows you to control the ingredients, ensuring there are no unnecessary preservatives or additives. Plus, the satisfaction of baking your own loaf is unmatched. With just a few pantry staples and a little time, you can create a loaf that’s far superior to most store-bought options.
The Benefits of Baking Your Own Bread
Baking bread at home offers numerous benefits beyond just taste. Firstly, it is a healthier option since you can choose organic and unbleached flour, omit preservatives, and reduce sugar and salt according to your dietary needs. Secondly, homemade bread is cost-effective. The ingredients required for a loaf are relatively inexpensive, making it a great choice for budget-conscious households. Finally, the act of bread-making can be incredibly therapeutic. Kneading dough and watching it transform can be a meditative process, offering a break from the hustle and bustle of daily life.
Ingredients You’ll Need
- 2 cups warm water: The warmth helps activate the yeast, starting the fermentation process.
- 2 tsp active dry yeast: The leavening agent that makes your bread rise.
- 2 Tbsp sugar: Feeds the yeast and adds a touch of sweetness.
- 1 tsp salt: Enhances flavor and strengthens the dough.
- 1/4 cup unsalted butter (or oil): Adds moisture and richness to the bread.
- 4 – 5 cups all-purpose flour: The main structure of your bread. The amount can vary based on humidity and flour type.
Alternative Ingredients and Add-Ins
While the basic ingredients form the foundation of a classic loaf, there is plenty of room for creativity. For a different texture, try substituting some of the all-purpose flour with whole wheat flour or bread flour. You can also experiment with add-ins like herbs, seeds, or dried fruit for a unique flavor profile. A tablespoon of honey can replace sugar for a more natural sweetener, while olive oil can be used instead of butter for a Mediterranean twist.
Step-by-Step Instructions

Bloom the Yeast
Start by blooming the yeast, which ensures it is active and ready to work its magic. In a tall measuring cup or container, combine the sugar, yeast, and warm water. Stir once to dissolve the sugar and distribute the yeast, then let the mixture sit until it doubles in size. This should take about 5-10 minutes.
Mixing and Kneading the Dough
With an Electric Mixer:
- Measure out the flour, salt, and butter, ensuring the butter is at room temperature.
- Add these dry ingredients to your mixing bowl.
- Once the yeast mixture has doubled, pour it into the bowl with the dry ingredients.
- Mix on low speed until the dough forms and pulls away from the sides of the bowl. Continue kneading for about 5 minutes.
Mixing by Hand:
- Combine the flour and salt in a large bowl.
- Create a well in the center of the flour mixture.
- Melt the butter and add it to the yeast mixture.
- Slowly pour the liquid into the flour well, gradually mixing the flour into the liquid with a spoon or your fingers.
- Continue until you have a cohesive dough, then knead by hand for 10-12 minutes until it is smooth and stretchy.
The Science of Kneading
Kneading is an essential step that develops gluten, the protein network giving bread its structure and chew. As you knead, the dough becomes more elastic, allowing it to trap air and rise properly. This is why it’s important to knead until the dough is smooth and passes the “windowpane test”: stretch a small piece of dough between your fingers; it should stretch thinly without tearing.
Proofing the Dough
Once kneaded, place the dough in a greased bowl, cover with a clean dish towel, and let it proof in a warm area for 30-40 minutes or until it doubles in size.
Shaping the Loaf
- Turn the proofed dough onto a lightly floured surface and punch it down to release air.
- Flatten it slightly, then roll it into a tight cylinder.
- Pinch the seam to secure it and place the loaf seam-side down in a greased loaf pan.
Second Proofing
Cover the loaf and allow it to rise again in a warm spot until it doubles in size.
Mastering the Art of Proofing
Proofing is a crucial step that allows the yeast to ferment, producing gases that make the dough rise. The ideal proofing environment is warm and humid, around 75°F to 85°F. To create this at home, try placing the dough in a turned-off oven with a bowl of hot water on a lower rack to add moisture to the air.
Baking Your Bread
- Preheat your oven to 375°F.
- Optionally, brush the top of the loaf with an egg wash for a shiny crust.
- Bake the loaf for 15 minutes, then reduce the temperature to 350°F and continue baking for an additional 30-40 minutes.
- The bread is done when it’s golden brown and sounds hollow when tapped. For precision, check that the internal temperature reaches 220°F.
Tips for Perfect Baking
To achieve an even, golden crust, place the loaf in the center of the oven and rotate it halfway through baking. If the top is browning too quickly, tent it with aluminum foil. An instant-read thermometer is a great investment to ensure the loaf reaches 220°F internally, guaranteeing it’s fully baked.
Final Thoughts and Serving Suggestions
Homemade sandwich bread is not just a delight to bake but a versatile staple to have on hand. Whether you’re making sandwiches, French toast, or simply enjoying it with a slather of butter, this bread will elevate your meals. Share the love by gifting a loaf to friends or family, and enjoy the warm compliments that follow.
Creative Serving Ideas
- Gourmet Sandwiches: Layer slices with fresh ingredients like avocado, roasted vegetables, and smoked turkey for a gourmet lunch.
- Classic French Toast: Dip thick slices in a mixture of eggs, milk, cinnamon, and vanilla for a decadent breakfast treat.
- Savory Bread Pudding: Use leftover chunks of bread in a savory bread pudding with cheese, herbs, and vegetables.
Nutrition Information
- Calories: 2838.7 kcal per loaf
- Serving Size: 1 serving
Time Required
- Prep Time: 20 minutes
- Cook Time: 3 hours
- Total Time: 3 hours 20 minutes
Baking bread is a timeless tradition that connects us with the past while providing nourishment and comfort. Enjoy the process and the delicious results of your homemade sandwich bread!
Storing and Freezing Your Bread
To keep your bread fresh, store it in a bread box or wrapped in a clean kitchen towel at room temperature for up to three days. For longer storage, slice the loaf and freeze it in airtight bags. This way, you can easily grab a slice or two and toast them straight from the freezer, preserving the bread’s fresh-baked quality.
Conclusion
Embarking on the journey of baking homemade sandwich bread opens a world of possibilities, from experimenting with flavors to perfecting techniques. The result is a loaf that not only satisfies your culinary cravings but also nourishes your soul. So, roll up your sleeves, dust off your apron, and experience the joy of homemade bread-making.
Bread Through History: A Brief Exploration
Bread has been a staple in human diets for thousands of years, reflecting cultural traditions and technological advancements. Early breads were simple mixtures of flour and water, baked on hot stones. The introduction of yeast fermentation revolutionized bread-making, leading to the fluffy loaves we enjoy today. Each culture has contributed its unique twist, from the baguettes of France to the naan of India. By baking bread at home, you participate in this rich history, connecting with millennia of bakers who have come before.
Troubleshooting Common Bread Baking Issues
Even seasoned bakers encounter challenges. Here are some common problems and their solutions:
- Dense Bread: This might be due to under-kneading or not allowing enough time for the dough to rise. Make sure to give the dough ample time to proof and increase kneading time if necessary.
- Cracked Crust: Often caused by the dough drying out during the final proof. Keep the dough covered with a damp cloth to maintain moisture.
- Bread Not Rising: Check the freshness of your yeast. If the yeast doesn’t froth during the blooming stage, it may be inactive. Always store yeast in a cool, dry place for longevity.
Embracing Variations: From Sweet to Savory
The beauty of baking at home is the ability to customize to your taste. Consider these variations to bring new flavors to your loaf:
- Sweet Bread: Add cinnamon and raisins to the dough for a sweet breakfast bread. A swirl of chocolate or a handful of nuts can also create a delightful surprise.
- Savory Bread: Incorporate shredded cheese, garlic, or jalapeños for a loaf with a kick. Fresh herbs like rosemary or thyme can infuse the bread with aromatic flavors.
The Science Behind Baking: Understanding Yeast and Gluten
Baking is as much a science as it is an art. Understanding how ingredients interact can improve your baking skills:
- Yeast: This microscopic fungus feeds on sugars, releasing carbon dioxide and alcohol as by-products. This gas gets trapped in the dough’s gluten network, causing it to rise.
- Gluten: A combination of proteins in wheat flour, gluten gives bread its chewy texture. Kneading strengthens gluten strands, creating elasticity.
The Environmental Impact of Homemade Bread
Baking bread at home can also be an eco-friendly choice. By reducing reliance on packaged goods, you minimize waste from plastic bags and wrappers. Opting for locally sourced ingredients further reduces your carbon footprint, supporting sustainable agriculture and reducing transportation emissions.
The Joy of Sharing: Bread as a Gift
Nothing says “I care” like a homemade loaf. Bread is a universal gift that brings comfort and joy. Wrap your loaf in a linen cloth and tie with a ribbon for a personal touch. Whether for a neighbor, friend, or family member, a homemade loaf is a heartfelt gesture that speaks volumes.
Conclusion: The Endless Possibilities of Bread Baking
Baking homemade sandwich bread is a journey filled with learning, creativity, and satisfaction. Each loaf you bake is a testament to your skill and care, offering a taste of tradition and innovation. Whether you stick to the classic recipe or embark on adventurous variations, the world of bread baking is yours to explore. Enjoy the process, savor the results, and share the joy that homemade bread brings to your life and the lives of those around you.


Homemade Sandwich Bread
This delightful homemade sandwich bread is perfect for sandwiches or toast, offering a soft and fluffy texture with a golden crust.
- Bread Loaf Pan
Bread Ingredients
- 480 ml warm water
- 2 tsp active dry yeast
- 2 Tbsp sugar
- 1 tsp salt
- 60 g unsalted butter (or oil) (room temperature)
- 480 to 600 g all purpose flour
- Measure out the yeast, warm water, and sugar. In a tall measuring cup or other container, combine them, stirring once to ensure all the yeast is mixed, and let it activate and double in size.
- Measure out the flour, salt, and butter. Ensure the butter is at room temperature.
- Add the flour, salt, and butter to the mixing bowl. Once the yeast and water mixture has risen, add it to the dry ingredients. Mix on low until the dough forms a solid mass, and knead for about 5 minutes.
- If mixing by hand, make a ‘well’ in the flour, pour the liquid into the well slowly, and mix until a dough forms. Knead by hand for 10-12 minutes.
- Preheat your oven to 375F.
- Set the dough in a greased bowl, cover with a dish towel, and let it proof in a warm area for 30 to 40 minutes until doubled in size.
- Punch down the dough, roll it into a loaf, and place it in a loaf pan. Cover and let it proof until doubled in size.
- Bake at 375F for 15 minutes, then at 350F for another 30 to 40 minutes until golden brown and hollow sounding when tapped.
For an extra golden crust, brush the top of the dough with an egg wash before baking. Enjoy this bread fresh or toasted!
