

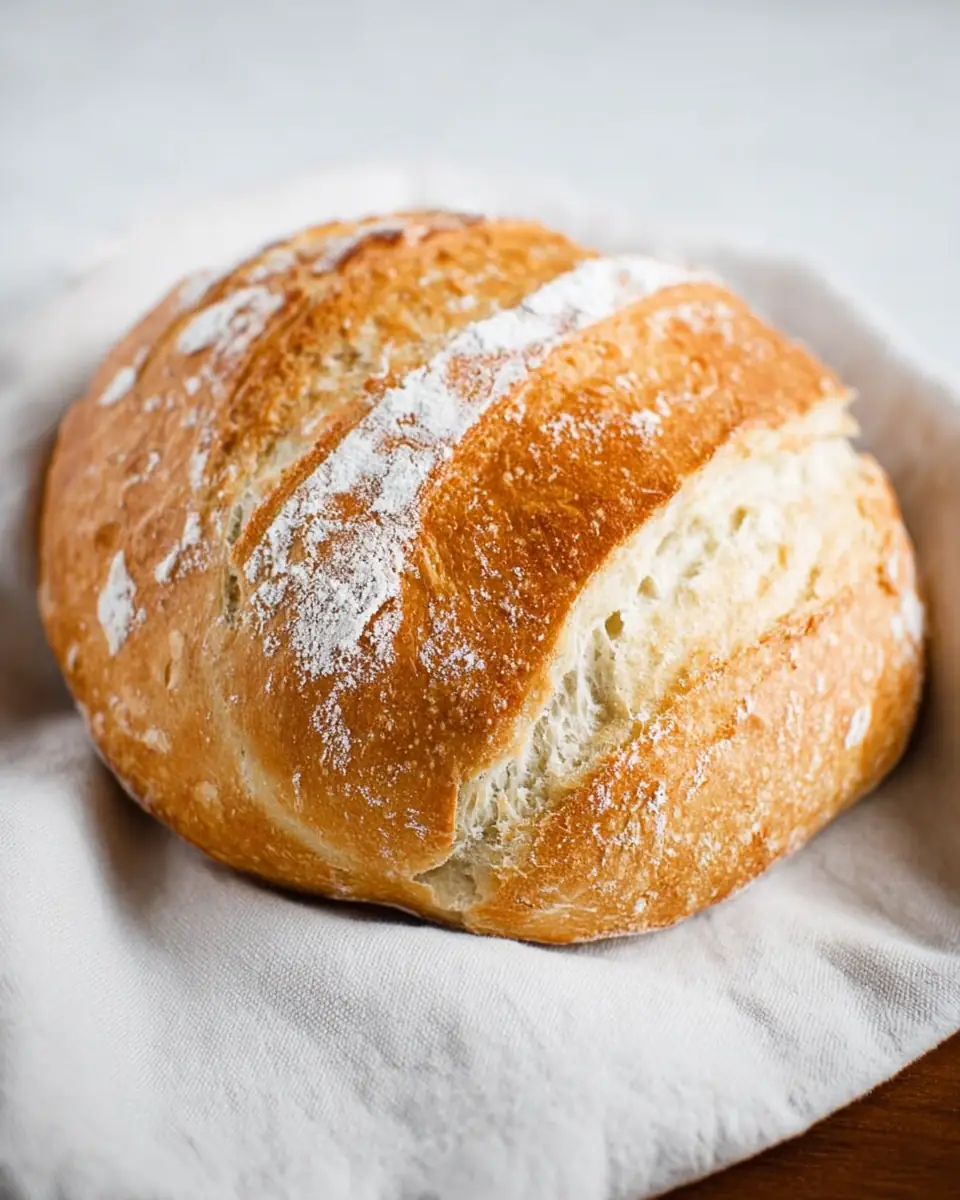
There’s something incredibly satisfying about baking your own bread. The aroma that fills your kitchen, the crackling crust as it cools, and the soft, airy crumb when you slice into it—it’s an experience that delights all the senses. If you’re looking for a simple yet impressive bread recipe, look no further than this 3-Ingredient Artisan Bread. With just a few pantry staples and a little patience, you can create a loaf that’s worthy of any bakery shelf.
The Allure of Homemade Bread
Baking bread at home has seen a resurgence in popularity, especially as people look for ways to connect with traditional, hands-on food preparation methods. The process of making bread is both an art and a science, a balance of precise measurements and intuitive adjustments. It allows you to slow down and savor the act of creation, turning humble ingredients into something extraordinary.
For many, the thought of making bread from scratch can be daunting. The fear of complex techniques, unfamiliar equipment, and the possibility of failure might deter even the most enthusiastic home cook. However, this 3-ingredient artisan bread recipe strips away the intimidation, offering an approachable entry point into the world of bread baking.
Ingredients: The Magic Trio
Let’s delve deeper into the essential ingredients that make this bread both simple and spectacular.
-
3 cups (395 grams) of all-purpose flour: This versatile flour is the foundation of our bread. You can also use bread flour for a slightly chewier texture. All-purpose flour is readily available and offers a reliable protein content that supports gluten development, which is crucial for achieving the desired structure and crumb.
-
½ Tablespoon of Kosher salt: Essential for flavor, salt also plays a crucial role in strengthening the dough. It moderates yeast activity, enhances gluten structure, and contributes to the overall taste profile. The choice of kosher salt ensures even distribution and a subtle salinity that complements the bread’s natural flavors.
-
¼ ounce instant or active dry yeast packet (or 2 1/4 teaspoons): This little powerhouse is what gives our bread its rise and airy texture. Yeast is a living organism that feeds on sugar and starches, producing carbon dioxide and alcohol as by-products. This fermentation process is what causes the dough to rise and develop its characteristic texture and flavor.
-
1 ½ cups warm water (105°F): The perfect temperature to activate the yeast without killing it. Water is the lifeblood of the dough, hydrating the flour and facilitating gluten formation. The temperature is critical; too hot, and you risk killing the yeast; too cold, and the yeast will not activate efficiently.
Instructions: From Dough to Delight
Make the Dough
Combine the Ingredients
Creating the dough is the first step toward artisanal excellence. In a large mixing bowl, combine the flour, salt, and yeast. This step is where the magic begins, as these simple ingredients start to interact. Pour the warm water over the mixture, and use a dough whisk, spatula, wooden spoon, or your hands to mix everything together. The dough should be wet and sticky, but if it’s too sticky to handle, add a bit more flour. The goal is a cohesive mass that retains moisture without being overly dry.
Let it Rise
Once mixed, cover the bowl with a towel or plastic wrap sprayed with nonstick spray. This creates a humid environment that encourages the yeast to thrive. Allow the dough to rise for 2 to 10 hours, or leave it on the counter overnight. The longer it sits, the better the flavor as it ferments and develops complexity. This extended fermentation time allows for the development of subtle, nuanced flavors and a more digestible crumb.
Shape Your Bread
Prepare the Dough
With the dough adequately risen, it’s time to shape it. Wet your hands to prevent sticking and turn the dough onto a lightly floured surface. Resist the urge to punch it down, knead, or roll it out. Instead, gently pull the sides up and fold them into the center to shape the dough. This folding technique helps to build tension on the surface, which is essential for an even rise and a beautiful crust. You can create a French boule (round shape) or divide it into two loaves, tucking the ends underneath.
Rest and Score
Place the shaped dough on a piece of parchment paper. Lightly dust the top with flour and use a sharp bread knife to score 1 to 4 lines across the top. Scoring is not just for aesthetics; it allows the bread to expand during baking without cracking unpredictably. Allow the dough to rest for 20 to 30 minutes while you prepare the oven. This resting period, known as proofing, is crucial for achieving the right texture and volume.
Bake to Perfection
Preheat the Oven
Set your oven to 450°F and place a baking stone, pizza stone, Dutch oven, or cast iron skillet inside to heat up. The preheating phase is vital for achieving the desired crust and oven spring—the rapid rise that occurs when the dough hits the hot oven.
Create Steam
Slide the dough with the parchment paper onto the hot stone. To achieve that quintessential crusty exterior, place either 1 cup of hot water in a small broiler pan or 5 ice cubes at the bottom of the oven. Quickly close the door to trap the steam. The steam interacts with the dough’s surface, creating a glossy, crisp crust that is both visually appealing and texturally satisfying.
Bake
Let the bread bake for 25 to 30 minutes, or until it’s beautifully browned and sounds hollow when tapped on the bottom. This hollow sound is an indication that the bread is fully baked. The Maillard reaction, a chemical reaction between amino acids and reducing sugars, occurs during this time, contributing to the bread’s complex flavor and golden-brown color.
Cool and Enjoy
Transfer the bread to a cooling rack and let it cool for at least 30 minutes before slicing. This step is crucial for the crumb to set properly. Cutting into the bread too soon can cause the crumb to become gummy and dense. Patience here pays off with a perfectly textured loaf.
Storage Tips

Store your artisan bread in a paper bag to maintain its crusty exterior. Avoid plastic bags, which can soften the crust. For longer storage, consider freezing the bread. Slice it first, so you can easily thaw individual pieces as needed.
Variations and Enhancements
While this bread is delightful in its simplicity, you can also explore variations to customize it to your liking. Consider adding herbs like rosemary or thyme for an aromatic twist, or mix in nuts and seeds for added texture and nutrition. For a touch of sweetness, incorporate dried fruits such as cranberries or raisins.
Exploring Flour Alternatives
Experimenting with different types of flour can also yield interesting variations. Whole wheat flour, for instance, can add a nutty flavor and a denser texture, while rye flour can impart a slightly sour, earthy note. Adjust the water content as needed, as whole grain flours typically require more hydration.
Enhancing with Oils and Fats
Incorporate a tablespoon of olive oil or melted butter into the dough for a richer flavor and softer crumb. These fats can also help extend the bread’s shelf life, keeping it fresh for longer without sacrificing taste.
Conclusion
This 3-Ingredient Artisan Bread is a testament to the idea that less is more. With minimal ingredients and effort, you can recreate the bakery experience in your own kitchen. Whether you’re a seasoned baker or a beginner, this recipe is accessible, forgiving, and undeniably rewarding. The process of making this bread is a journey of discovery, where you learn to trust your instincts and embrace the simplicity of good ingredients.
So why not give it a try? Your taste buds will thank you! As you savor each bite, you’ll appreciate the transformative power of baking—a timeless tradition that nourishes both body and soul. Happy baking!
The Joy of Sharing
One of the most rewarding aspects of baking artisan bread is sharing it with loved ones. A homemade loaf, with its rustic appearance and delectable aroma, makes a thoughtful gift for friends, family, or neighbors. It embodies care and craftsmanship, making it much more than just food—it’s a gesture of warmth and connection.
Troubleshooting Common Issues
Even with a simple recipe, there can be occasional hiccups in the baking process. Understanding common issues and their solutions can help ensure success every time.
- Dense Bread: This may result from insufficient rising time or over-kneading. Ensure the dough has ample time to ferment, and handle it gently during shaping.
- Flat Loaf: If your bread lacks height, the yeast may have been inactive. Check the expiration date on your yeast and confirm your water temperature is within the recommended range.
- Crumbly Texture: This could be due to too much flour or insufficient hydration. Aim for a sticky dough that holds together well, adjusting flour and water as needed.
By mastering these simple yet effective techniques, you’ll build confidence and skill in your bread baking journey. Enjoy the process, embrace the experimentation, and most importantly, savor the delicious results!


3 Ingredient Artisan Bread

This easy-to-make artisan bread only requires three simple ingredients. Perfect for beginners and ideal for any meal.
- Dutch Oven
- Parchment Paper
Artisan Bread
- 395 g all-purpose flour
- 1/2 Tablespoon Kosher salt
- 1/4 ounce instant or active dry yeast packet (or 2 1/4 teaspoons)
- 355 ml warm water (105°F)
- Place the flour, salt and yeast in a large bowl. Pour the warm water over top, ensuring it’s not too hot. Mix together until dough is wet and sticky.
- Cover with a towel or plastic wrap sprayed with nonstick spray for 2-10 hours, or leave on the counter overnight.
- Wet hands and turn dough onto a lightly floured surface. Gently shape into desired form.
- Place dough on parchment paper. Dust top with flour and score lines across the top. Let rest 20-30 minutes.
- Preheat oven to 450°F. Place a baking stone or Dutch oven in the oven.
- Slide dough with parchment paper onto hot stone. For a crustier finish, add hot water or ice cubes to oven. Bake 25-30 minutes until browned.
- Allow to cool on a rack for at least 30 minutes before slicing. Store in a paper bag.
For a more intense flavor, allow the dough to rise overnight. This bread pairs well with soups and salads.
