

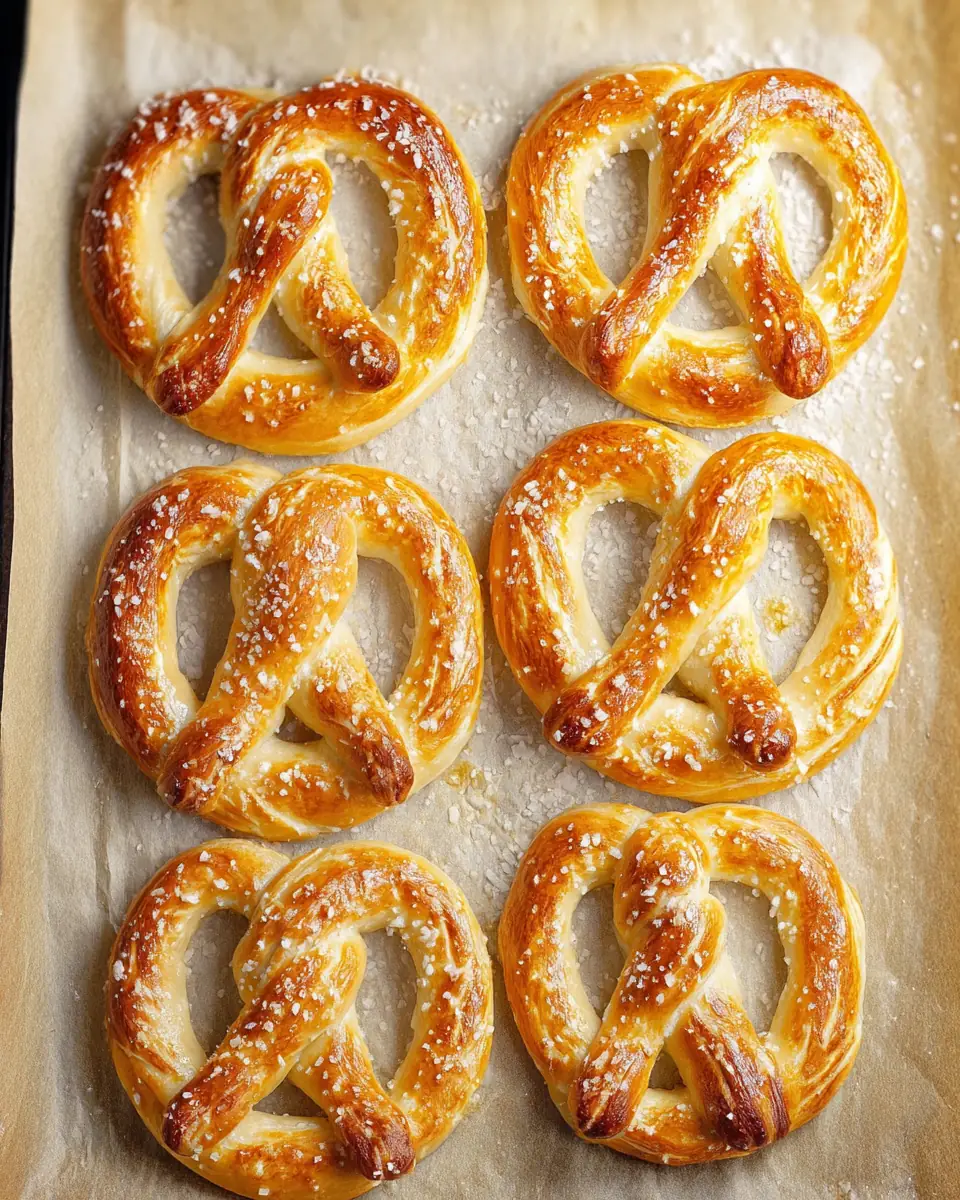
There’s something utterly irresistible about the aroma and taste of freshly baked soft pretzels. If you’ve ever wandered through a mall and been lured by the tantalizing scent wafting from an Auntie Anne’s kiosk, you’re not alone. These soft, golden-brown delights, with their characteristic salty crust and soft, chewy interior, are a treat that many of us hold dear. Now, you can recreate that magic right in your own kitchen with this Copycat Auntie Anne’s Soft Pretzel recipe.
The Allure of Homemade Pretzels
Homemade pretzels are not just about replicating a beloved treat; they are about the experience of crafting something special with your own hands. The process of making pretzels is both an art and a science. From the precision of measuring ingredients to the tactile satisfaction of kneading dough, each step is an opportunity to connect with the age-old tradition of baking. Plus, the reward is immediate: the comforting aroma filling your kitchen and the joy of sharing (or not sharing!) a warm, freshly baked pretzel.
Creating your own soft pretzels at home allows for customization, from adjusting the saltiness to experimenting with different toppings and dips. More than just a snack, homemade pretzels can become a staple for gatherings, family movie nights, or even as a unique twist to a meal. The process of making them can be therapeutic, offering a sense of accomplishment that comes from transforming simple ingredients into something extraordinary.
Equipment Needed
Before you dive into making these delectable treats, gather the following equipment to ensure a smooth baking experience:
- 2 Mixing Bowls: One for the dough and another for the baking soda solution.
- Thermometer: To ensure your milk reaches the perfect temperature for activating the yeast.
- Measuring Cup: For precise ingredient measurement.
- Large 20×15 Cookie Sheet: To bake your pretzels to golden perfection.
- Kitchen Scale: For those who prefer precise measurements, especially useful when measuring flour.
- Pastry Brush: To apply the melted butter evenly on the pretzels.
Having the right tools not only makes the process easier but also helps ensure consistent results. A kitchen scale, for example, can be particularly helpful for bakers who aim for precision, making sure each pretzel has the same texture and flavor profile. The pastry brush, while seemingly simple, plays a crucial role in achieving that signature Auntie Anne’s shine that makes these pretzels so visually appealing.
Ingredients
Pretzel Dough:
- 1/2 cup whole milk
- 1/2 cup of water
- 2 tsp dry active yeast
- 410 grams of bread flour (approximately 2 1/2 cups plus 3 tablespoons)
- 1/3 cup packed brown sugar
- 1 tsp salt
- 1/2 teaspoon baking powder
- 2 tbsp unsalted butter, melted
Baking Soda Solution:
- 2 cups of warm water
- 2 tbsp baking soda
Topping:
- 6 tbsp melted unsalted butter (for dipping after baking)
- Coarse pretzel salt (for topping before baking)
Each ingredient in this recipe plays a vital role in achieving the perfect pretzel. The bread flour, with its higher protein content, contributes to the chewy texture that distinguishes a pretzel from other types of bread. The brown sugar not only adds a hint of sweetness but also aids in the browning process, helping to create that deep, golden color. The baking soda solution is a traditional technique used in pretzel making, giving the exterior its distinct flavor and chewiness.
Instructions

1. Prepare the Dough
Begin by gently heating the milk and water to 105°F. You can achieve this by microwaving it for approximately 45 seconds. Once warmed, stir in the dry active yeast and let it sit for 5 minutes to proof. This step is crucial for activating the yeast, which contributes to the dough’s rise. You’ll know it’s ready when it looks foamy and bubbly, signaling that the yeast is alive and ready to work its magic.
In a large mixing bowl, combine the bread flour, brown sugar, salt, baking powder, and melted butter. Pour in the proofed yeast mixture and knead the mixture until it forms a cohesive, slightly tacky dough ball. Kneading is essential; it develops the gluten in the dough, giving your pretzels their characteristic chewy texture.
The proofing process is a testament to the wonder of yeast, a living organism that transforms simple sugars into carbon dioxide and alcohol, causing the dough to rise. This transformation is not only critical for texture but also imparts a subtle complexity to the flavor of the pretzels. As you knead the dough, you’ll notice it becoming smoother and more elastic, which is a sign that the gluten is developing correctly.
2. Let the Dough Rise
Lightly grease the top of the dough with a teaspoon of oil. Cover the bowl with a clean kitchen towel and let the dough rise in a warm place for about 45 minutes, or until it has doubled in size. The rising process allows the dough to develop flavor and texture. If you’re in a colder environment, consider placing the dough in an oven with just the light on to create a warm, draft-free environment.
While the dough is rising, prepare the baking soda solution in a separate bowl by dissolving 2 tablespoons of baking soda in 2 cups of warm water. Set this aside. This solution is what gives pretzels their distinctive taste and deep brown color.
Patience during the rising process is key. As the dough sits, fermentation occurs, which not only helps the dough to double in size but also enhances the depth of flavor. The environment in which the dough rises can significantly impact the final product. A warm spot encourages a more robust fermentation, leading to a well-developed dough with a rich taste.
3. Shape the Pretzels
Preheat your oven to 410°F. Once the dough has risen, turn it out onto a lightly greased surface. Using a pizza cutter or a sharp knife, divide the dough into 6 equal strips. This is where you can get creative — while the classic pretzel shape is traditional, you can also try knots or twists.
Roll each strip into a rope approximately 35 to 40 inches long, or about the thickness of your finger. Form each rope into a U-shape, twist the ends twice, and then fold them back to the base of the U, pinching the ends firmly to secure the pretzel shape. This might take a bit of practice, but the end result is worth the effort.
Shaping pretzels can be a fun and rewarding part of the process. The traditional shape, with its twists and loops, is not just for aesthetics; it also affects how the pretzel bakes, ensuring even cooking and a consistent texture. If you’re making pretzels with children or friends, this step can be a delightful way to get everyone involved.
4. Dip and Salt
Dip each pretzel into the prepared baking soda solution, then briefly pat them dry with a kitchen towel to remove excess moisture. Transfer the pretzels to a parchment-lined cookie sheet, sprinkle them generously with coarse pretzel salt, and bake for 7-8 minutes until they are golden brown. The baking soda bath is a crucial step, as it helps to create the pretzel’s signature chewy crust.
The baking soda dip is what sets pretzels apart from other types of bread. This alkaline bath triggers the Maillard reaction during baking, which is responsible for the rich color and unique taste of pretzels. The coarse salt not only enhances flavor but also provides a delightful contrast to the soft, chewy interior.
5. Butter and Serve
Once the pretzels are out of the oven, immediately dip or brush them with the melted unsalted butter. This step not only adds a delicious richness but also gives the pretzels that signature Auntie Anne’s shine. If you’re feeling adventurous, you can also experiment with other toppings like cinnamon sugar or garlic parmesan.
Brushing the pretzels with butter while they’re still hot ensures that the butter melts evenly, seeping into every crevice and enhancing the overall flavor and texture. This final touch is what elevates a good pretzel to an exceptional one, making each bite a savory delight.
Enjoy!
Serve these soft pretzels warm, perhaps with a side of mustard or cheese dip for the ultimate snacking experience. Whether you’re hosting a party, enjoying a cozy movie night, or simply indulging in some self-care, these homemade pretzels are sure to delight. Their versatility makes them perfect for any occasion.
Tips for Success
- Yeast Proofing: Ensure your yeast is fresh and active by proofing it correctly. If it doesn’t foam, consider starting over with a fresh batch of yeast.
- Rising Environment: A warm, draft-free spot is ideal for dough rising. If your kitchen is cool, consider placing the dough in an oven with just the light on to create a warm environment.
- Baking Soda Solution: This step is crucial for achieving the pretzel’s characteristic texture and flavor, so don’t skip it!
- Flour Type: Bread flour is recommended for this recipe due to its higher protein content, which aids in developing a chewy texture. However, all-purpose flour can be used in a pinch.
- Customization: Feel free to experiment with different toppings and dips to make these pretzels your own.
These tips are designed to help you achieve the best results possible. Fresh yeast is critical, as inactive yeast can prevent the dough from rising properly. The rising environment can make a significant difference in the outcome, so take the time to find a suitable spot. And remember, baking is both a science and an art, so don’t be afraid to experiment and make adjustments based on your preferences and conditions.
History and Fun Facts
The Origin of Pretzels
Pretzels have a rich history that dates back over a thousand years. They are believed to have originated in Europe, possibly among monks in the early Middle Ages. Legend has it that the shape of the pretzel resembles arms crossed in prayer, and they were given to children as a reward for learning their prayers. This connection to religious rituals made them a popular Lenten food in many cultures.
Pretzels in America
Soft pretzels made their way to America with German immigrants, particularly in the Pennsylvania region, where they became a beloved snack. Today, Pennsylvania is known for its pretzel production, and the state even celebrates “National Pretzel Day” on April 26th.
Modern Variations
While the classic salted pretzel remains a favorite, modern variations abound. From sweet cinnamon sugar to spicy jalapeño cheddar, the possibilities are endless. Gourmet pretzel shops and bakeries continue to innovate, offering everything from pretzel sandwiches to pretzel ice cream cones.
The evolution of pretzels from a simple snack to a versatile culinary delight showcases the ingenuity of bakers and the universal appeal of this treat. Whether enjoyed as a traditional snack or as part of a creative dish, pretzels continue to capture the hearts and taste buds of people around the world.
Conclusion
Enjoy this Copycat Auntie Anne’s Soft Pretzel recipe and bring the delightful taste of the mall to your home kitchen. There’s something deeply satisfying about crafting these delicious treats from scratch, and the end result is sure to impress. So roll up your sleeves, gather your ingredients, and embark on a baking adventure that will fill your home with warmth and joy. Happy baking!


Soft Pretzel Recipe (Copycat Annies Pretzels)

Recreate the delicious taste of Annies Pretzels at home with this soft and chewy pretzel recipe.
- 2 mixing bowls
- Thermometer
- Measuring cup
- Large 20×15 cookie sheet
Pretzel Dough
- 120 ml whole milk
- 120 ml water
- 2 tsp dry active yeast
- 410 g bread flour
- 67 g packed brown sugar
- 1 tsp salt
- 0.5 tsp baking powder
- 28 g unsalted butter (melted)
Baking Soda Solution
- 480 ml warm water
- 2 tbsp baking soda
Topping
- 84 g melted unsalted butter
- to taste coarse pretzel salt (for topping before baking)
- Heat the milk and water to 105°F (I microwave it for 45 seconds.) Stir in the yeast and allow it to proof for 5 minutes.
- In a large bowl, combine the flour, sugar, salt, baking powder, and melted butter. Pour in the proofed yeast mixture and knead for a few minutes until the dough comes together into a ball.
- Lightly grease the top of the dough with 1 tsp of oil and allow it to rise in a warm place for 45 minutes. Meanwhile, in another mixing bowl, dissolve the baking soda in water. Set aside.
- Preheat the oven to 410°F. Turn the dough over to a greased area and cut the dough into 6 equal strips.
- Roll and stretch each piece into a 35 to 40-inch rope or to the thickness of your finger. Make a U-shape and twist twice. Pinch ends to the pretzel.
- Dip pretzels into the baking soda solution and quickly pat against a kitchen towel to remove any excess water.
- Transfer the pretzels onto a large sheet pan lined with parchment paper. Sprinkle with salt and bake for 7-8 minutes.
- Dip warm pretzels into the melted butter and serve.
These soft pretzels are best enjoyed fresh out of the oven. You can experiment with different toppings such as cinnamon sugar or sesame seeds for a variation.
