

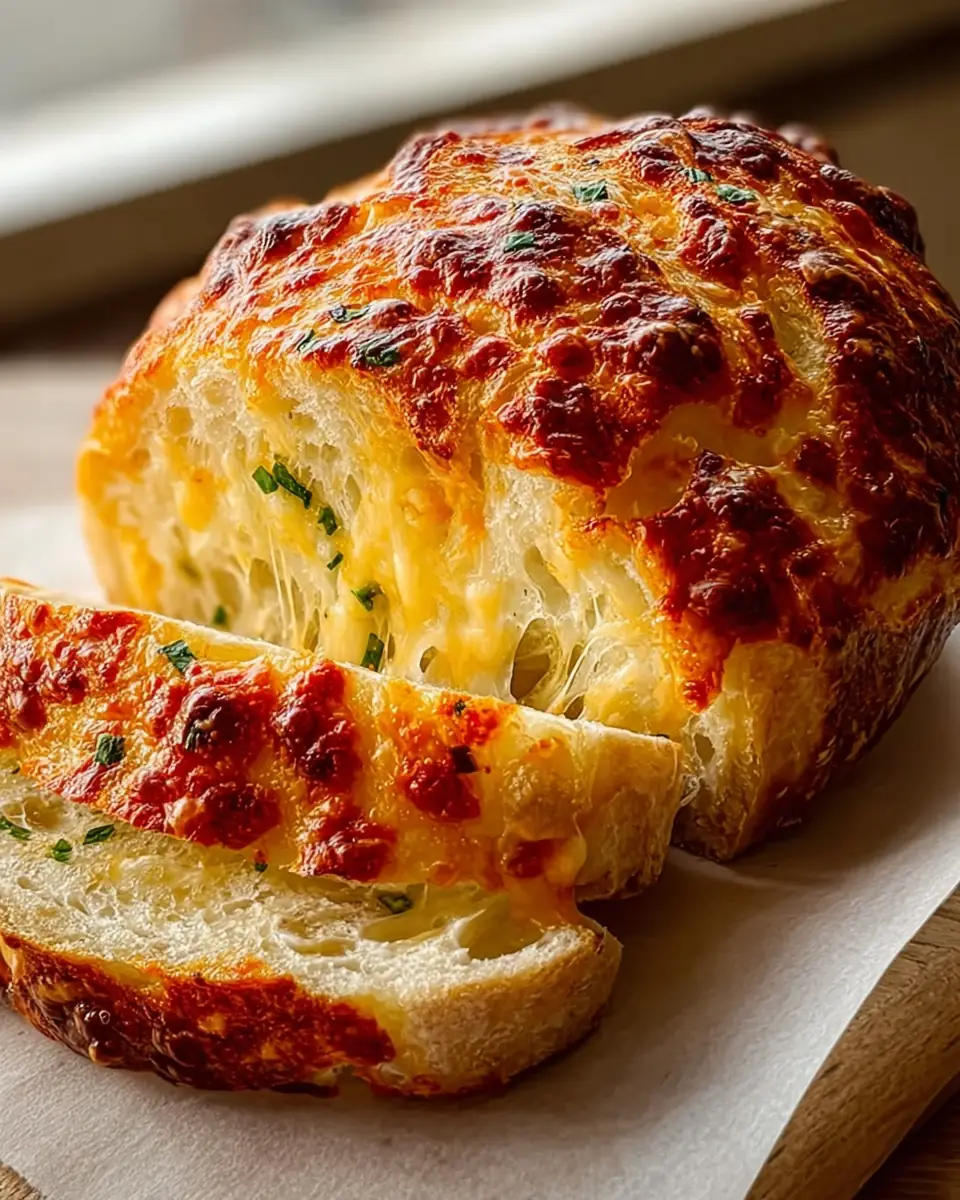
When it comes to baking bread at home, few experiences compare to the satisfaction of pulling a warm, crusty loaf from your oven. Yet, the thought of kneading dough can be daunting for many home bakers. Enter the no-knead method—a game-changer for bread enthusiasts everywhere. Our Delicious No Knead Cheese Bread is the perfect blend of simplicity and flavor. Packed with cheesy goodness and boasting a beautiful crust, this bread will make you feel like a professional baker. Let’s delve into this easy and flavorful recipe that even beginners can master!
Why No Knead?
The no-knead method has revolutionized home baking by utilizing time instead of labor to develop gluten. This means you can enjoy artisan-style bread without the elbow grease. The long resting period allows the dough to ferment slowly, enhancing flavor and texture in the final loaf. This technique also produces a bread with a chewy crust and an airy, tender crumb, characteristics often associated with professional bakery loaves.
The Science Behind It
The secret to the no-knead method lies in its simplicity and the power of time. By allowing the dough to rest for a prolonged period, the yeast has ample time to ferment, producing carbon dioxide and alcohol. The carbon dioxide helps the bread rise, while the alcohol contributes to the depth of flavor. The lengthy fermentation process also allows the gluten in the flour to develop naturally, eliminating the need for physical kneading.
Ingredients You’ll Need:
- 3 cups all-purpose flour: The base of your bread, providing structure.
- 1 ½ teaspoons salt: Essential for flavor and controlling yeast activity.
- ½ teaspoon instant yeast: Helps the dough rise without the need for kneading.
- 1 ½ cups shredded cheese: Choose your favorite—cheddar, mozzarella, or a mix for a unique flavor.
- 1 ½ cups warm water: Activates the yeast and hydrates the flour.
- 1 tablespoon olive oil: Adds moisture and a subtle richness to the dough.
Ingredient Insights
Flour: All-purpose flour is versatile and provides a good balance of protein and starch, making it ideal for no-knead bread. For a heartier loaf, consider substituting some of the all-purpose flour with whole wheat or rye flour. This will add complexity to the flavor and increase the nutritional value.
Cheese: The choice of cheese is crucial as it defines the flavor profile of your bread. Cheddar offers a sharp, tangy taste, while mozzarella provides a milder, creamy flavor. For a more adventurous loaf, try mixing different cheeses or adding a touch of blue cheese for a bold twist.
Olive Oil: While optional, olive oil enhances the dough’s texture and flavor. It adds a subtle richness and helps to create a slightly softer crumb.
Step-by-Step Instructions:
Mix the Dry Ingredients
- In a large mixing bowl, combine the flour, salt, and instant yeast. Using a wooden spoon, stir until the ingredients are well mixed. This step ensures that the yeast is evenly distributed, which is crucial for a consistent rise.
Incorporate the Cheese
- Stir in the shredded cheese, ensuring it’s evenly distributed throughout the dry mixture. This step is crucial for hitting those cheesy pockets in every bite! The cheese will melt during baking, creating delightful pockets of gooey goodness.
Add the Wet Ingredients
- Pour in the warm water and olive oil. Mix with the spoon until a shaggy dough forms. The dough will be sticky, but that’s exactly what you want. The stickiness is due to the hydration level, which is higher in no-knead recipes to facilitate gluten development.
Let it Rest
- Cover the bowl tightly with plastic wrap and let the dough rest at room temperature for 12 to 18 hours. This long fermentation period is key for flavor development. The slow fermentation allows the yeast to work its magic, resulting in a flavorful, airy crumb.
Preheat Your Oven
- About 30 minutes before you’re ready to bake, place your Dutch oven (with the lid on) in the oven and preheat to 450°F (230°C). This ensures a hot environment for baking, which is essential for a good rise and crust. The preheated Dutch oven mimics a professional steam-injected oven, crucial for achieving that perfect crust.
Shape the Dough
- Once the dough has risen, lightly flour a surface and turn the dough out onto it. With floured hands, gently shape it into a ball. Handle it lightly to maintain the air bubbles. The air bubbles are what make the bread light and airy, so take care not to deflate the dough.
Final Rest
- Place the shaped dough on a piece of parchment paper. Cover it with a clean kitchen towel and let it rest for another 30 minutes. This allows the dough to relax and expand slightly. The final rest is important for achieving a good oven spring—the initial rise when the bread is placed in the hot oven.
Bake Your Bread
- Carefully remove the hot Dutch oven from the oven. Using the parchment paper, lift the dough and place it into the pot. Cover with the lid and bake for 30 minutes to create steam, which aids in developing a crispy crust. The steam from the covered baking helps gelatinize the surface starch, leading to a glossy, crisp crust.
Finish Baking
- Remove the lid and bake for an additional 15 to 20 minutes until the bread is golden brown and crusty. The aroma will be irresistible! The final uncovered baking allows the crust to dry out and turn a beautiful golden brown.
Cool and Enjoy
- Once baked, transfer the bread to a cooling rack. Allow it to cool for at least 30 minutes before slicing. This helps set the crumb and makes slicing easier. Cutting too soon can lead to a gummy texture as the steam inside the bread needs time to redistribute.
Tips for Success:

-
Cheese Choices: Experiment with different cheeses or combinations to find your favorite flavor profile. Consider using smoked cheese for a touch of smokiness or pepper jack for a spicy kick.
-
Flour Variations: Try substituting a portion of the all-purpose flour with whole wheat or rye for added depth of flavor. These flours add nutritional benefits and a rustic texture.
-
Add-ins: Consider incorporating chopped herbs, garlic, or even jalapeños for an extra kick. Sun-dried tomatoes and olives can also add a Mediterranean flair to your loaf.
-
Timing: The fermentation time can be adjusted based on your schedule. If you need to extend the fermentation, place the dough in the refrigerator to slow down the yeast activity.
-
Dutch Oven Alternatives: If you don’t have a Dutch oven, use any heavy pot with a lid. The key is to trap steam during the initial baking phase.
Serving Suggestions:
This cheese bread is perfect for any occasion. Enjoy it warm with a pat of butter, serve it alongside soups and salads, or use it to craft the ultimate grilled cheese sandwich. Its versatility and rich, cheesy flavor make it a household favorite. Pair it with a hearty tomato soup for a comforting meal, or serve it as an appetizer with a side of olive oil and balsamic vinegar for dipping.
Pairing Ideas
-
Soups and Stews: The bread’s cheesy richness pairs wonderfully with creamy soups like broccoli cheddar or hearty stews. The crusty exterior holds up well when dipped, while the cheesy interior complements the savory flavors of the soup.
-
Charcuterie Boards: Add slices of this bread to your charcuterie board for a delightful contrast to cured meats and cheeses. The bread’s robust flavor profile can stand up to bold cheeses and rich meats, making it an excellent addition to any spread.
-
Breakfast: Toast slices and top with avocado or a poached egg for a gourmet breakfast treat. The melted cheese within the bread adds a savory undertone that pairs beautifully with creamy avocado or a runny egg yolk.
Troubleshooting Common Issues
Even with a foolproof recipe, baking can sometimes go awry. Here are a few troubleshooting tips to help you achieve perfect results every time:
-
Dense Bread: If your bread turns out denser than expected, it may be due to insufficient fermentation. Ensure the dough has enough time to rise and develop flavor. Also, avoid over-handling the dough after the initial rise to preserve the air bubbles.
-
Flat Loaf: A flat loaf could be a result of over-proofing, where the dough rises too much and collapses. Monitor the dough during its final rest and ensure it’s not left for too long.
-
Burnt Crust: If your crust is browning too quickly, try reducing the oven temperature slightly after removing the lid. You can also cover the loaf loosely with aluminum foil to prevent excessive browning.
Conclusion
In conclusion, this Delicious No Knead Cheese Bread is not only easy to make but also incredibly rewarding. With minimal effort, you’ll produce a loaf that rivals any bakery’s offering. So, roll up your sleeves and get ready to impress your family and friends with your newfound bread-making prowess! Whether you’re a seasoned baker or a complete novice, this recipe is sure to become a staple in your kitchen repertoire. Happy baking!

Delicious No Knead Cheese Bread

This easy no knead cheese bread is full of flavor and requires minimal effort. Perfect for any meal!
- Dutch Oven
Bread Ingredients
- 360 g all-purpose flour
- 1.5 tsp salt
- 0.5 tsp instant yeast
- 150 g shredded cheese
- 360 ml warm water
- 15 ml olive oil
- In a large mixing bowl, combine the flour, salt, and instant yeast. Use a wooden spoon to stir until they are well mixed.
- Stir in the shredded cheese, ensuring it’s evenly distributed throughout the dry mixture. Then, pour in the warm water and olive oil. Mix with the spoon until a shaggy dough forms.
- Cover the bowl tightly with plastic wrap and let the dough rest at room temperature for 12 to 18 hours.
- About 30 minutes before you’re ready to bake, place your Dutch oven (with the lid on) in the oven and preheat to 450°F (230°C).
- Once the dough has risen, lightly flour a surface and turn the dough out onto it. With floured hands, gently shape it into a ball.
- Place the shaped dough on a piece of parchment paper. Cover it with a clean kitchen towel and let it rest for another 30 minutes.
- Carefully remove the hot Dutch oven from the oven. Using the parchment paper, lift the dough and place it into the pot. Cover with the lid and bake for 30 minutes.
- After that, remove the lid and bake for an additional 15 to 20 minutes until golden brown and crusty.
- Once baked, transfer the bread to a cooling rack. Allow it to cool for at least 30 minutes before slicing.
This bread pairs wonderfully with soups or can be enjoyed on its own. Feel free to experiment with different types of cheese for a unique flavor.
