

A Comprehensive Guide to Making Rustic Bread at Home
There’s something undeniably satisfying about baking your own bread. The aroma that fills your kitchen, the crackling of the crust as it cools, and the rewarding first bite of a soft, warm slice are experiences that store-bought bread simply can’t offer. Our Rustic Bread recipe is perfect for both novice and seasoned bakers. With minimal ingredients and a straightforward process, you can easily create a loaf that’s both hearty and flavorful. Let’s dive into the details of this delightful recipe, ensuring you achieve the perfect rustic loaf every time.
The Allure of Rustic Bread
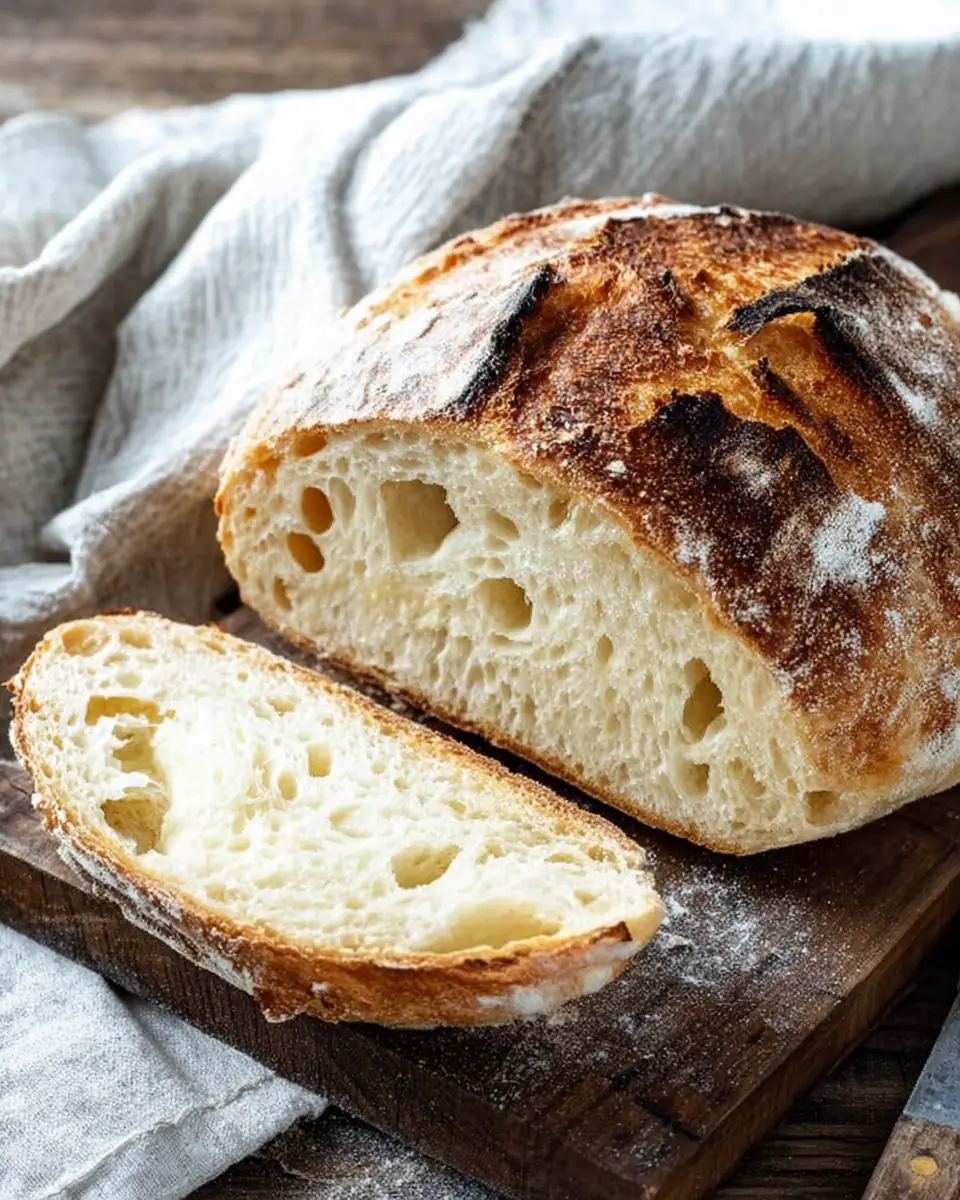
Before we delve into the recipe, it’s worth understanding what makes rustic bread so special. Unlike its more refined counterparts, rustic bread is known for its hearty texture and robust flavor. It harks back to traditional methods of bread-making where simplicity and quality of ingredients are paramount. The open crumb structure, chewy crust, and earthy flavor make it a staple in many households across the globe.
The Science Behind Bread
Bread-making is both an art and a science. At its core, it’s a simple combination of flour, water, yeast, and salt. Yet, the transformation of these humble ingredients into a loaf of bread is a fascinating process driven by biological and chemical reactions. Yeast, a living organism, feeds on sugars and starches in the flour, producing carbon dioxide gas and alcohol through fermentation. This gas gets trapped within the dough’s gluten network, causing it to rise and develop its airy structure.
Ingredients
To create this rustic masterpiece, you’ll need the following basic ingredients that are likely already in your pantry:
- 3 cups warm water: Aim for water that is warm to the touch but not hot. This helps activate the yeast without killing it. Ideal water temperature is between 100°F to 110°F (37°C to 43°C).
- 2 ¼ tsp (1 package) active dry yeast: The magic ingredient that gives the bread its rise. It’s important to note that active dry yeast requires proofing in warm water before use.
- 1 Tbsp sugar: Feeds the yeast, aiding in the fermentation process. You could substitute it with honey or maple syrup for a slightly different flavor.
- 6 cups (750 g) flour: All-purpose flour works perfectly, but you can experiment with bread flour for a chewier texture. Whole wheat flour can also be added for a heartier loaf.
- 3 tsp salt: Essential for flavor and controlling the yeast’s activity. Salt strengthens the gluten structure, which is crucial for the bread’s texture.
Directions
Step 1: Activate the Yeast
Begin by mixing the warm water, yeast, and sugar in a large mixing bowl or the bowl of your stand mixer. The water should be warm, not hot, to effectively activate the yeast. Allow this mixture to sit for about 10 minutes until it becomes bubbly. This indicates that the yeast is active and ready to work its magic. If your mixture doesn’t bubble, the yeast may be expired, and you’ll need to start over with fresh yeast.
Step 2: Prepare the Dough
Once your yeast is bubbly, add the flour and salt to the bowl. Mix until a soft dough forms. The dough should be slightly sticky to the touch, but not excessively so. If it’s too sticky, gradually add more flour, ¼ cup at a time, until the desired consistency is reached. Kneading can be done by hand or using a stand mixer with a dough hook. Knead until the dough is smooth and elastic, which should take about 10 minutes by hand or 5 minutes in a mixer.
Step 3: First Rise
Cover the bowl loosely with plastic wrap and a kitchen towel. Let the dough rise at room temperature for 1 to 3 hours. For the best flavor and texture, aim for a longer rise, but if you’re pressed for time, even 30-60 minutes will suffice. The dough should double in size, which is a good indicator that it’s ready for the next step.
Step 4: Preheat the Oven
As your dough is rising, preheat your oven to 450°F (232°C). Place a pizza stone or a flipped-over cookie sheet in the oven to heat up. This will help achieve that coveted crispy crust. A hot baking surface ensures that the dough begins to cook immediately, contributing to oven spring (the final rise of the dough in the oven).
Step 5: Create Steam
Fill a baking dish with 2 inches of water and place it on the bottom rack of the oven. This will create steam during baking, enhancing the crust’s crispiness. Steam prevents the crust from setting too quickly, allowing the bread to expand fully before the crust hardens.
Step 6: Shape the Dough
Sprinkle flour on your counter and turn the dough out onto it. Gently fold the dough onto itself, divide it in half, and form each half into a ball. Handle the dough as little as possible to maintain its airy texture. If needed, add a bit of flour to manage stickiness. You can also experiment with different shapes, such as a bâtard or boule, to vary your presentation.
Step 7: Score and Bake
Using a sharp knife, cut an X shape on the top of each ball. This not only adds a rustic touch but also allows the bread to expand properly during baking. Place the dough balls on a lightly floured pan and then onto the preheated pizza stone or cookie sheet. Scoring helps control the expansion of the bread during baking, allowing for a beautiful bloom.
Step 8: Bake to Perfection
Bake for 25-30 minutes or until the loaves are golden brown and sound hollow when tapped on the bottom. This ensures that your bread is fully cooked. An internal temperature of about 200°F (93°C) is a good indicator that the bread is done.
Tips for the Perfect Rustic Bread

Patience is Key: Don’t rush the rising process. The longer the dough rises, the better the flavor and texture of the bread. Consider an overnight rise in the refrigerator for even more developed flavors.
Experiment with Flours: While all-purpose flour is a great starting point, don’t hesitate to experiment with different types of flour. Whole wheat, rye, and spelt can add unique flavors and textures to your bread.
Add-Ins: Once you’ve mastered the basic recipe, try adding ingredients like olives, roasted garlic, herbs, or nuts to create a personalized loaf.
Use a Dutch Oven: If you have a Dutch oven, bake your bread in it for an even better crust. The enclosed environment traps steam, mimicking a professional steam-injected oven.
Store Properly: To keep your bread fresh, store it in a paper bag or a bread box. Avoid plastic bags as they trap moisture, leading to a soggy crust.
The Cultural Significance of Rustic Bread
Rustic bread is more than just a delicious food item; it carries cultural significance that dates back centuries. Its origins can be traced to rural European communities where bread was a staple of daily life, often made in communal ovens. Each family would bring their dough to be baked, an activity that fostered community spirit and collaboration.
Bread, especially rustic bread, symbolizes sustenance and hospitality. In many cultures, breaking bread together is a sign of friendship and unity. The process of making bread, from kneading to baking, was a skill passed down through generations, often with family-specific techniques and recipes that were closely guarded secrets.
Common Troubleshooting Tips
Why Didn’t My Bread Rise?
If your bread doesn’t rise as expected, the culprit is often the yeast. Ensure the yeast is fresh and not expired. Also, check the water temperature during the activation step; if it’s too hot, it can kill the yeast.
Why Is My Bread Dense?
Dense bread can result from insufficient kneading, which doesn’t develop the gluten network necessary for trapping gases. Overly compact dough can also be a result of not allowing enough time for the first rise. Ensure your dough doubles in size before proceeding to the next steps.
Why Is My Crust Too Hard?
While a crispy crust is desirable, an overly hard crust can be a result of baking for too long or the oven being too hot. Ensure your oven is calibrated correctly, and consider reducing the baking time slightly if this issue persists.
Exploring Flavor Variations
Herbs and Spices
Incorporating herbs and spices into your rustic bread can transform its flavor profile. Consider adding rosemary, thyme, or oregano for a Mediterranean twist. A touch of garlic powder or cumin can introduce an aromatic depth.
Sweet Variations
For a subtle sweetness, mix in a handful of dried fruits like raisins or cranberries. A sprinkle of cinnamon or nutmeg can also add a warm, comforting flavor, making your bread a perfect companion for breakfast spreads.
Bread Pairings and Serving Suggestions
With Soups and Stews
Rustic bread pairs beautifully with soups and stews. Its hearty texture makes it perfect for dipping into rich broths and sauces. Consider serving it alongside a bowl of minestrone or beef stew.
As a Sandwich Base
Use your rustic bread as a base for sandwiches. Its dense crumb can hold up to layers of ingredients without becoming soggy. Try it with classic fillings like cheese and ham or get creative with hummus and roasted vegetables.
Simply with Butter
Sometimes, the simplest pairings are the best. A slice of freshly baked rustic bread with a pat of butter is a timeless delight. The rich, creamy butter complements the bread’s earthy flavor perfectly.
Final Thoughts
With a total preparation time of approximately 2 hours, including both prep and baking time, this Rustic Bread recipe is an achievable and rewarding baking project. Whether you’re serving it with a hearty soup, using it for sandwiches, or enjoying it with a spread of butter, this bread is sure to impress.
Embrace the simplicity and satisfaction of baking your own bread. Once you’ve mastered this basic recipe, feel free to experiment with add-ins like herbs, cheese, or nuts to make it uniquely yours. Happy baking!


Rustic Bread Recipe
This rustic bread is perfect for any meal. Easy to make with a crispy crust and soft interior.
- Pizza Stone
Dough
- 710 ml warm water
- 2.25 tsp active dry yeast
- 1 Tbsp sugar
- 750 g flour
- 3 tsp salt
- Mix water, yeast, and sugar in a large mixing bowl or stand mixer. Let sit for about 10 minutes until bubbly.
- Add flour and salt. Mix until combined into a soft dough.
- Cover loosely and let rise for 1-3 hours.
- Preheat oven to 450°F with a pizza stone or cookie sheet inside.
- Fill a baking dish with water and place on the bottom rack.
- Turn out the dough, divide, and form into balls. Cut an X on top.
- Place dough on a floured pan and bake for 25-30 minutes.
For best results, use a pizza stone to achieve a crispy crust, and don’t skip the steam step for a perfect texture.
