

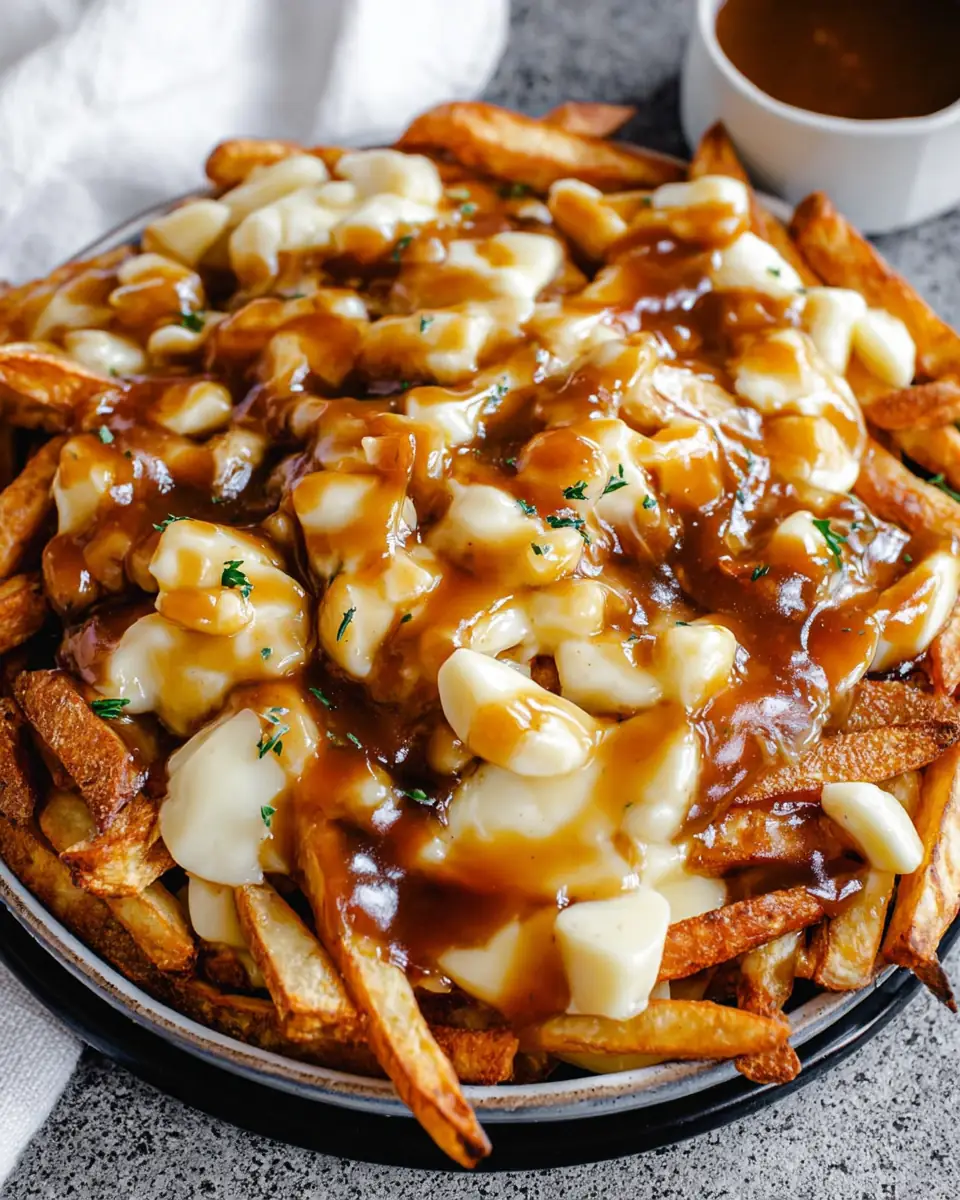
Authentic Canadian Poutine Recipe: A Delicious Dive into Canada’s Comfort Food
There’s nothing quite like indulging in a plate of authentic Canadian poutine. This iconic dish, known for its simple yet irresistible combination of crispy fries, squeaky cheese curds, and rich gravy, is a staple in Canadian cuisine. With this comprehensive guide, you’ll learn how to recreate this beloved comfort food right in your own kitchen. Whether you’re hosting a gathering or simply craving something delicious, this poutine recipe is sure to become a favorite.
The Roots of Poutine
Before diving into the recipe, it’s worth exploring the history of poutine, a dish that is as Canadian as the maple leaf. Originating in Quebec in the late 1950s, poutine was initially met with skepticism and even disdain. Some viewed it as a peculiar, unrefined concoction. However, its popularity surged in the following decades, and it has since become a symbol of Canadian culinary identity. The word “poutine” is believed to be derived from a Quebecois slang word meaning “a mess,” but what a delicious mess it is!
The Journey from Quebec to Global Fame
The story of poutine is one of humble beginnings and eventual global recognition. It all started in rural Quebec, with several small-town diners claiming to be the birthplace of this now-famous dish. Regardless of its exact origin, one thing is clear: poutine quickly captured the hearts of locals. As the dish gained popularity, it spread beyond Quebec, becoming a nationwide favorite and eventually making its way onto menus around the world.
Today, poutine is celebrated as a quintessential Canadian dish, often featured at festivals and events that showcase the country’s rich culinary heritage. It’s a testament to the power of simple ingredients coming together to create something truly special.
Ingredients: The Building Blocks of Poutine
To create the perfect poutine, you’ll need the following ingredients:
Fries:
- 4 pounds (1814g) Russet potatoes, peeled and cut into 1/2-inch sticks
- Vegetable oil, for frying
- 1-2 tablespoons salt
Gravy:
- 6 tablespoons (90g) unsalted butter
- 1/4 cup (32g) all-purpose flour
- 4 cups (960ml) beef or chicken stock (beef stock is preferred for a darker gravy)
- 2 tablespoons ketchup
- 1 tablespoon Worcestershire sauce
- 1/2 teaspoon salt + more to taste
- 1/2 teaspoon black pepper + more to taste
- 3 tablespoons cornstarch
- 2 tablespoons water
Cheese Curds:
- 2 cups (250g) cheese curds
Choosing the Right Ingredients
The quality of your ingredients can make or break your poutine experience. Start with fresh Russet potatoes, known for their high starch content and low moisture, which makes them ideal for frying. The cheese curds are equally important; they should be fresh and have that characteristic “squeak” when bitten into. Finally, the gravy ties everything together, and while homemade is always best, a high-quality store-bought variety can work in a pinch. However, in this recipe, we guide you through making the gravy from scratch for an authentic taste.
Sourcing Fresh Cheese Curds
Finding fresh cheese curds can sometimes be a challenge outside of Canada. These curds are a byproduct of the cheese-making process and are known for their unique texture and mild flavor. If you’re unable to find cheese curds at your local grocery store, try visiting a specialty cheese shop or farmer’s market. Alternatively, you can substitute with small cubes of mozzarella, though the texture won’t be quite the same.
Directions: Bringing Your Poutine to Life
Step 1: Prepare the Fries
Slice the Potatoes: Peel the potatoes and slice them lengthwise into 1/4-inch thick disks. Then, cut each disk into 1/4-inch thick sticks. If you prefer to keep the skin on, ensure you wash the potatoes thoroughly before slicing. This step is crucial to achieving the perfect texture for your fries.
Soak the Potatoes: Place the potato sticks into a container or large bowl filled with cold water. Let them soak for at least an hour, or preferably overnight in the refrigerator. This step is crucial for removing excess starch, which results in extra crispy fries. The soaking process also helps to prevent the potatoes from oxidizing, ensuring they maintain their natural color.
Dry the Potatoes: After soaking, drain the water and rinse the fries twice with cold water. Transfer them to a paper towel-lined baking sheet, patting them dry with another paper towel to remove as much moisture as possible. Removing excess moisture is essential for achieving crispiness.
Fry the Fries (First Fry): Heat 3 inches of vegetable oil in a large deep pot to 300°F. Carefully add a handful of fries at a time (avoid using your hands) and fry for 4-5 minutes, or until the insides are cooked but not yet browned. Remove them and let them drain on a paper towel-lined baking sheet. This initial frying cooks the potatoes through without browning them, setting the stage for the final crisping.
Fry the Fries (Second Fry): Increase the oil temperature to 400°F. Fry the par-cooked fries again in small batches until they turn golden and crispy, about 3-5 minutes. Drain on paper towels and sprinkle with salt to taste. This second fry is what gives the fries their signature crunch.
Step 2: Make the Gravy
Melt the Butter: In a saucepan over medium heat, melt the butter. Using unsalted butter allows you to control the saltiness of the final dish.
Create the Roux: Add the flour to the melted butter, whisking until the mixture begins to bubble and foam. Continue whisking for another minute. The roux serves as the base of your gravy, thickening it to the perfect consistency.
Add Stock and Seasonings: Gradually pour in the beef stock, whisking constantly to prevent lumps. Once incorporated, whisk in the ketchup, Worcestershire sauce, salt, and pepper. These ingredients add depth and complexity to your gravy, capturing the authentic flavors of Canadian poutine.
Thicken the Gravy: Bring the mixture to a boil. Meanwhile, combine the cornstarch and water to create a slurry. Once the gravy is boiling, add the slurry and whisk to combine. Reduce the heat to medium-low and let the gravy simmer until it thickens, coating the back of a spoon, about 10-15 minutes. Taste and adjust seasonings as needed. A well-balanced gravy is key to enriching the overall flavor profile of your poutine.
Step 3: Assemble and Serve
Plate the Fries: Transfer the hot, crispy fries to your serving plates. The fries should be hot enough to partially melt the cheese curds when assembled.
Add Cheese Curds: Generously sprinkle cheese curds over the fries. The curds should be evenly distributed for the best taste experience.
Pour the Gravy: Immediately pour the hot gravy over the fries and cheese curds, allowing the heat to partially melt the curds. The sight of the cheese softening under the warm gravy is a delight to the senses.
Enjoy: Serve your poutine immediately and savor each delicious bite! Poutine is best enjoyed fresh, with each component contributing to a harmonious blend of textures and flavors.
Nutrition Information

Here’s a quick look at the nutritional breakdown per serving:
- Calories: 529
- Carbohydrates: 63g
- Cholesterol: 60mg
- Fat: 26g
- Fiber: 4g
- Protein: 13g
- Saturated Fat: 13g
- Sodium: 4422mg
- Sugar: 11g
- Trans Fat: 1g
- Unsaturated Fat: 11g
A Note on Nutrition
Poutine is a decadent treat, and while it’s delicious, it’s also rich in calories and sodium. As with any indulgence, moderation is key. Consider balancing your meal with lighter options or enjoying poutine as a special occasion dish.
Cooking Time
- Prep Time: 45 minutes
- Cook Time: 30 minutes
- Total Time: 2 hours 15 minutes
Tips for Perfect Poutine
Fresh Cheese Curds: For the authentic poutine experience, use fresh cheese curds. If they’re not available in your area, small chunks of mozzarella can serve as a substitute, though the texture will differ slightly.
Double Frying Method: This method is crucial for achieving fries that are crispy on the outside and tender on the inside. Don’t skip the soaking and double frying steps!
Gravy Consistency: Aim for a gravy that is thick enough to coat a spoon but not so thick that it becomes glue-like. Adjust with stock or cornstarch slurry as needed.
Serving Suggestions: Poutine can be a standalone dish or served alongside other Canadian favorites such as smoked meats or maple-infused dishes. It pairs wonderfully with a crisp beer or a glass of Canadian cider.
Experiment with Variations: While the traditional poutine is unbeatable, feel free to experiment with toppings. Some popular additions include pulled pork, mushrooms, or even spicy jalapeños for a kick.
Conclusion
Crafting an authentic Canadian poutine at home is both rewarding and delectable. With its crispy fries, gooey cheese curds, and luscious gravy, this dish is a true testament to the comforting spirit of Canadian cuisine. Whether you’re new to poutine or a seasoned fan, this recipe promises to deliver an unforgettable culinary experience. Enjoy the flavors of Canada from the comfort of your kitchen, and don’t be surprised if this becomes a regular on your menu! By following this guide, you’ll not only master the art of making poutine but also gain a deeper appreciation for this beloved Canadian dish.
A Culinary Invitation
Poutine is more than just a dish; it’s an invitation to partake in a cultural experience that brings people together. Whether shared at a bustling Canadian diner, a family gathering, or a quiet evening at home, poutine is a testament to the universal appeal of comfort food. So, gather your ingredients, roll up your sleeves, and embark on this culinary journey to create your own piece of Canada on a plate. Bon appétit!
The Cultural Significance of Poutine
Poutine’s rise to fame is a reflection of Canada’s multicultural fabric. As the dish spread across the country, it began to take on regional variations, each adding its own twist to the classic recipe. In some parts of Canada, you might find poutine topped with smoked meat, while in others, a sprinkle of fresh herbs adds a touch of sophistication. This adaptability has allowed poutine to transcend its origins and become a versatile dish that can be tailored to suit a variety of tastes.
Furthermore, poutine has become a symbol of Canadian unity. It’s a dish that transcends linguistic and cultural barriers, bringing people together over a shared love for comfort food. Whether enjoyed at a late-night diner or at a high-end restaurant, poutine is a reminder that sometimes the simplest dishes are the most satisfying.


Authentic Canadian Poutine

Experience the classic Canadian dish with this authentic poutine recipe, featuring crispy fries, cheese curds, and rich gravy.
- Deep Fryer
Gravy
- 90 g unsalted butter
- 32 g all purpose flour
- 960 ml beef or chicken stock (I used beef for a darker gravy)
- 2 tbsp ketchup
- 1 tbsp Worcestershire sauce
- 0.5 tsp salt (more to taste)
- 0.5 tsp black pepper (more to taste)
- 3 tbsp cornstarch
- 2 tbsp water
Poutine
- 250 g Cheese curds
- 1814 g Russet potatoes (peeled and cut into 1/2″ inch sticks)
- ml Vegetable oil (for frying)
- 1-2 tbsp salt
- Peel the potatoes and slice lengthwise into 1/4-inch thick disks. Slice each disk into 1/4-inch thick sticks. If you want to keep the skin on, wash the potatoes before slicing.
- Place all of the potato sticks into a container or large bowl filled with cold water. Set aside to soak for at least an hour or preferably overnight. If soaking overnight, cover and keep in the fridge. This removes the starch, making the fries extra crispy!
- Drain the starch water and rinse off the fries twice with cold water. Transfer fries to a paper towel lined baking sheet and use another sheet of paper towel to pat and dry them as much as possible.
- Pour 3-inches of oil into a large deep pot, heat to 300°F. You can use a thermometer or wait a few minutes, then drop a small fry in the oil to check if it starts to fry gently. If it doesn’t, wait a bit longer, if it begins to pop, turn the heat down.
- Once the oil is hot enough, grab a handful of fries (don’t actually use your hands) and place them in the oil. Fry for 4-5 minutes to cook the inside, remove them from the oil if they begin to brown.
- Place fries onto another paper towel lined baking sheet or plate while you fry the remaining batches. You’ll need to work in small batches because if too many fries are added at once, the oil can bubble up and spill over, so stick with a handful at a time to be safe.
- Once all fries are cooked, heat the oil to 400°F, then once again fry the fries in small batches until they are golden and crispy, another 3-5 minutes. Keep an eye on them, you don’t want them to burn.
- Place them on paper towels to soak up the oil, then sprinkle with some salt. There’s no measurements for this, feel free to sprinkle as much or as little salt as you like.
- Add butter to a saucepan and heat over medium heat until melted.
- Once butter has melted, add the flour and whisk until mixture begins to bubble and foam. Continue to whisk for another 1 minute.
- Slowly pour in the beef stock while whisking constantly.
- Once stock is incorporated, whisk in the ketchup, Worcestershire sauce, salt and pepper.
- Allow gravy to reach a boil. Meanwhile, combine cornstarch and water to make a slurry.
- Once gravy begins to boil, add cornstarch slurry and whisk to combine.
- Turn the heat down to medium-low and allow gravy to simmer until the mixture begins to thicken, it should coat the back of a spoon. About 10-15 minutes. Taste the sauce and adjust the seasonings to your liking.
- Transfer the fries to your serving plates. Place cheese curds on top of the fries and immediately pour the hot gravy on top so it can melt the curds. Serve and enjoy!
For a twist, try adding some crispy bacon bits or fresh herbs on top of the poutine before serving for extra flavor.
