

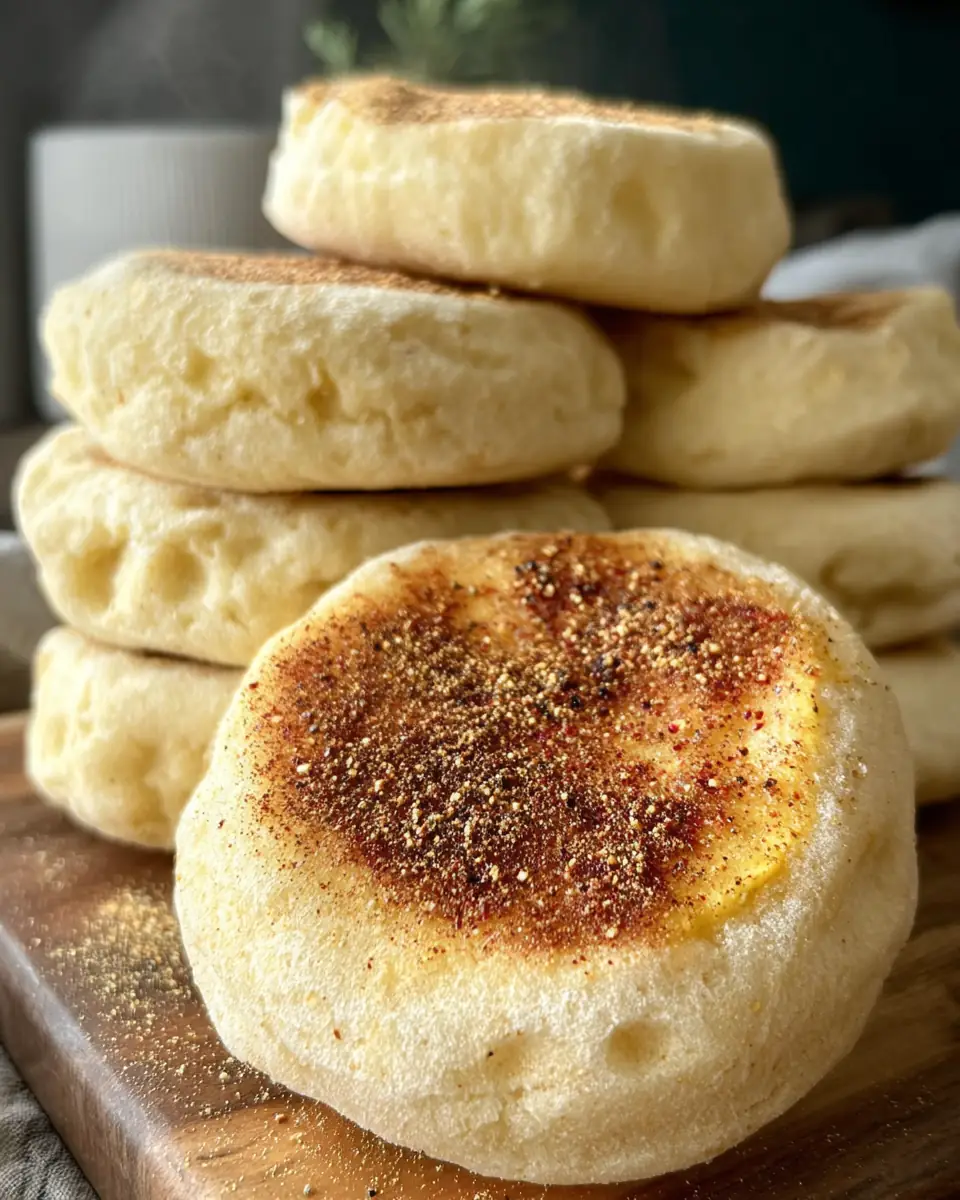
Homemade Buttermilk English Muffins: A Delightful Breakfast Treat
English muffins are a breakfast staple cherished for their soft, chewy texture and the way they cradle melted butter and jam in their iconic nooks and crannies. While store-bought versions offer convenience, there’s something undeniably satisfying and rewarding about crafting them from scratch. With this Buttermilk English Muffins recipe, you’ll discover just how easy and gratifying homemade baking can be, while also enjoying the superior taste and texture of your creation.
Why Buttermilk?
The secret to these delicious English muffins lies in the buttermilk. Buttermilk not only lends a subtle tanginess that enhances the overall flavor profile but also plays a critical role in tenderizing the dough, resulting in a softer and more delicate crumb. Combined with the richness of melted butter, this recipe promises muffins that are just as delicious on their own as they are when piled high with your favorite toppings.
The History and Appeal of English Muffins
Before diving into the recipe, it’s fascinating to understand the history behind English muffins. Originating in the United Kingdom during the 10th or 11th century, these muffins were traditionally cooked on a griddle, a practice that continues today. They were often sold by street vendors in England, becoming a popular snack among workers who appreciated their heartiness and portability. English muffins gained popularity in the United States in the late 19th century, thanks to Samuel Bath Thomas, who introduced them as a sophisticated alternative to toast. Today, English muffins are enjoyed worldwide, appreciated for their versatility and ability to complement both sweet and savory flavors.
Ingredients Breakdown
- Warm Water & Yeast: The foundation of any good bread starts with yeast. Warm water activates the dry active yeast, ensuring your dough rises beautifully and results in a light, airy texture.
- Maple Syrup or Honey: Adds a touch of sweetness to balance the tanginess of the buttermilk and helps feed the yeast. Maple syrup imparts a slight earthy flavor, while honey offers floral notes. Granulated sugar can be used as a straightforward alternative if you prefer a more neutral sweetness.
- Buttermilk: The star ingredient that provides tang and moisture, significantly improving the flavor and texture of your muffins.
- Melted Butter: Adds richness and moisture to the dough, contributing to a tender crumb and enhancing the overall flavor.
- All-Purpose Flour: Provides the structure necessary for the muffins to rise while keeping them light and airy.
- Salt: Essential for enhancing all the flavors in the dough and balancing the sweetness.
- Cornmeal: Used for griddling, it creates a deliciously crisp exterior, giving the muffins their classic texture.
Step-by-Step Directions
1. Activate the Yeast
Begin by combining the warm water, yeast, and your choice of sweetener in a large mixing bowl. Stir until the sweetener dissolves, then let the mixture stand for about five minutes. This allows the yeast to bloom, becoming foamy and ready for action. If your kitchen is chilly, consider placing the bowl in a turned-off oven with the light on to provide a slightly warmer environment. This step is crucial as it ensures your yeast is active, setting the stage for a successful rise.
2. Form the Dough
Once your yeast is ready, add the buttermilk, melted butter, flour, and salt to the bowl. Stir until the ingredients are combined, gently bringing the dough together with your hands if necessary. It’s important not to knead the dough; you want to preserve its softness. The dough should be slightly sticky and soft, which is a good indicator that your muffins will be tender once baked.
3. Let It Rise
Drizzle a bit of olive oil into your mixing bowl, then return the dough ball to the bowl, turning it to coat lightly with oil. Cover with plastic wrap and let it rise in a warm, dry place for about an hour. This rise allows the dough to double in size, developing flavor and texture. A warm, draft-free spot is ideal for this process, as it helps the yeast work efficiently, creating the bubbles that give English muffins their characteristic texture.
4. Shape the Dough
After the initial rise, carefully remove the dough and place it on a lightly floured surface. Divide it into eight equal pieces. Gently shape each piece into a ball by tucking the edges under, then cover the dough balls with plastic wrap to rise for another 30 minutes. This second rise is crucial for achieving the perfect texture, allowing the dough to relax and expand further.
5. Cook on the Griddle
Preheat your oven to 350°F. Heat a lightly greased cast iron skillet over medium-high heat. Dip each dough ball into a bowl of cornmeal, ensuring both sides are coated. This step creates the signature English muffin crust. Cook each dough ball in the skillet for 1-2 minutes on each side, until a golden brown crust forms. If they brown too quickly, reduce the heat to medium-low. The griddle cooking gives the muffins their classic appearance and texture, with a slightly crispy exterior.
6. Bake to Finish
Transfer the skillet to the oven and bake the muffins at 350°F for 10 minutes. This ensures they are cooked through. Once baked, allow them to cool slightly before slicing and serving. Baking them after griddling ensures they are perfectly cooked inside, with a soft, airy interior that contrasts beautifully with the crisp exterior.
Troubleshooting Tips
- Dough Consistency: If your dough is too sticky, add a little extra flour, a tablespoon at a time, until it becomes manageable. Conversely, if it feels too dry, incorporate a small amount of additional buttermilk.
- Yeast Activation: If your yeast doesn’t foam up after five minutes, it might be inactive. Consider trying a fresh batch of yeast to ensure a successful rise.
- Griddle Cooking: If your muffins are browning too quickly, lower the heat and extend the cooking time slightly to ensure they cook evenly.
Serving Suggestions
These Buttermilk English Muffins are incredibly versatile and can be enjoyed in a myriad of ways. Enjoy them warm with a generous pat of butter and a dollop of jam, or use them as a base for the classic eggs Benedict. For a savory twist, top with fresh avocado and a perfectly poached egg, or create a hearty breakfast sandwich with crispy bacon and melted cheese. The possibilities are endless, and each combination highlights the muffins’ ability to complement both sweet and savory flavors.
Health Benefits and Nutritional Information
English muffins, especially when made at home, can be part of a healthy breakfast. With ingredients like buttermilk providing calcium and protein, and the option to use whole-grain flour for added fiber, these muffins can be a nutritious start to your day. Buttermilk also contains probiotics, which support digestive health. By controlling the ingredients, you can reduce added sugars and unhealthy fats typically found in store-bought versions, making your homemade English muffins a healthier choice.
Variations and Customizations
Once you’ve mastered the basic recipe, consider experimenting with different flavors and add-ins. For a sweet variation, try adding a handful of raisins or cinnamon to the dough. For a savory twist, incorporate shredded cheese or chopped herbs like rosemary or thyme. You can also experiment with different types of flour, such as whole wheat or spelt, to adjust the nutritional content and flavor to your liking.
Conclusion
Making Buttermilk English Muffins at home is a simple yet deeply satisfying process. The combination of buttermilk and melted butter creates a muffin that’s tender and flavorful, while the cornmeal crust adds an irresistible crunch. Whether you’re a seasoned baker or trying your hand at bread making for the first time, this recipe is sure to become a breakfast favorite. Enjoy the fruits of your labor with each delicious bite, and savor the satisfaction of having crafted something truly special from scratch. Once you’ve tasted the homemade version, you’ll find it hard to go back to store-bought muffins. Enjoy your homemade creation with pride!
Reader Engagement
We’d love to hear about your experiences making these Buttermilk English Muffins! Did you try any variations or discover a new favorite topping combination? Share your thoughts and photos in the comments below. If you’re looking for more homemade bread recipes, be sure to check out our blog for more inspiration. Happy baking!


Buttermilk English Muffins

Enjoy these homemade buttermilk English muffins for breakfast or brunch, offering a delightful texture and flavor.
- Cast Iron Skillet
Yeast Mixture
- 60 ml warm water
- 2 tsp dry active yeast
- 15 ml maple syrup or honey (or granulated sugar)
Dough
- 310 ml buttermilk
- 45 g melted butter (salted)
- 490 g all purpose flour
- 1.5 tsp salt
For Griddling
- 50 g corn meal
- In a large mixing bowl, combine ¼ cup of warm water with 2 tsp of dry active yeast and 1 tbsp of maple syrup or honey.
- Stir until sugar is dissolved and let stand 5 mins until foamy. If your house is cold, you may need to set it in the oven TURNED OFF but with the oven light on to activate.
- Once the yeast has bloomed, add 1¼ cup buttermilk, 3 tbsp melted butter, 3½ cups all purpose flour and 1½ tsp salt.
- Stir until combined, gently bringing together with your hands if needed until a dough ball forms, do not knead the dough!
- Add a drizzle of olive oil to your mixing bowl and return your dough ball to the oiled bowl. Cover with plastic wrap and let rise in a warm, dry place for an hour, it should have doubled in size.
- Carefully remove the risen dough from the bowl and place on a lightly floured counter.
- Gently cut the dough into 8 even pieces and gently tuck edges into the shape of a ball. Cover dough balls with plastic wrap to let rise for another 30 minutes.
- Preheat oven to 350℉. Place a lightly greased cast iron skillet over medium high heat.
- Dip each side of the dough ball into a bowl of corn meal before pan frying for 1-2 minutes each side, until a golden brown crust forms. Reduce heat to medium low if they are cooking too quickly.
- Bake at 350℉ for 10 minutes to ensure they are cooked all the way through. Allow to cool some before slicing and serving.
Serve your English muffins toasted with butter or jam. They are perfect for breakfast sandwiches too!

