

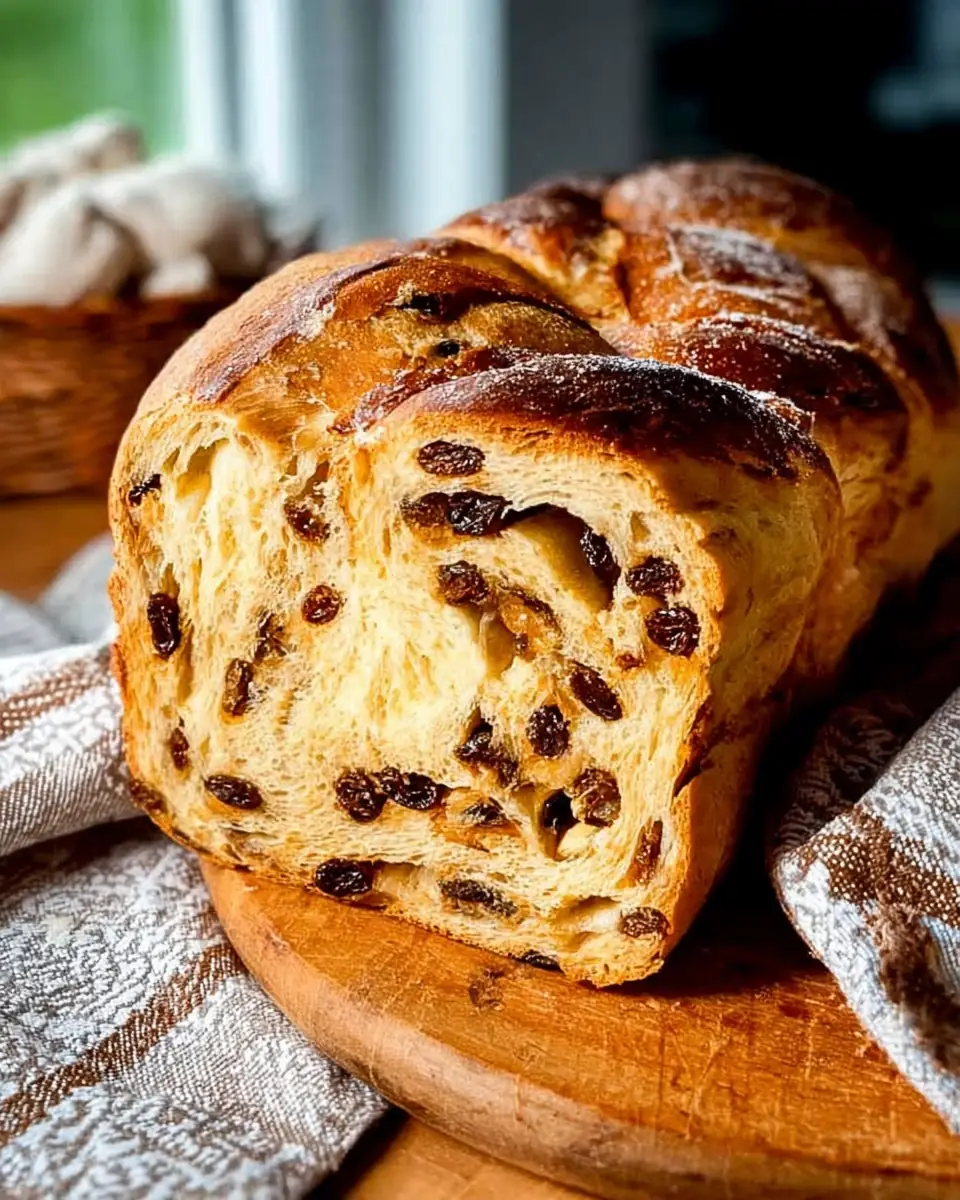
Classic Raisin Bread: A Timeless Homemade Delight
Raisin bread is a classic staple that combines the comforting aroma of freshly baked bread with the delightful sweetness of raisins. Whether it’s toasted and buttered for breakfast or served as a sweet snack, this homemade treat is sure to warm your kitchen and your heart. In this article, we’ll guide you through crafting this timeless bread from scratch, ensuring a loaf that’s perfectly soft, fragrant, and flavorful.
The History of Raisin Bread
Ancient Beginnings
Raisin bread’s history is as rich as its flavor. The origins of this beloved baked good can be traced back to ancient times. Raisins themselves have been a part of human diets since grapes were first cultivated. Ancient Egyptians and Romans both recognized the value of drying grapes to preserve them for long-term storage, and they often incorporated raisins into various foods. These early uses of raisins were not limited to bread; they were also an integral part of various sweet and savory dishes, highlighting their versatility and ability to enhance flavors.
European Influence
In more recent history, raisin bread gained popularity in Europe, particularly in Britain, during the 15th and 16th centuries. It was often associated with festive occasions and special breakfasts. The addition of spices like cinnamon and nutmeg, which were becoming more accessible due to trade, enhanced the bread’s appeal. As a result, raisin bread became a symbol of luxury and celebration, often reserved for holidays and special gatherings.
Raisin Bread in America
As European settlers moved to the New World, they brought their love for raisin bread with them, and it became a cherished staple in American households. In America, the recipe evolved slightly, incorporating local ingredients and adapting to the available resources. Raisin bread was not only a household favorite but also made its way into bakeries, becoming a beloved choice for families across the nation.
Ingredients for Success
To embark on this baking journey, you’ll need the following ingredients:
- 1 cup raisins: Soaked in warm water to plump them up, ensuring they remain juicy and flavorful throughout the bread.
- 3 cups all-purpose flour: This serves as the foundation for our dough, providing structure and texture.
- ¼ cup granulated sugar: Adds a subtle sweetness to the dough, complementing the raisins.
- 2¼ teaspoons instant yeast: Essential for leavening, giving our bread its airy texture.
- 1 teaspoon salt: Balances the sweetness and enhances overall flavor.
- ½ cup whole milk: Contributes to a tender crumb and rich taste.
- ¼ cup water: Adjust the dough consistency, ensuring the perfect balance.
- ¼ cup vegetable oil or melted butter: Adds moisture and richness.
- 1 large egg: Acts as a binder, enhancing the dough’s texture.
- 3 tablespoons butter (melted): Used in the filling for added richness.
- 2 teaspoons ground cinnamon: Infuses the bread with warm, spicy notes.
- ½ cup brown sugar: Sweetens the filling, creating a delicious swirl within the bread.
The Science of Baking Bread
Yeast and Fermentation
Understanding the science behind bread-making can enhance your baking experience. When yeast is mixed with the dough, it begins to feed on the sugars present, producing carbon dioxide and ethanol in the process. This fermentation is what causes the dough to rise, creating the fluffy texture that we all love in homemade bread. The yeast’s activity is affected by several factors, including temperature, sugar content, and moisture levels, which all play a critical role in the final product.
Gluten Development
The gluten in the flour provides the necessary elasticity and strength to trap the gases produced by the yeast. Kneading the dough helps align the gluten strands, forming a network that holds the structure of the bread. This process is crucial for achieving the desired texture and consistency, ensuring that the bread is not only soft but also strong enough to hold its shape.
Role of Fats and Sugars
Meanwhile, the fats from the milk and butter enrich the dough, making it tender and flavorful. The sugars not only provide sweetness but also contribute to the browning of the crust during baking, enhancing the aroma and taste. The balance of ingredients is essential for creating a harmonious loaf that pleases both the palate and the senses.
Step-by-Step Instructions

Step 1: Make the Dough
Begin by mixing all the dough ingredients, except for the raisins. The consistency should be slightly sticky yet firm enough to hold its shape. If the dough appears too dry, gradually add small amounts of water. Conversely, if it’s overly sticky, incorporate more flour as needed. Knead the dough by hand, or use a bread machine or stand mixer, until it is smooth and elastic. Finally, fold in the soaked raisins, ensuring they are evenly distributed.
Step 2: First Rise
Transfer the dough to a greased bowl, covering it with plastic wrap or a damp kitchen towel. Allow it to rise in a warm, draft-free area for 1 to 1.5 hours, or until it has doubled in size. Be patient; the milk and sugar content may slow down the rise. This first rise is crucial for developing the bread’s flavor and texture, allowing the yeast to work its magic.
Step 3: Fill and Shape
Once the dough has risen, gently stretch it into a 9×14-inch rectangle. For the filling, combine the melted butter, brown sugar, and cinnamon. Spread this mixture evenly over the dough. Roll the dough tightly from the short end into a log. Tuck in the ends and place it seam-side down in a greased 9×5-inch loaf pan. The filling adds a delightful swirl of flavor, ensuring each slice is as delicious as the last.
Step 4: Second Rise
Cover the loaf with plastic wrap or a damp kitchen towel and let it rise again in a warm place for 45 minutes to 1 hour, until the dough rises 1-2 inches above the pan’s rim. As the second rise nears completion, preheat your oven to 350°F (175°C). This second rise is crucial for achieving the perfect loaf height and ensuring a light and airy crumb.
Step 5: Bake
Place your loaf in the preheated oven and bake for 35-40 minutes. The bread should turn a lovely golden brown and sound hollow when tapped on the bottom. Once baked, remove it from the oven and allow it to cool in the pan for about 10 minutes. Transfer the loaf to a wire rack to cool completely before slicing and serving. Patience during the cooling process ensures that the bread slices cleanly and maintains its structure.
Tips for Perfect Raisin Bread
Choosing Your Ingredients
- Raisins: Experiment with different types of raisins, such as golden or sultana, for varied flavors. Each variety offers a unique taste and texture, adding depth to your bread.
- Flour: For a heartier loaf, consider substituting some of the all-purpose flour with whole wheat flour. This not only increases the nutritional value but also adds a nutty flavor.
- Sweeteners: You can replace granulated sugar with honey or maple syrup for a different taste profile. These natural sweeteners can enhance the bread’s complexity and complement the raisins beautifully.
Troubleshooting Common Issues
- Dense Bread: If your bread is too dense, it might be due to insufficient kneading or not allowing enough time for the dough to rise. Ensure the dough is smooth and elastic before the first rise. Proper gluten development is key to achieving the right texture.
- Over-browning: If the top of your bread is browning too quickly, cover it loosely with aluminum foil during the last 10 minutes of baking. This simple trick prevents burning and ensures an even crust.
- Uneven Raisin Distribution: To prevent raisins from clumping, thoroughly dry them after soaking and evenly incorporate them into the dough during kneading. This ensures that each slice is filled with raisins.
Nutritional Information
This classic raisin bread offers a delightful balance of flavors and nutrients. Each serving contains:
- Calories: 279 kcal
- Carbohydrates: 48 g
- Protein: 5 g
- Fat: 8 g
- Saturated Fat: 5 g
- Trans Fat: 0.3 g
- Cholesterol: 33 mg
- Sodium: 264 mg
- Fiber: 2 g
- Sugar: 14 g
- Unsaturated Fat: 2.5 g
This nutritional profile makes raisin bread a balanced choice for those seeking a sweet yet wholesome option for breakfast or a snack.
Timing Your Bake
- Prep Time: 30 minutes
- Cook Time: 45 minutes
- Total Time: 3 hours 15 minutes
The timing of each step is crucial for achieving the perfect loaf, so be sure to follow the instructions carefully and allow enough time for each rise and bake.
Serving Suggestions
Raisin bread is versatile and can be enjoyed in many ways:
- Breakfast: Toast slices and spread with butter or cream cheese for a sweet morning treat. Add a sprinkle of cinnamon for an extra touch of warmth.
- Dessert: Serve with a scoop of vanilla ice cream or drizzled with a caramel sauce. This transforms the bread into a delightful dessert that’s sure to impress.
- Snack: Pair with a slice of sharp cheddar cheese for a unique and satisfying snack. The contrast of sweet and savory flavors creates a delightful taste experience.
Conclusion
Baking classic raisin bread at home is a rewarding experience that fills your kitchen with the comforting scent of cinnamon and warm bread. This recipe balances sweetness and spice, creating a loaf that’s perfect for any occasion. Whether you’re a novice baker or a seasoned pro, this recipe is sure to become a cherished part of your baking repertoire. Enjoy your homemade raisin bread toasted with butter or as a delightful treat on its own!
By understanding the history, science, and versatile nature of this delightful bread, you enrich not only your baking skills but also your appreciation for this timeless classic. Happy baking!
Expanding Your Baking Horizons
Once you’ve mastered the classic raisin bread, consider experimenting with variations to suit your personal taste. Try adding nuts, such as walnuts or pecans, for added crunch. You can also explore different spices, like nutmeg or cardamom, to infuse new flavors into your bread. The possibilities are endless, and each variation offers a unique twist on this beloved classic.
Community and Sharing
Baking bread can also be a communal activity. Consider inviting friends or family to join you in the kitchen, sharing techniques and stories as you bake together. Homemade bread makes a thoughtful gift, perfect for sharing with neighbors or bringing to gatherings. The shared experience of baking and enjoying raisin bread can create lasting memories and strengthen bonds.
The Art of Baking
In the fast-paced world of today, taking the time to bake bread from scratch is an art form that allows for creativity and mindfulness. The process of measuring, mixing, kneading, and baking can be a meditative experience, offering a moment of calm and focus. As you hone your skills, you’ll find that baking becomes not just a means to an end, but a journey of discovery and self-expression.
By embracing the art and science of baking, you join a long tradition of bakers who have crafted delicious and nourishing bread for their communities. As you continue to explore and experiment, you’ll find that the joys of baking extend far beyond the kitchen, enriching your life and connecting you to a broader culinary heritage.


Classic Raisin Bread
This classic raisin bread is perfect for breakfast or as a sweet snack. It’s soft, flavorful, and filled with plump raisins.
- Loaf Pan
- Mixing bowl
- Plastic Wrap
Dough
- 1 cup raisins (soaked in warm water)
- 3 cups all-purpose flour
- 60 g granulated sugar
- 2.25 tsp instant yeast (or active dry)
- 1 tsp salt
- 120 ml whole milk
- 60 ml water
- 60 ml vegetable oil (or melted butter)
- 1 large egg
Filling
- 45 g butter (melted)
- 2 tsp ground cinnamon
- 120 g brown sugar
- Make the dough. Mix all dough ingredients except the raisins and check the consistency. It should be very slightly sticky but still hold its shape. If the dough is heavy or crumbly, add water a bit at a time. If it is overly sticky or does not hold its shape, add flour a bit at a time. Knead by hand, bread machine, or stand mixer until smooth and elastic. Add raisins and briefly knead in.
- First rise. Place the dough in a greased bowl, covering it with plastic wrap or a damp kitchen towel. Let it rise in a warm place for 1 to 1.5 hours, or until doubled in size. Due to the milk and sugar in the recipe, it may rise slower than what you are used to.
- Fill and shape. Stretch the dough out into a rectangle approximately 9×14 inches. To make the filling, mix the melted butter, brown sugar and 2 teaspoons ground cinnamon. Spread the raisin mixture evenly over the dough. Roll the dough tightly into a log, starting from the short end. Tuck in the ends and place seam-side down in a greased 9×5-inch loaf pan.
- Second rise. Cover the loaf with plastic wrap or a damp kitchen towel and let it rise in a warm place for 45 minutes to 1 hour, or until risen 1-2 inches over the top of the loaf pan. Towards the end of the rising time, preheat your oven to 350°F.
- Bake. Place the loaf in the preheated oven and bake for 35-40 minutes, or until golden brown and the loaf sounds hollow when tapped on the bottom. Remove from the oven and allow to cool in the pan for 10 minutes, then transfer to a wire rack to cool completely before slicing.
For a richer flavor, try using a mix of dark and golden raisins. This bread is delicious toasted and served with butter.
