

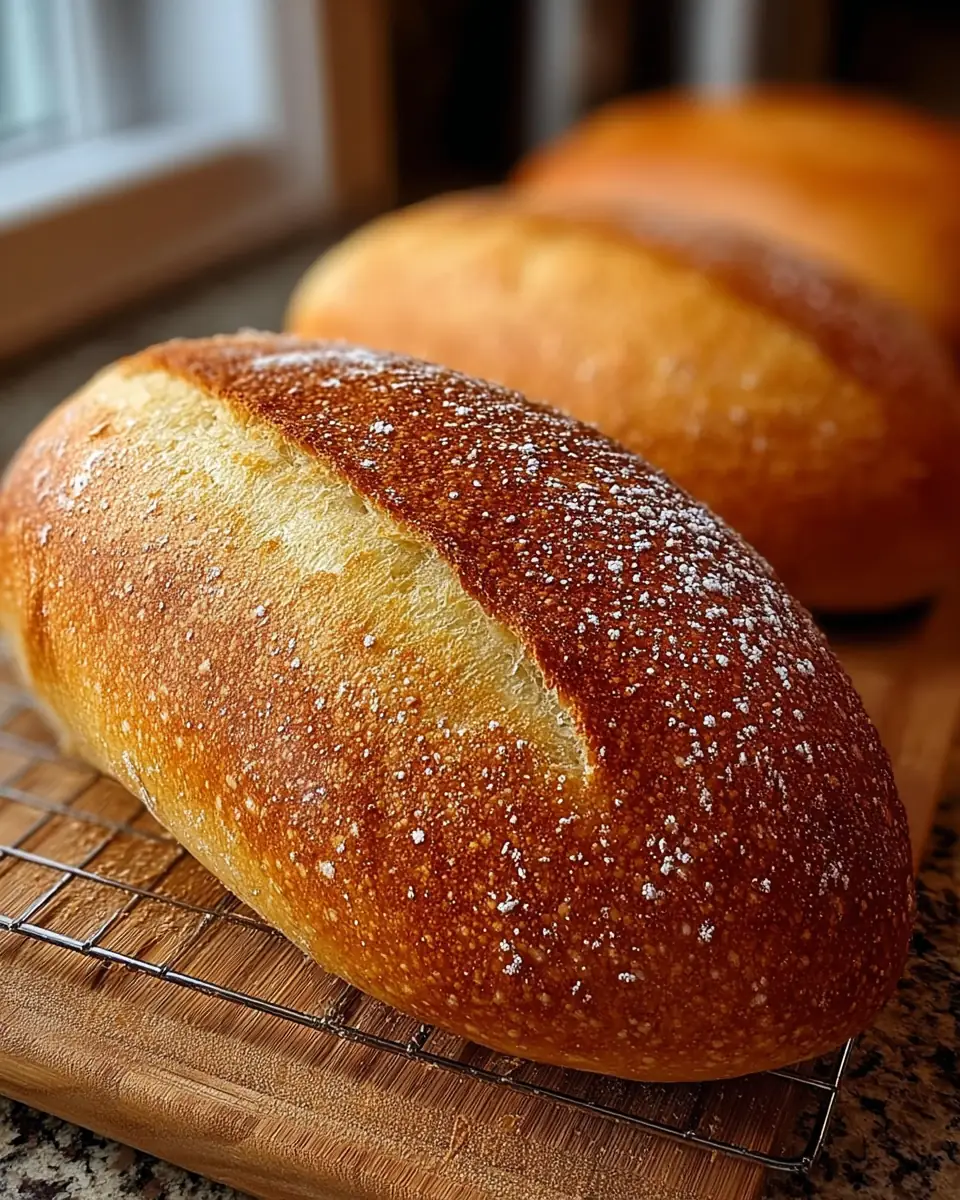
In this article, we will delve deep into the art of crafting a delicious and easy-to-prepare French bread recipe that can be ready in under two hours. The allure of French bread lies in its crispy crust and soft, airy interior, making it a timeless classic that never fails to impress. With this simple yet effective recipe, you can bring the aroma and taste of freshly baked French bread into your home without dedicating an entire day to baking.
The Art of Making French Bread
Bread-making is often considered a labor of love, a slow and methodical process. However, with the right techniques and ingredients, you can produce a quality loaf of French bread in a fraction of the time typically required. The key lies in understanding the fundamental principles of bread-making, selecting quality ingredients, and executing each step with precision.

Understanding the Ingredients
Before diving into the recipe, let’s explore the role each ingredient plays in creating the perfect French bread:
-
All-Purpose Flour: This type of flour provides the ideal balance of protein and gluten necessary for developing the bread’s structure. It ensures the right amount of chewiness and supports the bread’s rise. When choosing flour, consider the protein content; higher protein flours can yield a chewier texture, which is desirable in French bread.
-
Salt: A vital component in bread-making, salt not only enhances flavor but also regulates yeast activity and strengthens gluten, contributing to the bread’s texture. The right amount of salt can make a difference between a bland and a flavorful loaf.
-
Active Dry Yeast: Yeast is the leavening agent that makes the dough rise. It ferments the sugars present in the flour, releasing carbon dioxide and causing the dough to expand. Freshness is key; always check the expiration date on your yeast to ensure it will function properly.
-
Warm Water: Water activates the yeast and hydrates the flour. The temperature is crucial; water that is too hot can kill the yeast, while too cold will not activate it sufficiently. Using a thermometer can be helpful to achieve the perfect temperature range of 105-115°F.
-
Sugar: A small amount of sugar feeds the yeast, accelerating fermentation and enhancing the bread’s flavor. While not always traditional in French bread, sugar can speed up the process, making it suitable for quick recipes.
-
Egg White: Used for the wash, egg white gives the crust a glossy finish and helps achieve that signature French bread look. This step is optional but adds an appealing sheen to the crust.
Step-by-Step Guide to Making French Bread
1. Activate the Yeast
The process begins with activating the yeast. This step is critical as it confirms that the yeast is alive and capable of leavening the bread. Dissolve the sugar in warm water in a large bowl and sprinkle the yeast over the top. Let it sit undisturbed for 5 to 10 minutes. You’ll know the mixture is ready when it becomes foamy, indicating that the yeast is active and producing carbon dioxide.
2. Form the Dough
Once your yeast is activated, it’s time to form the dough. Add the flour and salt to the yeast mixture. Stir with a wooden spoon or use a stand mixer until a shaggy dough forms. The dough will appear rough and uneven at this stage, but this is normal. Ensure all flour is incorporated; any dry patches could affect the consistency of the final dough.
3. Knead the Dough
Kneading is an essential step in developing the gluten network within the dough, giving the bread its structure and chewiness. Turn the dough out onto a lightly floured surface and knead it for 5 to 7 minutes until it becomes smooth and elastic. If using a stand mixer, utilize the dough hook attachment and mix on medium speed. The dough should spring back when pressed lightly with a finger, indicating sufficient gluten development.
4. First Rise
Once kneaded, place the dough in a lightly oiled bowl, turning it once to coat it with oil. This prevents the dough from drying out. Cover the bowl with plastic wrap or a clean towel and let it rise in a warm place for about 60 minutes, or until it doubles in size. This rise allows the yeast to work its magic, transforming the dough into a light and airy mass. For an optimal rise, find a spot in your kitchen that is draft-free and warm, such as near a window with sunlight or on top of a refrigerator.
5. Shape the Loaves
After the first rise, gently punch down the dough to release excess air. Divide the dough in half and shape each half into a long, even loaf about 12 to 14 inches long. Shaping is an opportunity to give your bread its final form, so take care to create even, symmetrical loaves. A gentle hand is key to preserving the air pockets that contribute to the bread’s airy texture.
6. Second Rise
Place the loaves on a baking sheet lined with parchment paper. Cover them loosely with a towel and let them rise for another 20 minutes. This second rise is crucial for achieving a light and fluffy interior, ensuring the bread is not too dense.
7. Prepare for Baking
Preheat your oven to 400°F (200°C). Place a shallow pan on the bottom rack of the oven. This pan will be used to create steam, which is key to achieving a crispy crust. Steam prevents the crust from forming too quickly, allowing the bread to expand fully before the outer layer hardens.
8. Slash and Steam
Before baking, brush the tops of the loaves lightly with beaten egg white for a glossy finish. Use a sharp knife to make three diagonal slashes across the top of each loaf—this allows the bread to expand without bursting. Pour about 1/2 cup of hot water into the shallow pan in the oven to create steam, then quickly close the door to trap it inside.
9. Bake to Perfection
Bake the loaves for 20 to 25 minutes. The crust should become a deep golden brown, and the bread should sound hollow when tapped. The combination of steam and egg wash results in a perfect crust, crispy yet delicate, while the interior remains soft and tender.
10. Cool and Serve
After baking, transfer the French bread to a wire rack to cool completely before slicing. Cooling is an often overlooked but vital step, as it allows the interior to set properly, preventing the bread from becoming gummy. The cooling process also enhances the bread’s flavor, as the crust continues to strengthen and develop its signature crunch.
Tips for Success
-
Temperature Check: Ensure your water is at the right temperature (105-115°F) to activate the yeast without killing it. An instant-read thermometer can be a handy tool in achieving this precision.
-
Kneading Technique: If using a stand mixer, use the dough hook attachment on medium speed to achieve the right consistency. Alternatively, hand kneading can be a rewarding process that allows you to feel the dough transition to the desired smooth, elastic state.
-
Create a Warm Environment: If your kitchen is cold, you can let the dough rise in a slightly warmed oven. Preheat it to the lowest setting, then turn it off before placing the dough inside to create a warm, draft-free environment. Another method is to use a proofing box or a warm cupboard.
-
Steam for Crust: The steam created by the shallow pan of water in the oven is essential for developing a crispy crust. Ensure the pan is hot and the water is boiling when added to generate sufficient steam. You may also spritz the oven walls with water at the start of baking for added steam.
Enjoying Your Freshly Baked French Bread
Once your French bread has cooled, it’s time to enjoy the fruits of your labor. This versatile bread pairs well with a variety of accompaniments. Spread a pat of butter on a warm slice, dip it into a hearty soup, or use it to create a classic French sandwich. The possibilities are endless, and the satisfaction of biting into a loaf you crafted with your own hands is unparalleled.
Beyond the Basic French Bread
Once you’ve mastered this basic French bread recipe, consider experimenting with variations to add new dimensions to your baking repertoire:
-
Herbed French Bread: Incorporate dried herbs such as rosemary, thyme, or basil into the dough for an aromatic twist. Fresh herbs can also be used, but be sure to chop them finely to distribute the flavor evenly throughout the bread.
-
Cheese-Stuffed Loaves: Add grated cheese into the dough or fold a layer of cheese into the loaf before the second rise for a gooey, savory surprise. Consider using cheeses like Gruyère, cheddar, or mozzarella for different flavor profiles.
-
Whole Wheat French Bread: Substitute a portion of the all-purpose flour with whole wheat flour for a heartier, more nutritious loaf. Whole grains add fiber and nutrients, making the bread a healthier option.
-
Sourdough French Bread: Replace part of the yeast with a sourdough starter for a tangy flavor profile that adds complexity to the bread. This variation requires a bit more planning, as sourdough starters need to be fed and maintained.
Conclusion
With this quick and easy recipe, you can enjoy the timeless pleasure of homemade French bread any day of the week. By understanding the role of each ingredient and mastering the fundamental techniques, you can produce a loaf that rivals those found in the finest bakeries. So why wait? Preheat your oven, gather your ingredients, and embark on the delightful journey of bread-making. Your taste buds will thank you! Whether you’re a seasoned baker or a newcomer to the kitchen, this guide provides all the insights and tips you need to succeed in making perfect French bread. Enjoy the process and the delicious results that follow.


Amazing French Bread in Under 2 Hours
This quick and easy French bread recipe yields a deliciously soft and crusty loaf in less than two hours, perfect for any meal or occasion.
- Baking Sheet
French Bread Dough
- 360 g all-purpose flour
- 1 tsp salt
- 1 packet active dry yeast (2 1/4 teaspoons)
- 300 ml warm water (about 105-115°F)
- 15 g sugar
- 1 egg white lightly beaten (for wash)
- In a large bowl, dissolve the sugar in the warm water. Sprinkle the yeast over the top and let it sit for 5 to 10 minutes until foamy.
- Add the flour and salt to the yeast mixture. Mix with a wooden spoon or stand mixer until a shaggy dough forms.
- Turn the dough out onto a lightly floured surface and knead for 5 to 7 minutes until the dough is smooth and elastic.
- Place the dough in a lightly oiled bowl, turning once to coat. Cover the bowl with plastic wrap or a clean towel and let it rise in a warm place for 60 minutes, or until doubled in size.
- Gently punch down the dough. Divide it in half. Shape each half into a long, even loaf shape, about 12 to 14 inches long.
- Place the shaped loaves on a baking sheet lined with parchment paper. Cover loosely and let them rest for a second rise for 20 minutes.
- Preheat your oven to 400°F (200°C). Place a shallow pan on the bottom rack for steam.
- Brush the tops of the loaves lightly with the beaten egg white. Use a sharp knife to make three diagonal slashes across the top of each loaf.
- Carefully pour about 1/2 cup of hot water into the shallow pan on the bottom rack to create steam. Quickly close the oven door.
- Bake for 20 to 25 minutes, or until the crust is deep golden brown and the bread sounds hollow when tapped.
- Transfer the French bread to a wire rack to cool completely before slicing.
Serve the bread warm with butter or olive oil for dipping. You can also use it for sandwiches or alongside soups and salads.
