

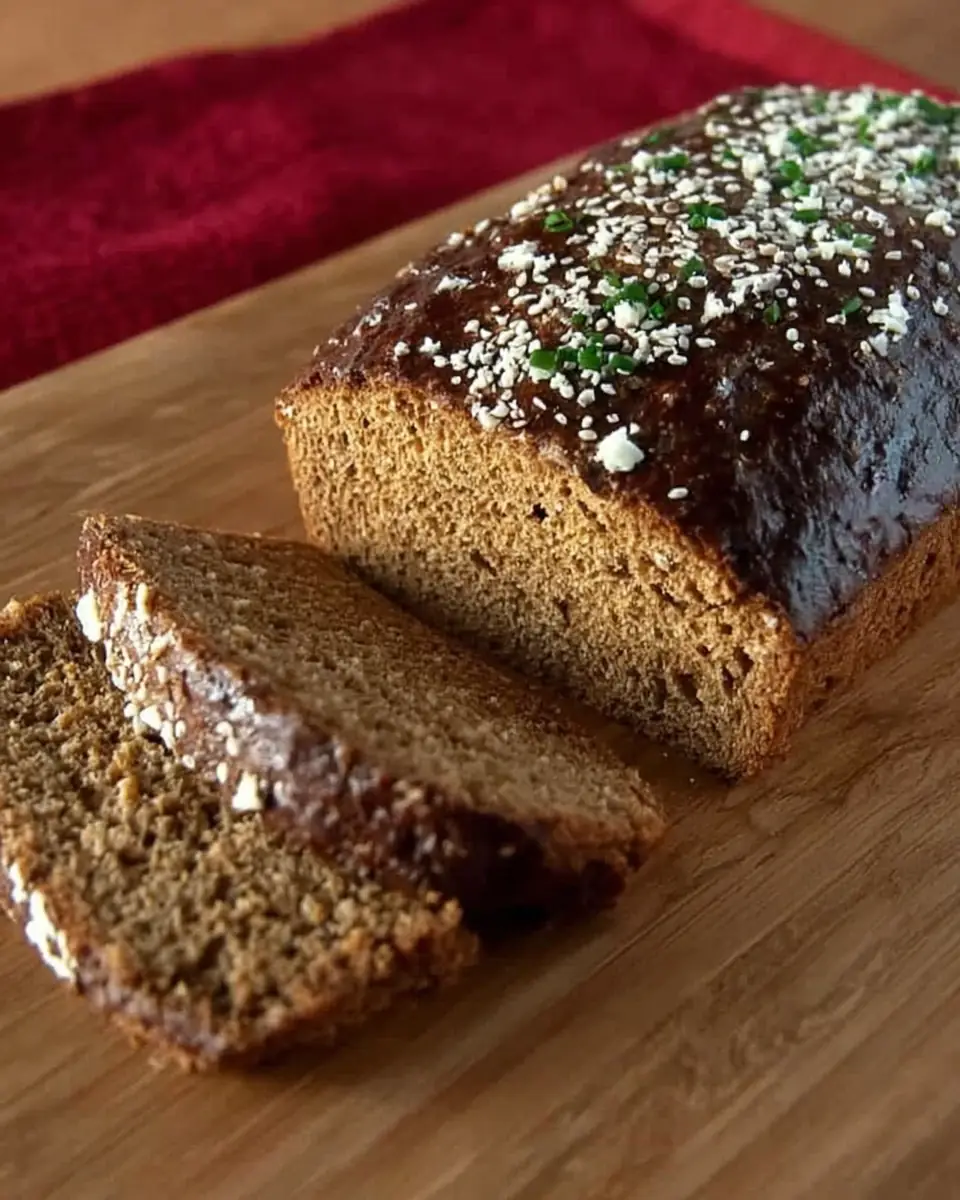
Homemade Cheesecake Factory Brown Bread Recipe: A Detailed Guide
There’s something truly magical about recreating a restaurant favorite in your own kitchen, and for many, the brown bread served at the Cheesecake Factory stands out as a quintessential treat. This beloved bread, with its unique taste and texture, is a delightful preamble to any meal. Fortunately, you don’t have to wait for your next dining out experience to enjoy it. In this expanded guide, we delve deep into not just how to make this bread, but why each step matters, ensuring you achieve the perfect bake every time.
Why You’ll Love This Recipe
The homemade version of the Cheesecake Factory’s brown bread offers you the chance to bring a slice of restaurant luxury into your home. This recipe is designed to be both approachable and rewarding, providing a balance of hearty and sweet flavors that make it versatile enough for any occasion. Whether you’re a seasoned baker or a beginner, this recipe is crafted to deliver both satisfaction and deliciousness.
The Perfect Blend of Ingredients
Whole Wheat Flour: This ingredient is the cornerstone of the bread, providing a rich, nutty flavor that is both wholesome and satisfying. Whole wheat flour is not only nutritious but also gives the bread its dense, hearty texture, making it a perfect base for the flavors that follow.
Molasses: Molasses contributes to the bread’s dark, inviting color and imparts a rich, slightly bittersweet taste that complements the other ingredients. It’s this ingredient that sets the tone for the bread’s distinctive flavor profile.
Honey: While molasses brings depth, honey adds a layer of sweetness that balances the flavors perfectly. It also helps retain moisture, ensuring your bread stays soft and delightful.
Cocoa Powder: A secret weapon in this recipe, cocoa powder not only enhances the bread’s color but also adds a subtle richness that elevates the overall taste.
Active Dry Yeast: The key to achieving a light, airy loaf with a good rise. Yeast not only influences the texture but also adds to the flavor complexity as it ferments the sugars.
Warm Water: Essential for activating the yeast, warm water helps to dissolve other ingredients and forms a cohesive dough. The right temperature is critical to ensure yeast activity without killing it.
Butter: Adds richness and flavor, contributing to the tender crumb of the bread. The fat content in butter allows the bread to stay moist and extend its shelf life.
The Science of Baking: Understanding Each Step
Step 1: Prepare the Dough
The journey to perfect brown bread begins with creating a uniform mixture of dry and wet ingredients. This step is crucial as it lays the foundation for your dough. By combining whole wheat flour, molasses, honey, and cocoa powder, you ensure all flavors are evenly distributed. It’s important to mix until the dough begins to come together, forming a sticky, yet manageable mass.
Step 2: Activating the Yeast
Yeast is a living organism that needs the right conditions to thrive. When activated in warm water, it begins to ferment the sugars, producing carbon dioxide that helps the bread rise. Ensure your water is warm (about 110°F or 45°C) to avoid killing the yeast. A pinch of sugar can be added to the water to give the yeast an immediate food source, ensuring it bubbles and froths, indicating it’s active.
Step 3: Kneading the Dough
Kneading is more than just mixing; it’s about developing gluten, which gives bread its structure. A well-kneaded dough should be smooth and elastic, allowing it to trap the gases produced by the yeast. This step is vital for achieving the chewy texture characteristic of Cheesecake Factory’s brown bread. Kneading can take about 10 minutes by hand or 5-6 minutes in a stand mixer. Look for a springy texture that doesn’t tear when stretched.
Step 4: Rising: The First Proof
Proofing the dough allows yeast to work its magic. In this warm, undisturbed environment, the dough doubles in size. This rise is crucial as it develops flavor and texture. A draft-free, warm place ensures consistent results. Cover the bowl with a damp cloth to prevent the surface from drying out during this first rise, which typically takes about 1 to 2 hours.
Step 5: Shaping and Final Proof
Once risen, the dough is punched down to release excess gas and then shaped. This second rise, or proof, is shorter but just as important. It allows the dough to relax and expand, ensuring a light and airy crumb. Shaping the dough into uniform loaves or rolls ensures even baking. Place the shaped dough on a baking tray lined with parchment paper and allow it to rise until slightly puffed, about 30 minutes.
Step 6: Baking to Perfection
Baking at 350°F (175°C) ensures the bread cooks evenly, developing a crust that is golden brown and aromatic. The key is to bake until the loaves sound hollow when tapped, signaling they are perfectly cooked through. This usually takes about 25-30 minutes. For an extra touch, brush the loaves with melted butter immediately after baking to enhance the crust’s flavor and sheen.
Nutrition Information
Understanding the nutritional profile of this bread can help you enjoy it as part of a balanced diet. Each serving, approximately one slice, contains around 200 calories. It’s a moderate indulgence rich in flavor, and when paired with nutritious toppings or sides, it can be a part of your healthy eating plan. The bread is also high in fiber due to the whole wheat flour, which aids in digestion and keeps you feeling full longer.
Time Management in Baking
- Prep Time: 2 hours (including rising time)
- Cook Time: 30 minutes
- Total Time: 2 hours 30 minutes
Efficient time management is essential in baking. Understanding each phase helps you plan your day around your bake, ensuring you can enjoy freshly baked bread right when you want it. Consider starting the dough early in the day so that you can have fresh bread ready for dinner.
Tips for Success

Kneading Techniques
Kneading can be done by hand or using a stand mixer with a dough hook. By hand, it can be a therapeutic process, allowing you to feel the dough transform. If using a mixer, keep an eye on the dough’s texture to avoid over-kneading. Over-kneading can cause the gluten to become too tight, resulting in a denser loaf.
Creating the Right Environment for Rising
The environment can make or break your dough’s rise. If your kitchen is too cool, consider creating a makeshift proofing box by placing a bowl of hot water in your oven with the dough, keeping the door closed to trap warmth and humidity. Alternatively, you can let the dough rise in a slightly warmed oven (turned off) to create a consistent, warm environment.
Baking Consistency
Ovens can vary, so investing in an oven thermometer can help ensure your temperature is accurate. Also, rotating your baking sheet halfway through can promote even baking, preventing one side from browning too quickly. Keep an eye on the bread during the last few minutes of baking to prevent over-browning.
Final Thoughts and Serving Suggestions
This Cheesecake Factory Brown Bread recipe not only brings a touch of nostalgia but also offers a canvas for culinary creativity. Serve it warm with softened butter for a simple pleasure. For a more elaborate treat, consider pairing it with honey butter or a savory herb-infused spread. It also makes an excellent base for sandwiches, providing a robust backdrop for your favorite fillings.
Imagine a turkey and cranberry sandwich with this bread, or a simple avocado toast topped with a sprinkle of sea salt and chili flakes. The possibilities are endless, and the hearty, slightly sweet flavor of the bread complements a wide range of ingredients.
Ultimately, this recipe is not just about making bread; it’s about creating an experience. The process of baking from scratch, the aroma that fills your kitchen, and the joy of sharing homemade goodness are what make this bread truly special. So, gather your ingredients, preheat your oven, and embark on a baking journey that promises warmth, comfort, and satisfaction. Happy baking!


Cheesecake Factory Brown Bread
Recreate the famous Cheesecake Factory Brown Bread at home with this simple recipe. Perfect for any meal!
- Mixing bowl
Bread Ingredients
- 200 g Whole Wheat Flour
- 50 ml Molasses
- 30 ml Honey
- 10 g Cocoa Powder
- Mix whole wheat flour, molasses, honey, and cocoa powder in a bowl until well combined.
- Add yeast mixture and knead until dough is smooth and elastic.
- Let the dough rise in a warm place until doubled in size, then shape into loaves and let rise again.
- Bake in a preheated oven until golden brown and cooked through.
This bread is delicious when served warm with butter. Consider adding oats on top before baking for added texture.
