

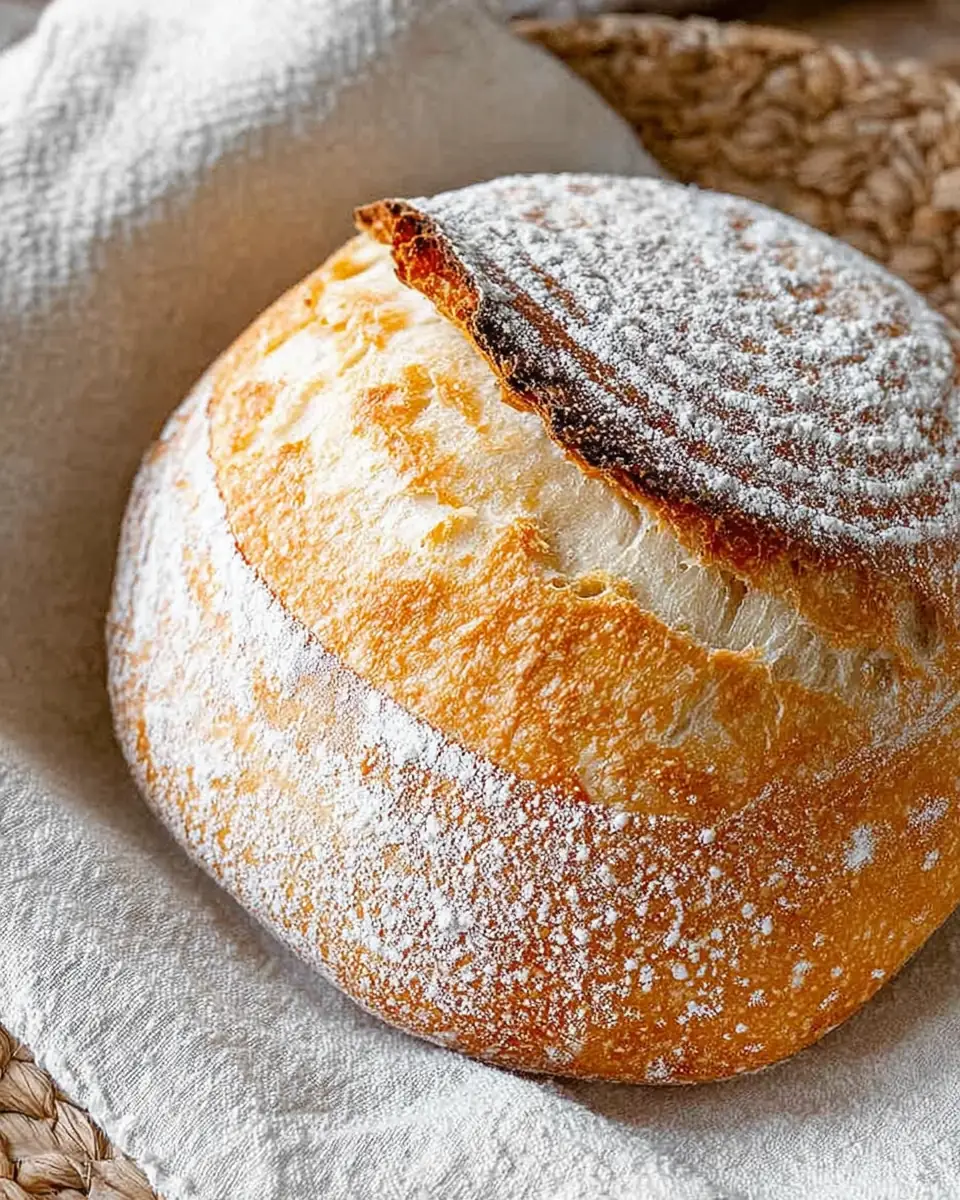
Easy Beginner Sourdough Bread: A Step-by-Step Guide
Sourdough bread has captured the hearts and taste buds of bakers and food lovers worldwide. Its rich history, stretching back thousands of years, and its delightful, tangy flavor make it a favorite among bread enthusiasts. Yet, many who wish to try their hand at making sourdough are often intimidated by the seemingly complex process. Fear not! This easy beginner sourdough bread recipe simplifies the steps, making it accessible for even novice bakers. With just a few ingredients and a dash of patience, you can create a delicious loaf that you’ll be proud to share with family and friends.
The History and Appeal of Sourdough
Before diving into the recipe, it’s worth exploring why sourdough is so beloved. Sourdough is one of the oldest forms of leavened bread, with its origins tracing back to ancient Egypt around 1500 BC. The process of fermentation, which gives sourdough its distinctive taste and texture, was likely discovered by accident when wild yeast and bacteria naturally present in flour and the environment caused dough to rise.
Sourdough’s appeal lies in its unique flavor profile and its health benefits. The fermentation process breaks down gluten, making it easier to digest than other bread types. It also leads to the production of lactic acid, which gives sourdough its signature tang and acts as a natural preservative. In recent years, sourdough has enjoyed a resurgence, as more people seek out traditional baking methods and natural foods.
Ingredients
- 625 grams white bread flour (about 4 cups)
- 100 grams active sourdough starter (about 1 cup)
- 10 grams salt (about 1 3/4 teaspoon)
- 450 grams water (about 1 1/2 cups)
Understanding the Ingredients
Each ingredient in sourdough plays a crucial role. The sourdough starter, a live culture of flour and water, is the soul of the bread. It is teeming with wild yeast and bacteria, which provide natural leavening and impart the bread’s characteristic flavor. Flour, the primary structure of your bread, provides the necessary proteins and starches that transform into gluten. Salt not only enhances flavor but also strengthens the gluten network, allowing the dough to expand without collapsing. Water is the medium in which all these ingredients combine, facilitating the fermentation and gluten development processes.
Directions

Understanding the Basics
Before you begin, it’s essential to understand the role of each ingredient in the sourdough process. The sourdough starter is a live culture of flour and water, teeming with wild yeast and bacteria. This starter is the heart of sourdough bread, providing the leavening and flavor. The flour acts as the structure, the salt adds flavor and strengthens the dough, and the water hydrates the mixture, enabling the fermentation process.
Mixing and Autolyse
Combine Ingredients: In a large mixing bowl, blend the sourdough starter, water, and flour. Use a wooden spoon or a dough whisk to mix until the dough becomes too dense to handle with the spoon.
Hand Mix: Engage your senses by mixing the dough with your hands until it is completely combined. This tactile interaction not only helps you become acquainted with the texture and feel of the dough but also ensures a thorough mix.
Autolyse Stage: Allow the dough to rest for one hour. This autolyse stage is crucial as it allows the flour to absorb water fully, enhancing the dough’s extensibility and flavor. During this time, enzymes in the flour break down proteins and starches, making the dough more workable.
Add Salt: After the hour has passed, sprinkle salt over the dough and let it sit for another 30 minutes. Salt is a critical component as it enhances flavor and strengthens the gluten structure, leading to a better rise and crumb in the final loaf.
Folding Techniques
- First Stretch and Fold or Coil Fold: You have two options for this step:
- Stretch and Fold: Pull the dough up from one corner, stretch it, and fold it over the top. Rotate the bowl and repeat this action four times.
- Coil Fold: Lift the dough from underneath with both hands, pull it up, and fold it down onto itself. Rotate the bowl and repeat three more times.
These folding techniques help develop the gluten structure without the need for extensive kneading. They also incorporate air into the dough, which is essential for a good rise.
- Repeat Folding: Let the dough rest for 30 minutes before repeating the stretch and fold or coil fold. Wetting your hands can make this process easier. Repeat this process 3-4 more times, up to a total of six times. Each fold strengthens the dough and helps it hold its shape during baking.
Bulk Fermentation and Shaping
Bulk Fermentation: Allow the dough to rise until it doubles in size, which can take anywhere from 3-8 hours. The dough should feel jiggly and have a soft texture. This stage is when the magic of fermentation happens, as the yeast and bacteria in the starter work to leaven the dough and develop its flavor.
Shape the Dough: Form the dough into a ball by rolling it in on itself. Flip it over and use the countertop to create surface tension by pushing and rolling the dough into a taut ball. This step is crucial for a good oven spring, as it helps the dough hold its shape during baking.
Prepare for Cold Fermentation: Allow the dough to rest for a few minutes. Prepare a bowl or a bread banneton proofing basket by lining it with a floured towel to prevent sticking.
Fridge Rest: Place the shaped dough into the prepared bowl, cover with plastic wrap, and secure it with a rubber band. Let it rest in the fridge for at least 12 hours, up to 24 hours. This cold fermentation stage allows the flavors to develop further and enhances the bread’s texture.
Baking
Preheat and Prepare: Remove the dough from the fridge and let it sit on the counter for about an hour. Preheat your oven to 450°F (232°C) and place a Dutch oven inside to heat up. The Dutch oven creates a steamy environment, crucial for a good crust.
Score and Bake: Transfer the dough to parchment paper, smooth side up, and score it with a lame or sharp knife for a beautiful rise. Carefully place the dough into the hot Dutch oven using the parchment paper.
Bake: Optionally add ice cubes between the parchment paper and the Dutch oven for a bubbly crust. Bake for 35 minutes, removing the lid after 30 minutes if necessary to achieve a golden crust. If you’re baking two smaller loaves, reduce the baking time. The initial high temperature helps the bread rise quickly, while the steam ensures a crispy crust.
Cool: Once baked, remove the bread from the oven and let it cool completely on a rack before slicing. Cooling is essential as it allows the interior to set, making it easier to slice and enhancing the flavor.
The Science Behind Sourdough
Understanding the science behind sourdough can deepen your appreciation for this ancient bread-making process. The fermentation process is a symbiotic relationship between lactic acid bacteria and wild yeast. The bacteria produce lactic and acetic acids, which contribute to the tangy flavor and act as preservatives. Meanwhile, the yeast ferments the sugars, producing carbon dioxide that leavens the bread.
This natural fermentation process not only affects flavor but also the nutritional profile of the bread. Sourdough fermentation has been shown to lower the glycemic index of bread, making it a better choice for those managing blood sugar levels. Additionally, the longer fermentation time can increase the bioavailability of minerals like magnesium and zinc.
Nutrition Information
- Calories: 223 kcal
- Carbohydrates: 44 g
- Protein: 7 g
- Fat: 2 g
- Saturated Fat: 0.2 g
- Sodium: 327 mg
- Fiber: 2 g
- Sugar: 2 g
- Unsaturated Fat: 1.4 g
- Serving Size: 1 serving
Troubleshooting Tips
Even with careful attention to the process, sourdough baking can sometimes yield unexpected results. Here are a few common issues and how to address them:
Dough Not Rising: Ensure your sourdough starter is active and bubbly before use. Temperature can also affect rise times; warmer environments speed up fermentation, while cooler ones slow it down.
Dense Texture: This can result from under-proofing or inadequate gluten development. Ensure you’ve given the dough enough time to rise, and don’t skip any folding steps.
Crust Not Crispy: Ensure your oven is adequately preheated, and consider adding steam by using ice cubes as suggested. This can help achieve that coveted crispy crust.
Time Commitment
- Prep Time: 1 hour 10 minutes
- Cook Time: 24 hours 35 minutes
While the time commitment may seem lengthy, much of it is hands-off, allowing you to go about your day while the dough works its magic.
Conclusion
Embarking on the journey of sourdough baking is not just about creating delicious bread; it’s about connecting with a tradition that spans cultures and centuries. Each loaf you bake will deepen your understanding of the process and refine your skills. Whether you’re sharing with family and friends or savoring a slice yourself, the satisfaction of creating your own sourdough bread is unparalleled. Enjoy the process, embrace the learning curve, and most importantly, happy baking!
Additional Tips for Success
Monitoring Your Starter
One of the keys to successful sourdough bread is maintaining an active, healthy starter. It should be fed regularly with equal parts flour and water, and it should be bubbly and double in size within 4-6 hours after feeding. If your starter is sluggish, consider moving it to a warmer spot or feeding it more frequently.
Experiment with Flavors
Once you’re comfortable with the basic sourdough recipe, consider experimenting with different flours or add-ins to create unique flavors. Whole wheat or rye flour can add complexity, while seeds, nuts, or dried fruits can provide interesting textures and tastes.
Understanding Room Temperature
Room temperature plays a significant role in the fermentation process. A warmer room will speed up fermentation, while a cooler room will slow it down. Adjust your timing and folding intervals based on how quickly your dough is developing.
Embracing Imperfection
Sourdough baking is as much an art as it is a science. Each bake is an opportunity to learn and improve. Don’t worry if your first few loaves aren’t perfect; even experienced bakers encounter surprises. Embrace the imperfections and enjoy the journey.
Storage Tips
To keep your sourdough bread fresh, store it in a paper bag or wrapped in a kitchen towel. Avoid plastic, as it can make the crust rubbery. Sourdough bread also freezes well; slice it before freezing for easy, individual servings.
By following these steps and tips, you’ll be well on your way to becoming a confident sourdough baker. Enjoy the process, and soon enough, you’ll be sharing your delicious creations with pride!
Easy Beginner Sourdough Bread

Perfect for beginners, this sourdough bread recipe is simple and results in a delightful loaf with a crispy crust and chewy interior.
- Dutch Oven
- Banneton Basket
Sourdough Bread
- 625 g white bread flour (about 4 cups)
- 100 g active sourdough starter (about 1 cup)
- 10 g salt (about 1 3/4 teaspoon)
- 450 g water (about 1 1/2 cup)
- Combine the sourdough starter, water, and flour in a large mixing bowl. Mix with a spoon, then your hand until fully combined.
- Let the mixture sit for one hour (autolyse stage).
- After an hour, add salt and let it sit for another 30 minutes.
- Perform a stretch and fold or coil fold. Let the dough rest for 30 minutes and repeat.
- Continue folding every 30 minutes until the dough is jiggly and has doubled in size.
- Shape the dough into a ball and let it sit for a few minutes.
- Prepare a banneton basket or a lined bowl with flour. Place the dough in it, cover, and refrigerate for 12-24 hours.
- Remove from fridge, preheat oven to 450°F with the Dutch oven inside.
- Place the dough on parchment, score it, and transfer to the Dutch oven. Bake covered for 35 minutes.
- Uncover and bake until golden brown, 15-20 minutes more. Cool on a rack before slicing.
For a bubbly crust, add ice cubes to the Dutch oven during baking. Allow bread to cool completely before slicing for the best texture.
