

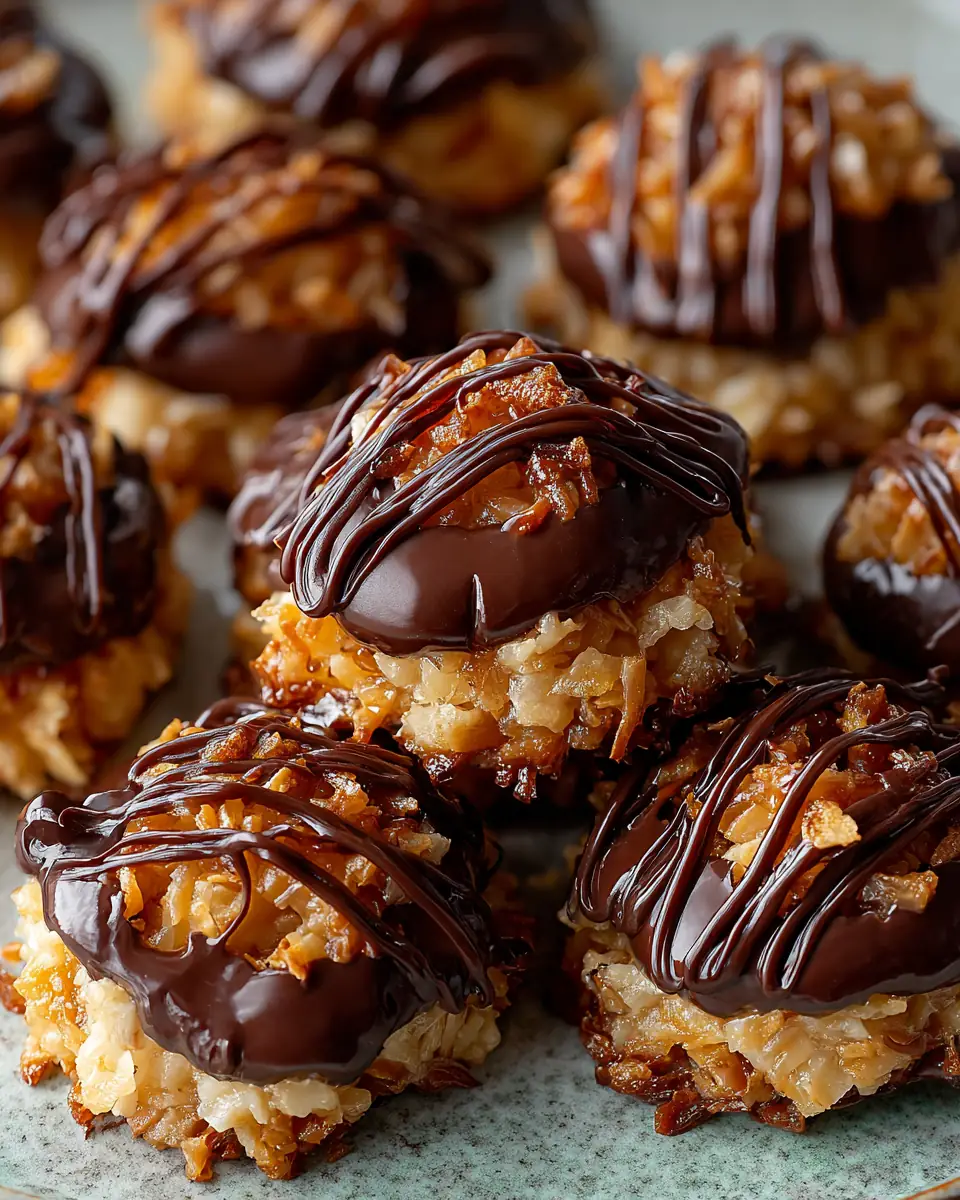
Introduction
In the world of desserts, the allure of no-bake treats lies in their simplicity and efficiency. With minimal equipment and a focus on ease, these desserts have captured the hearts of many who seek a quick yet indulgent solution to their sweet cravings. Among the pantheon of no-bake delights, No-Bake Samoa Cookies stand out for their irresistible blend of flavors and textures. This article delves into the elements that make these cookies a beloved treat, providing insights, tips, and even a few fun facts along the way.

The Rise of No-Bake Desserts
No-bake desserts have surged in popularity, particularly during the warmer months when the thought of turning on an oven can be daunting. These desserts are a testament to culinary creativity, allowing for delicious outcomes without the traditional baking process. They offer a quick fix for last-minute gatherings or spontaneous sweet cravings, making them a staple in many households.
The appeal of no-bake desserts extends beyond convenience. They often require fewer ingredients and less preparation time, making them accessible to both novice cooks and seasoned bakers. This accessibility has contributed to their widespread popularity, with variations ranging from simple treats to elaborate, layered confections.
The Iconic Samoa Cookies
Samoa cookies, also known as Caramel deLites, are a beloved staple in the lineup of Girl Scout cookies. Their iconic combination of coconut, caramel, and chocolate creates a flavor profile that is both rich and satisfying. This no-bake adaptation retains the essence of the original cookies while simplifying the preparation process.
The Importance of Ingredients
Each ingredient in No-Bake Samoa Cookies plays a crucial role in achieving the desired flavor and texture:
Shredded Coconut: Unsweetened shredded coconut is preferred for this recipe as it balances the overall sweetness. Toasting the coconut enhances its nutty flavor and adds a delightful crunch, elevating the textural experience of the cookies.
Caramel Candies: Quality soft caramel candies are essential for achieving the chewy texture that is integral to Samoa cookies. The caramel acts as the glue that binds the coconut, providing a rich, velvety flavor that is the heart of these cookies.
Milk or Heavy Cream: A bit of liquid is necessary to achieve a silky caramel sauce. Heavy cream is recommended for a richer, more indulgent caramel, while milk can be used for a lighter version.
Semi-Sweet Chocolate Chips: The slight bitterness of semi-sweet chocolate complements the sugary caramel and coconut, balancing the cookies’ sweetness.
Coconut Oil or Butter: This addition ensures the chocolate coating is smooth and shiny. Coconut oil, in particular, melds beautifully with the coconut flavor in the cookies.
Vanilla Extract and Salt: Vanilla extract adds depth to the caramel, while a pinch of salt accentuates all the flavors, preventing the sweetness from becoming overwhelming.
Detailed Instructions and Tips
Toasting the Coconut
Toasting the coconut is a crucial step that should not be rushed. Stirring frequently prevents burning and ensures even toasting. The process should be monitored closely, as coconut can quickly go from perfectly toasted to burnt. Once you start smelling its nutty aroma, it’s a sign that it’s nearly done.
Melting the Caramel
Melting caramel requires patience. Keep the heat low and stir continuously to avoid scorching. If the caramel begins to harden as it cools, gently reheat it over low heat while stirring. Adding vanilla extract and salt while the caramel is warm allows these flavors to meld seamlessly.
Shaping the Cookies
When shaping the cookies, wet your fingers slightly to prevent the coconut-caramel mixture from sticking to them. This makes it easier to shape the mixture into neat rounds. If you want a more polished look, use a round cookie cutter to shape the mixture after placing it on the parchment.
Melting the Chocolate
When melting chocolate, using short intervals in the microwave prevents it from burning. Stirring between intervals helps distribute the heat evenly. For those who prefer more control over the melting process, a double boiler can be used to melt the chocolate gently.
Dipping and Drizzling
For a uniform chocolate coating, allow any excess to drip off before placing the cookies back on the parchment. Use a fork or a spoon to create a beautiful drizzle over the tops. If you’re feeling creative, try different drizzle patterns to add a personal touch to your cookies.
Variations and Serving Suggestions
The beauty of these No-Bake Samoa Cookies lies in their adaptability. Here are some variations to consider:
-
Dark Chocolate Lovers: Use dark chocolate for a more intense chocolate experience. It pairs wonderfully with the caramel and coconut.
-
Nutty Twist: Add chopped nuts, such as almonds or pecans, to the coconut-caramel mixture for an extra crunch.
-
Vegan Version: Substitute caramel candies with a homemade vegan caramel using coconut milk and coconut sugar. Use dairy-free chocolate chips and coconut cream instead of heavy cream.
These cookies are perfect on their own, but pairing them with a warm beverage elevates the experience. Enjoy them with a cup of coffee or tea, and let the flavors mingle with the drink’s warmth. They also make a delightful addition to a dessert platter, offering a contrast to baked goods.
Storing and Sharing
No-Bake Samoa Cookies can be stored in an airtight container at room temperature for up to three days. If you prefer a firmer texture, refrigerate them. These cookies also make thoughtful gifts. Package them in decorative boxes or bags and share them with friends and family during holidays or special occasions.
Fun Facts About Samoa Cookies
-
Origins: The Samoa cookie has been a part of the Girl Scouts’ lineup since the 1970s. Its unique combination of flavors quickly made it a favorite among cookie lovers.
-
Name Variations: Depending on the bakery that produces them, Samoa cookies may also be known as Caramel deLites. Despite the name difference, the essential ingredients and flavors remain consistent.
-
Annual Sales: Samoa cookies are among the top-selling Girl Scout cookies, with millions sold each year during the cookie season. Their popularity is a testament to their delightful flavor profile.
Conclusion
In a world where convenience is key, these No-Bake Samoa Cookies offer a quick yet indulgent solution to satisfy sweet cravings. Their combination of toasted coconut, chewy caramel, and rich chocolate is a testament to the enduring appeal of classic flavors. Whether you’re a seasoned baker or a novice in the kitchen, this recipe is a delightful addition to your repertoire. Enjoy the process, savor the flavors, and most importantly, share the joy of these delicious cookies with those around you. Happy no-baking!


No-Bake Samoa Cookies

These no-bake Samoa cookies are a delightful treat with toasted coconut, caramel, and a chocolate drizzle. Perfect for satisfying your sweet tooth!
- Skillet
- Small Saucepan
- Microwave-safe Bowl
Coconut Mixture
- 200 g unsweetened shredded coconut
- 20 pieces soft caramel candies (approximately 1 cup)
- 30 ml milk or heavy cream (for richer flavor)
- 180 g semi-sweet chocolate chips
- 1 tsp coconut oil or butter
- 0.25 tsp vanilla extract
- 1 pinch salt
- Spread the shredded coconut on a dry skillet over medium heat. Stir frequently until golden brown and fragrant (about 5–7 minutes). Transfer to a plate to cool.
- In a small saucepan over low heat, combine the caramel candies and milk. Stir continuously until smooth. Remove from heat and stir in the vanilla and salt.
- Pour the toasted coconut into the caramel mixture and stir until fully coated.
- Using a tablespoon or small cookie scoop, drop mounds of the coconut-caramel mixture onto a parchment-lined baking sheet. Use your fingers to gently flatten and shape into rounds.
- In a microwave-safe bowl, combine the chocolate chips and coconut oil. Heat in 20-second intervals, stirring after each, until melted and smooth.
- Dip the bottom of each cookie into the melted chocolate, place back on the parchment, and drizzle remaining chocolate over the tops.
- Refrigerate for 15–20 minutes until the chocolate is firm. Store in an airtight container at room temperature for up to 3 days, or refrigerate for longer freshness.
These cookies are perfect for those who love the combination of coconut and chocolate. They are easy to make and store well for a few days.
