

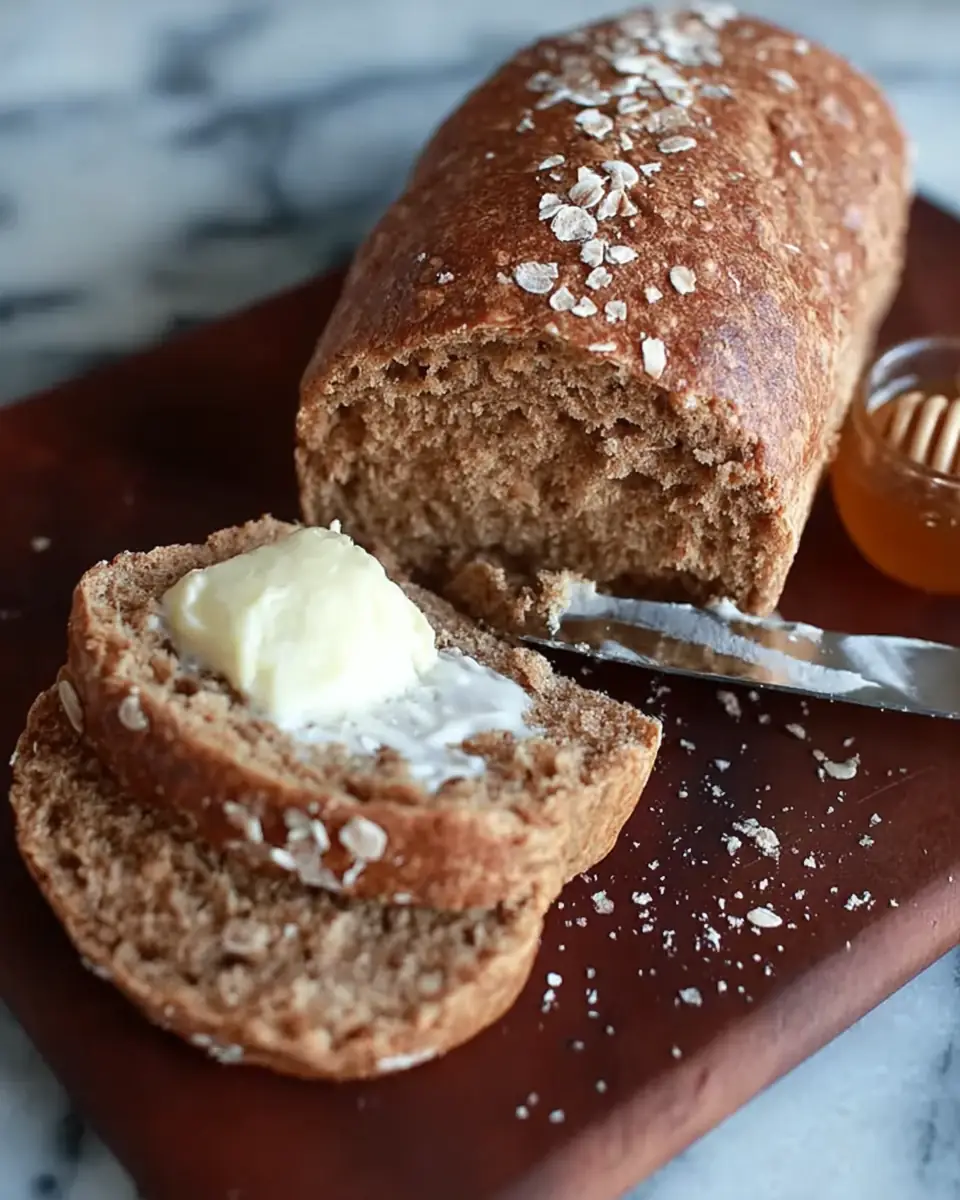
If you’ve ever dined at the Cheesecake Factory, you probably remember the irresistible Honey Wheat Bread that greets you as you take your seat. Its soft texture, subtle sweetness, and inviting aroma make it a standout starter. Luckily, you can bring this delightful experience to your kitchen with our copycat version of this beloved bread. Not only is it easy to make, but it also fills your home with the comforting scent of freshly baked bread.
Ingredients You’ll Need
To recreate this famous bread, gather the following ingredients:
- 2 cups all-purpose flour, plus extra for kneading
- 1 1/2 cups whole wheat flour for that authentic, hearty texture
- 2 teaspoons cocoa powder to give the bread its distinctive color
- 1 tablespoon granulated sugar for a hint of sweetness
- 1 1/2 teaspoons salt to enhance flavors
- 2 1/4 teaspoons instant yeast for that perfect rise
- 1 1/4 cups warm water to activate the yeast
- 2 tablespoons melted butter for richness
- 1/4 cup molasses which adds depth and sweetness
- 1/4 cup honey for a natural sweet touch
- Rolled oats for topping, adding a rustic finish
Step-by-Step Instructions

1. Prepare Your Ingredients
Begin by setting up your KitchenAid stand mixer. In the mixer’s bowl, combine the all-purpose flour, whole wheat flour, cocoa powder, sugar, salt, and instant yeast. Give it a gentle stir to ensure all dry ingredients are evenly distributed. This initial mix is crucial as it ensures that the yeast is evenly dispersed throughout the flour, which will result in an even rise.
2. Mix the Wet Ingredients
In a separate medium-sized bowl, mix together the warm water, melted butter, molasses, and honey. This mixture will bring the dough to life with rich, sweet flavors. The combination of molasses and honey not only contributes to the bread’s sweetness but also gives it a deep, rich color. Warm water is essential here, as it will help activate the yeast, creating the perfect environment for it to thrive.
3. Combine and Form the Dough
Make a small well in the center of your dry ingredients and pour in the wet mixture. Using your KitchenAid mixer, blend the ingredients until the dough begins to form. Once combined, remove the dough from the bowl. This initial mixing stage is about hydrating the flour and starting to develop the gluten, which is vital for the bread’s structure.
4. Knead the Dough
Transfer the dough to a lightly floured surface and knead by hand for about 5-8 minutes. This step is crucial for developing the dough’s texture. If you prefer, you can use the mixer, but there’s something satisfying about kneading it by hand. Add more flour if the dough feels too sticky. Kneading develops the gluten network, which gives the bread its chewy texture and allows it to hold the gases produced by the yeast.
5. First Rise
Oil a clean bowl with about 1 tablespoon of oil. Place the dough inside, rolling it around to coat all sides. Cover the bowl with plastic wrap and let it rise for approximately 2 hours, until it has doubled in size. This first rise, known as fermentation, is where the dough develops flavor and the yeast works its magic, creating carbon dioxide that makes the dough expand.
6. Shape the Loaves
Once risen, divide the dough into three equal pieces. Shape each piece into a 9-inch log. Line a baking sheet with parchment paper and place the logs on it. The shaping process is where you can get creative with your loaves. The rustic, elongated shape is part of what makes this bread unique.
7. Final Touches
Sprinkle rolled oats over the top of each loaf for an appealing texture. If desired, score the tops lightly with a sharp knife for a classic bakery look. Cover again with plastic wrap and allow them to rise for another 30 minutes. Scoring the bread not only adds a decorative element but also allows the bread to expand without bursting in uncontrolled directions.
8. Bake to Perfection
Preheat your oven to 350°F (175°C). Bake the loaves for 30 minutes, or until they are golden brown and sound hollow when tapped on the bottom. The baking process is where the magic happens. The heat causes the gases inside the dough to expand rapidly, creating a light, airy crumb.
9. Cool and Serve
Once baked, transfer the loaves to a wire rack to cool. Slice and serve warm with butter or enjoy on their own. Cooling the bread on a wire rack prevents the bottom from becoming soggy by allowing air to circulate around the loaf.
Tips for Success
- Temperature Matters: Ensure your water is warm, not hot, to activate the yeast without killing it. The perfect temperature range is between 105°F and 115°F.
- Flour Control: Keep extra flour handy to adjust for stickiness during kneading. Humidity and temperature can affect how much flour you need.
- Patience is Key: Allowing enough time for the dough to rise is crucial for achieving the perfect texture. Don’t rush these steps; the slow fermentation process develops flavor.
The Science Behind Bread Making
Understanding the science behind bread making can enhance your baking skills. When yeast ferments, it consumes sugars and releases carbon dioxide and alcohol. This fermentation process not only helps the dough rise but also contributes to the flavor and aroma of the bread.
Gluten, a protein found in wheat flour, plays a crucial role in bread making. When you knead the dough, gluten proteins form an elastic network that traps carbon dioxide and allows the dough to rise. This network is what gives bread its chewy texture.
Variations and Serving Suggestions
This Honey Wheat Bread is incredibly versatile and can be adapted to suit your taste. Consider adding seeds like flax or chia for added texture and nutrition. You can also incorporate nuts or dried fruits for a sweeter version.
For serving, this bread pairs wonderfully with various spreads. A simple slather of butter or cream cheese enhances its rich flavor. For a savory option, consider a garlic herb butter or a tangy olive tapenade. The bread also makes an excellent base for sandwiches, complementing fillings like turkey and cranberry or fresh mozzarella and basil.
The History of Honey Wheat Bread
Bread has been a staple in human diets for thousands of years, evolving from simple flatbreads to the diverse array of loaves available today. The inclusion of honey in bread recipes dates back to ancient times, where it was used for its preservative qualities and its ability to add moisture and sweetness. Honey wheat bread, specifically, became popular as people sought out healthier bread options that combined the nutritional benefits of whole grains with the natural sweetness of honey.
The Cheesecake Factory’s version of honey wheat bread captures this tradition by providing a wholesome, slightly sweet bread that’s perfect for pairing with a variety of dishes. Its rich color, partly due to the addition of cocoa powder, is reminiscent of the darker breads favored in European countries, where hearty, flavorful loaves are a dining staple.
Health Benefits of Homemade Bread
Making bread at home offers numerous health benefits. By controlling the ingredients, you can create a loaf that’s free from preservatives and artificial additives, often found in store-bought varieties. Whole wheat flour, a primary component of this recipe, is rich in fiber, which aids digestion and helps maintain steady blood sugar levels.
Honey, a natural sweetener, contains antioxidants and has been praised for its potential health benefits, including antibacterial properties and its role in soothing sore throats. Molasses, another key ingredient, is packed with essential minerals such as iron, calcium, and magnesium, making this bread not only delicious but also nutritious.
The Joy of Bread Baking
There’s something inherently satisfying about baking your own bread. The process, though somewhat time-consuming, is meditative and rewarding. As you work with the dough, you connect with a tradition that spans cultures and centuries, a basic yet profound act of transforming simple ingredients into sustenance.
Baking bread at home also allows you to experiment and adapt recipes to suit your personal preferences. Whether you choose to stick to the classic recipe or venture into adding new flavors and textures, each loaf becomes a unique creation, a testament to your creativity and skill.
Enjoy Your Homemade Masterpiece
This Copycat Cheesecake Factory Honey Wheat Bread is not only a testament to the deliciousness of homemade bread but also a nod to the comforting experience of dining out. Whether for a family dinner or a cozy afternoon snack, this bread is sure to become a household favorite. Enjoy the satisfaction of creating a restaurant-quality dish in your own kitchen!
Bread making is an art and a science, a process that connects us to age-old traditions while allowing room for creativity and personal flair. As you perfect this recipe, you’ll gain confidence and perhaps even develop your variations, making this Honey Wheat Bread truly your own. Enjoy the warmth and comfort of freshly baked bread, and the joy it brings to your home and table.


Copycat Cheesecake Factory Honey Wheat Bread

Recreate the delicious honey wheat bread from Cheesecake Factory at home with this easy-to-follow recipe.
- KitchenAid Stand Mixer
Dough
- 240 g all-purpose flour (plus extra for kneading)
- 180 g whole wheat flour
- 2 tsp cocoa powder
- 1 tbsp granulated sugar
- 1.5 tsp salt
- 2.25 tsp instant yeast
- 310 ml warm water
- 2 tbsp butter (melted)
- 60 ml molasses
- 60 ml honey
- g rolled oats (for topping)
- In your KitchenAid stand mixer, combine all the flours, cocoa powder, sugar, salt, and yeast. Set aside.
- Mix together the warm water, butter, molasses, and honey in a medium-sized bowl.
- In the middle of your dry ingredients, make a hole and pour the water mixture in. Mix until the dough comes together.
- Take the dough out and knead by hand for 5-8 minutes. Add flour if the dough is too sticky.
- Oil another bowl, place the dough inside, and cover with plastic wrap. Let it rise for 2 hours.
- Divide the dough into 3 pieces, roll each into a 9-inch log, and place on a parchment-lined baking sheet.
- Sprinkle rolled oats on top of each loaf and score the tops lightly. Cover and let rise for 30 minutes.
- Preheat your oven to 350 degrees.
- Bake the loaves for 30 minutes. Cool on a wire rack.
This bread pairs wonderfully with soups or as a base for sandwiches. For a sweeter version, add a bit more honey.
