

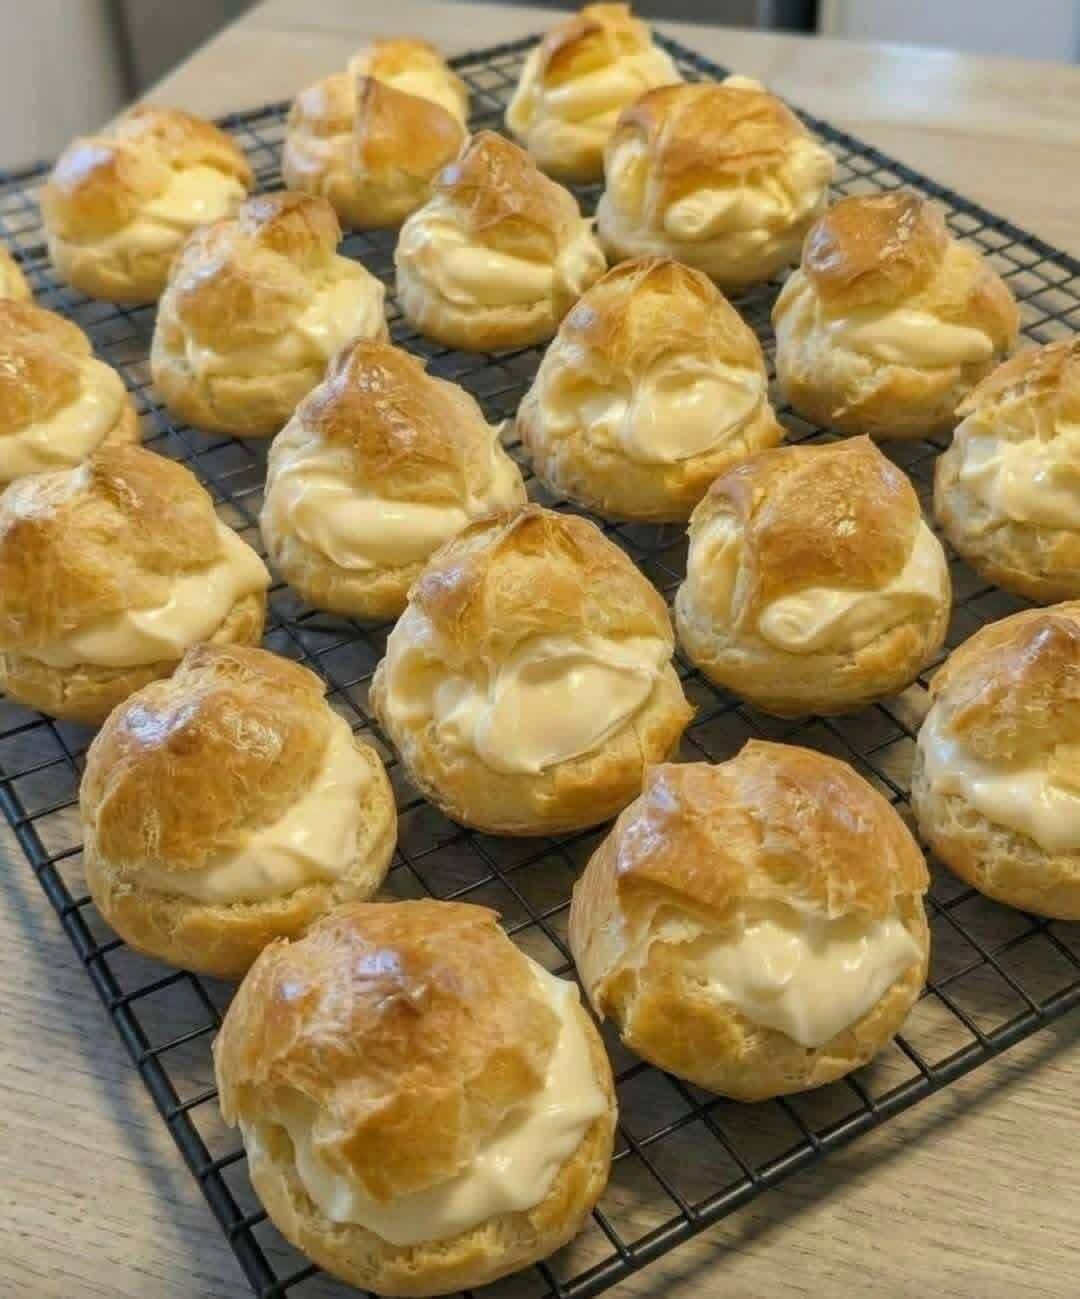
There is something timeless about cream puffs. Light, airy shells filled with rich vanilla cream have been a favorite dessert for generations. They look elegant enough for celebrations yet simple enough to make in your own kitchen. If you have ever been intimidated by the idea of making cream puffs from scratch, this recipe will change your mind.
This Famous Cream Puffs recipe uses simple ingredients and clear steps to create perfectly golden choux pastry shells filled with a smooth, fluffy vanilla cream. The result is a dessert that feels impressive but is surprisingly easy to prepare.
In this complete blog guide, you will learn exactly how to make cream puffs, understand why the method works, and discover helpful tips for perfect results every time.
What Makes Cream Puffs So Special
Cream puffs are made from a unique dough called choux pastry. Unlike traditional cake or cookie dough, choux pastry is cooked on the stovetop before baking. The high moisture content creates steam in the oven, causing the dough to puff dramatically and form a hollow center. That hollow center is what makes cream puffs ideal for filling.
The texture contrast is what makes them irresistible:
- A lightly crisp golden exterior
- A soft, hollow interior
- A creamy, sweet filling
This version uses a stabilized whipped cream filling made with instant vanilla pudding. The pudding mix helps the cream hold its shape longer, making it perfect for serving at parties or gatherings.
Ingredients
For the Cream Puffs
- ½ cup (1 stick / 115 g) butter
- 1 cup (240 ml) water
- 1 teaspoon vanilla extract
- 1 cup (125 g) all-purpose flour
- 4 large eggs
For Mom’s Celebrated Filling
- 2 cups (480 ml) heavy cream
- 1 package (3.4 oz / 96 g) instant vanilla pudding
- ⅓ cup (80 ml) milk
These basic pantry ingredients come together to create a bakery-quality dessert.
Step-by-Step Instructions
Step 1: Preheat and Prepare
Preheat your oven to 400°F (200°C). Line a baking sheet with parchment paper. Parchment prevents sticking and allows the bottoms to bake evenly without burning.
Avoid greasing the pan directly, as excess grease can cause spreading instead of proper lift.
Step 2: Make the Choux Dough
In a medium saucepan, combine the butter and water. Place over medium heat and bring to a full boil. Once the butter is completely melted and the mixture reaches a steady boil, remove the pan from heat.
Add the flour all at once and stir immediately with a wooden spoon or sturdy spatula. The mixture will look rough at first.
Return the pan to medium heat and stir continuously. After one to two minutes, the dough will form a smooth ball and pull away from the sides of the pan. A thin film may form on the bottom of the saucepan. This indicates that enough moisture has evaporated.
Remove the pan from heat and allow the dough to cool for about five minutes.
Step 3: Add the Eggs
Once the dough has cooled slightly, add the eggs one at a time. Beat thoroughly after each addition. At first, the mixture may look separated or curdled. Continue mixing until it becomes smooth and glossy before adding the next egg.
After all eggs are fully incorporated, stir in the vanilla extract.
The finished dough should be thick, smooth, and glossy. When lifted with a spoon, it should slowly fall and hold its shape.
Step 4: Shape and Bake
Drop spoonfuls of dough onto the prepared baking sheet. Each mound should be about two tablespoons in size. Leave space between each one because they will expand significantly during baking.
Bake for 20 to 25 minutes until the puffs are golden brown, firm, and fully expanded.
Do not open the oven during baking. The trapped steam is essential for proper puffing.
Once baked, remove from the oven and allow the shells to cool completely on a wire rack.
Step 5: Prepare the Filling
In a large mixing bowl, combine the heavy cream, instant vanilla pudding mix, and milk.
Using a hand mixer or stand mixer, beat the mixture for about three to four minutes until thick and fluffy. The pudding mix stabilizes the whipped cream, helping it stay firm for longer periods.
The filling should be smooth and able to hold soft peaks.
Step 6: Fill the Cream Puffs
Once the shells are completely cool, slice each one in half horizontally.
Spoon or pipe the cream mixture generously onto the bottom half. Replace the top gently.
For an elegant finish, dust lightly with powdered sugar before serving
Helpful Tips for Perfect Cream Puffs
Measure Ingredients Accurately
Too much flour can result in heavy shells. Spoon flour into the measuring cup and level it off.
Allow Dough to Cool Before Adding Eggs
If the dough is too hot, the eggs may cook prematurely and affect texture.
Bake Until Deep Golden
Underbaked shells may collapse. A rich golden color ensures they are fully set.
Cool Completely Before Filling
Warm shells can cause the filling to melt and become watery.
Storage Instructions
Filled cream puffs should be stored in the refrigerator and are best enjoyed within 24 hours.
Unfilled shells can be kept at room temperature in an airtight container for up to one day.
You can also freeze unfilled shells for up to one month. Reheat briefly in the oven to refresh before filling.
Variations to Try
Cream puffs are incredibly versatile. Consider these variations:
- Use chocolate pudding instead of vanilla
- Add cocoa powder to the filling for a chocolate cream
- Fill with lemon curd and whipped cream
- Drizzle melted chocolate over the tops
- Add sliced strawberries inside for a fresh twist
You can also pipe smaller mounds to create mini profiteroles.
Why This Recipe Works
Choux pastry relies on steam for lift. The high water content combined with eggs creates structure and expansion during baking. Cooking the flour mixture before adding eggs ensures the proper texture and stability.
The filling combines whipped cream with pudding mix, which provides both sweetness and stability. This prevents the cream from deflating quickly.
Together, these elements create a dessert that feels light yet indulgent.
Frequently Asked Questions
Why Did My Cream Puffs Collapse?
They were likely underbaked. Make sure they are fully golden and firm before removing them from the oven.
Can I Pipe the Dough Instead of Using a Spoon?
Yes. Piping creates more uniform shapes and a professional look.
Can I Make Them Ahead of Time?
Yes. Bake the shells in advance and fill them shortly before serving.
Can I Use Homemade Pastry Cream Instead?
Absolutely. Traditional pastry cream works beautifully in this recipe.
Serving Suggestions
Cream puffs are ideal for:
- Birthday celebrations
- Holiday dessert tables
- Baby showers
- Afternoon tea
- Family gatherings
Arrange them on a decorative platter or stack them into a simple tower for a dramatic presentation.
Final Thoughts
Famous Cream Puffs are a classic dessert that never goes out of style. With their golden shells and creamy filling, they strike the perfect balance between elegant and comforting.
This recipe proves that impressive desserts do not have to be complicated. With a few simple steps and basic ingredients, you can create bakery-style cream puffs in your own kitchen.
Whether you are baking for a special occasion or simply treating your family, these cream puffs are guaranteed to impress.
