

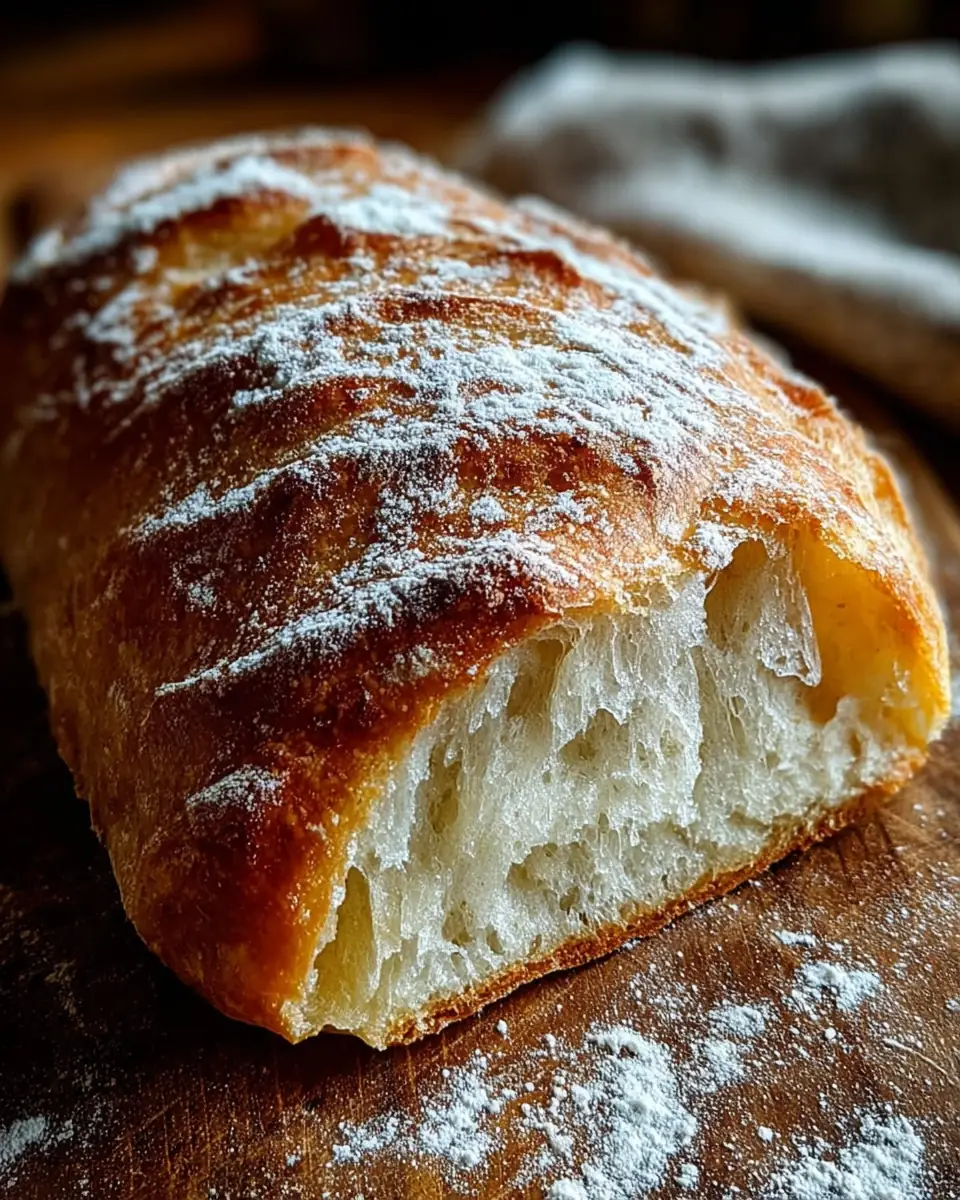
Rustic French Bread Loaf: A Step-by-Step Guide to Artisan Baking at Home
There’s something magical about the aroma of freshly baked bread filling your home. The rustic French bread loaf, renowned for its crisp crust and soft, airy interior, is a culinary staple that brings a touch of artisanal charm to any meal. Whether you’re a seasoned baker or a novice in the kitchen, this comprehensive guide will walk you through the process of creating your own loaf of rustic French bread right in your kitchen. Prepare to embark on a rewarding baking journey that is sure to yield delicious results.
Ingredients
For a Single Loaf (Scale as needed):
- 410 grams all-purpose flour
- 1 teaspoon granulated sugar
- 1 teaspoon fine salt
- 1.5 teaspoons active dry yeast
- 300 milliliters warm water (38 – 46 °C)
These simple ingredients, when combined with care and attention, transform into something extraordinary. Each component plays a crucial role in the development of flavor, texture, and structure, culminating in a loaf that is as pleasing to the eye as it is to the palate.
Instructions
Step 1: Activate the Yeast
Begin by combining the active dry yeast, warm water, and sugar in a mixing bowl. This initial step is crucial as it activates the yeast, which is the driving force behind the bread’s rise. Allow this mixture to rest for approximately 5 minutes until it becomes foamy. This foam is a sign that the yeast is alive and ready to do its job. Yeast activation is a fascinating process, as the tiny organisms feast on the sugar, producing carbon dioxide and alcohol, which contribute to the bread’s rise and flavor.
The activation of yeast is a cornerstone of successful bread baking. Yeast, a single-celled fungus, ferments the sugars present in the flour, releasing carbon dioxide gas and ethanol. This fermentation process is what gives bread its light and airy texture. Ensuring that the water is at the correct temperature is vital; too hot and the yeast will die, too cold and the yeast will not activate properly. The sight of yeast bubbling to life in a bowl is a small miracle, a testament to the wonders of chemistry at work in the kitchen.
Step 2: Create the Dough
Add half of the flour and all of the salt to the yeast mixture. Using a stand mixer equipped with a dough hook, knead the mixture on medium-low speed. Gradually incorporate the remaining flour as you knead. The goal is to achieve a dough that is just beginning to form and remains slightly sticky to the touch. Kneading is an art form in itself; it develops gluten, the protein network that gives bread its structure. As you knead, you’ll notice the dough transforming from a shaggy mixture to a smooth, elastic ball, a testament to the magic of gluten development.
Gluten is the substance that gives bread its chewy texture. It forms when two proteins found in flour, glutenin and gliadin, come into contact with water. Through the process of kneading, these proteins link together to form a complex network that traps air bubbles, allowing the dough to rise. For those who choose to knead by hand, the process is a tactile pleasure, a rhythmic, meditative task that connects you to bakers across time.
Step 3: First Rise
Transfer the dough to a lightly floured bowl and cover it with a clean towel. Allow it to rise at room temperature for 2 hours. During this time, the dough should double in size, a transformation driven by the yeast’s fermentation. The first rise is a crucial step, as it allows the dough to develop flavor and structure. This resting period is often referred to as “proofing,” and it’s a time of transformation, where the dough becomes more than the sum of its parts.
The importance of this step cannot be overstated. As the yeast ferments the sugars in the dough, it releases carbon dioxide, which becomes trapped in the gluten network. This is what causes the dough to rise, giving the bread its characteristic lightness. The first rise also allows for the development of complex flavors, as the long fermentation time helps break down the starches and proteins in the flour.
Step 4: Shape the Dough
Once risen, place the dough on a well-floured surface or parchment paper. Gently shape it into a smooth ball, being careful not to deflate it too much. Dust the top with additional flour to prevent sticking, then cover it with a large inverted bowl. Let it rise for another 30 minutes to develop more flavor and structure. This second rise, or “bench rest,” is shorter than the first but equally important. It allows the dough to relax and expand, creating an open crumb and a light, airy texture.
Shaping the dough is a delicate process. The goal is to create a taut, smooth surface without deflating the dough too much. This helps the loaf retain its shape during baking and contributes to a more even crumb. The second rise is essential for the final texture of the bread. It gives the dough a chance to develop a bit more, creating the perfect balance between structure and airiness.
Step 5: Preheat the Oven
While the dough is resting, preheat your oven to 220 °C. Place a Dutch oven, complete with its lid, inside to heat for 20 minutes. This preheating step is essential for achieving a crusty exterior. The high heat of the Dutch oven creates a steamy environment, which contributes to the formation of a thick, chewy crust—a hallmark of rustic French bread.
The use of a Dutch oven is a traditional method for creating artisan-style bread at home. The heavy lid traps steam released from the dough, which keeps the crust soft during the initial stages of baking, allowing the loaf to expand fully. Once the lid is removed, the crust hardens, resulting in that signature crunchy texture. This technique mimics the conditions of a professional steam-injected oven, giving home bakers the ability to produce bakery-quality bread.
Step 6: Score and Bake
Score the top of the dough with a sharp knife. This allows the bread to expand properly during baking. Carefully transfer the dough on parchment into the heated Dutch oven. Bake it covered for 30 minutes. Afterward, remove the lid and continue baking for an additional 10 minutes until the bread turns golden brown. If you’re using a baking sheet instead, bake the bread for approximately 35 minutes. The internal temperature should reach about 99 °C to ensure it’s fully cooked. Scoring the dough is both an art and a science; it allows for controlled expansion and lends an artisanal appearance to the finished loaf.
Scoring is a critical step for both aesthetic and practical reasons. The cuts provide weak points in the dough’s surface, directing the expansion during baking and preventing the loaf from bursting unpredictably. The pattern of the scores also contributes to the bread’s visual appeal, turning each loaf into a unique work of art.
Step 7: Cool and Store
Once baked, remove the bread from the oven and transfer it to a wire rack to cool completely before slicing. This cooling phase is crucial for setting the bread’s structure. As the bread cools, the interior continues to finish cooking, and the crust firms up, creating the perfect balance of textures. Store any leftovers in an airtight container at room temperature for up to 3–5 days. The cooling process is a test of patience, as cutting into a hot loaf can result in a gummy interior.
The cooling period is often the most challenging part for eager bakers, but it is essential for achieving the best texture. During this time, the moisture within the bread redistributes, and the crumb structure stabilizes. Cutting too soon can lead to a gummy, undercooked interior, as the bread has not had a chance to set fully.
Tips for Success
- Water Temperature: Ensure the water is warm, not hot, to avoid killing the yeast. Aim for a temperature between 38 and 46 °C. If the water is too hot, it can kill the yeast, resulting in a flat, dense loaf.
- Flour Amount: The amount of flour can vary slightly due to humidity and other factors. Adjust as needed to achieve a tacky but manageable dough. Flour is hygroscopic, meaning it absorbs moisture from the air, which can affect the dough’s consistency.
- Scoring the Dough: Use a very sharp knife or a bread lame for clean cuts. This step helps control the expansion and gives your loaf a professional look. Scoring is more than just an aesthetic choice; it prevents the bread from bursting unpredictably during baking.
The Science Behind Bread Baking

Understanding the science of bread baking can elevate your skills and improve your results. The transformation from simple ingredients to a beautiful loaf involves a series of complex biochemical reactions. Yeast fermentation is a key process, where the yeast consumes sugars and produces carbon dioxide and alcohol, causing the dough to rise. Gluten development is another critical aspect, as kneading aligns the gluten strands, giving the dough its elasticity and strength.
The Maillard reaction, which occurs during baking, is responsible for the bread’s golden-brown crust and complex flavors. This chemical reaction between amino acids and reducing sugars creates a myriad of flavor compounds, contributing to the bread’s depth and aroma.
Beyond these basic reactions, the artistry of bread baking lies in balancing time, temperature, and ingredients. Each variable can influence the final product, making every loaf a unique reflection of its process. Understanding these elements allows bakers to experiment and perfect their craft, turning bread baking into both a science and an art.
Conclusion
Baking a rustic French bread loaf at home is an incredibly rewarding experience. With a few simple ingredients and a little patience, you can create a loaf that not only tastes delicious but also elevates your home-cooked meals. Whether enjoyed with a pat of butter, dipped into a hearty soup, or as part of a sandwich, this bread is sure to become a household favorite. The process of baking bread is as much about the journey as it is about the destination, and each step offers an opportunity to connect with the age-old tradition of breadmaking. From the first knead to the final slice, each moment is a celebration of culinary heritage and personal achievement. Happy baking!


